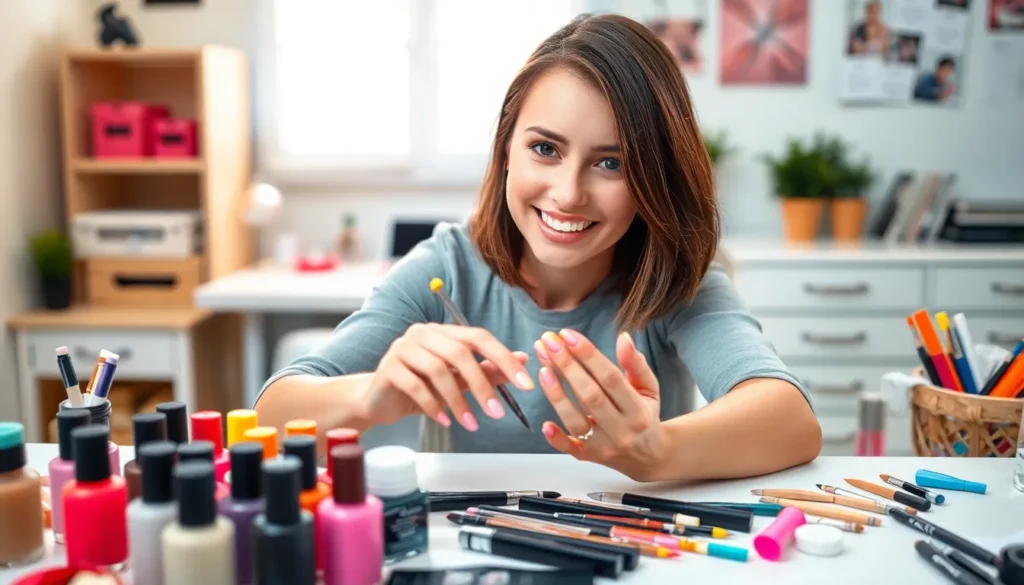
Creating beautiful nail art doesn’t have to be intimidating or expensive. We’ve all admired those stunning manicures on social media and wondered if we could achieve the same results at home. The truth is anyone can master nail art with the right techniques and a little practice.
We’ll guide you through simple yet impressive designs that require minimal tools and experience. From basic polka dots to elegant gradients our step-by-step tutorials break down each technique into manageable steps. You’ll discover how to transform your nails from plain to professional-looking without spending hours at the salon.
Whether you’re preparing for a special occasion or simply want to add some creativity to your daily routine these beginner-friendly nail art ideas will boost your confidence and save you money. Let’s jump into the industry of DIY nail art and unlock your creative potential.
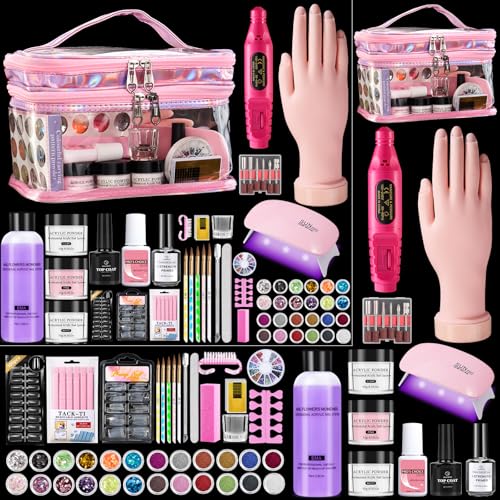
Choose Your Essential Nail Art Supplies and Tools
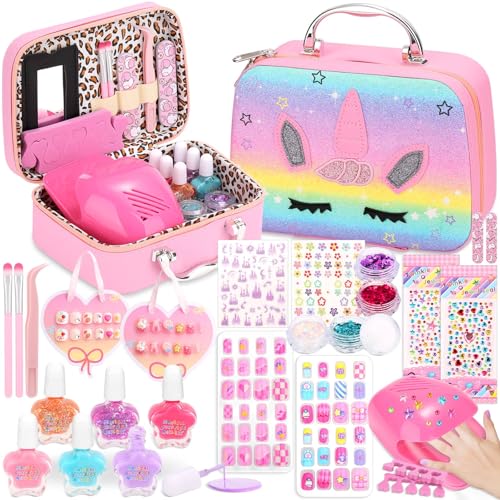
Starting your nail art journey requires building a foundation with the right supplies and tools. We’ll break down the must-have items that’ll transform your nails from basic to beautiful without very costly.
Basic Nail Polish Collection
Building your polish collection starts with selecting versatile colors that work for multiple designs. We recommend starting with these essential shades:
Classic neutrals like nude, white, and black form the backbone of any nail art collection. These colors serve as perfect bases for detailed designs and create stunning contrast when layered together.
Bold primary colors including red, blue, and yellow open up endless mixing possibilities for custom shades. You can create orange by mixing red and yellow, or purple by combining red and blue.
Metallic finishes such as gold, silver, and rose gold add instant glamour to simple designs. These polishes work beautifully as accent colors or can be used to create elegant gradient effects.
Pastel shades like baby pink, mint green, and lavender are perfect for spring nail art and delicate designs. They’re forgiving for beginners since imperfections are less noticeable on lighter colors.
Nail Art Brushes and Dotting Tools
Precision tools make the difference between amateur and professional-looking nail art. We’ve identified the essential brushes and tools you’ll need:
Detail brushes with fine tips allow you to create thin lines, intricate patterns, and small decorative elements. Look for brushes with synthetic bristles that maintain their shape after multiple uses.
Dotting tools come in various sizes and create perfect circles every time. You can use the large end for bigger dots and the small end for delicate details like flower centers or polka dot patterns.
Striping brushes feature extra-long, thin bristles that help you draw straight lines and curved designs. These brushes are essential for creating geometric patterns and French manicure tips.
Fan brushes spread polish in unique patterns and create textured effects like marble or ombre looks. They’re particularly useful for blending multiple colors seamlessly.
Cleanup brushes with angled tips help remove excess polish from cuticles and skin. Dip these in acetone to clean up mistakes and create crisp, professional edges.
Base and Top Coats
Protecting your nail art starts with proper base and top coat application. We always use these products to ensure our designs last longer and look more professional:
Base coats create a smooth surface for polish application and prevent staining of your natural nails. Ridge-filling base coats work especially well if you have uneven nail surfaces or vertical ridges.
Quick-dry top coats seal your design and add glossy shine while reducing drying time significantly. Look for formulas that dry within 60 seconds to prevent smudging your artwork.
Matte top coats transform any glossy design into a sophisticated matte finish. You can apply matte top coat over the entire nail or use it selectively to create texture contrast.
Strengthening base coats contain ingredients like calcium and protein that help weak or brittle nails grow stronger. These are particularly beneficial if you frequently wear nail polish.


Prepare Your Nails for Perfect Nail Art Application

Creating stunning nail art starts with proper nail preparation, which forms the foundation for long-lasting and professional-looking designs. We’ll walk you through the essential preparation steps that ensure your nail art adheres properly and looks flawless.
Clean and Shape Your Natural Nails
Remove old polish completely using a gentle nail polish remover to create a fresh canvas. Acetone-free removers work best for maintaining nail health while effectively eliminating any residual color or buildup.
Wash and dry your hands thoroughly to eliminate oils and dirt that can prevent polish from adhering well. Clean nails provide the optimal surface for base coat application and improved polish longevity.
Trim your nails to the desired length using sharp nail clippers, cutting straight across to prevent ingrown nails. File your nails into your preferred shape such as round, square, or almond using a fine-grit nail file.
Push back cuticles gently with a cuticle pusher to create a neat base for polish application. Buff the nail surface lightly to smooth ridges and create an even texture that improves polish adherence.
Apply Base Coat for Protection
Apply a thin layer of base coat on each nail to protect your natural nails from staining and create a smooth canvas for your design. Base coats prevent nail polish pigments from penetrating the nail plate while extending the life of your manicure.
Allow the base coat to dry completely before proceeding to the next step, typically 2-3 minutes depending on the formula. Proper drying prevents smudging and ensures optimal adhesion for subsequent polish layers.
Focus on even coverage by applying the base coat from cuticle to tip in smooth, controlled strokes. Seal the nail edges by running the brush along the tip to prevent chipping and extend wear time.
Choose Your Background Color
Select a base color that complements your planned nail art design and skill level. Beginners should start with neutral shades like nude, light pink, or soft beige that provide forgiving backgrounds for simple patterns.
Apply two thin coats of your chosen nail polish color rather than one thick coat to achieve even coverage and prevent bubbling. Allow each coat to dry completely before applying the next to avoid smudging or streaking.
Consider color combinations that work well together for your first nail art attempts, such as white backgrounds for colorful dots or nude bases for metallic accents. Light base colors make mistakes easier to correct and designs more visible.


Master Simple Polka Dot Designs for Your First Nail Art

Polka dots offer the perfect starting point for beginners because they’re forgiving and create stunning results with minimal effort. We’ll show you how to achieve professional-looking dots using simple techniques that anyone can master.
Create Even Dots Using a Dotting Tool
Dotting tools make creating perfect circles effortless. We recommend investing in a set of dotting tools with various tip sizes, though bobby pins or toothpicks work as excellent alternatives. Dip your dotting tool lightly into the nail polish, avoiding overloading it with product.
Press the tool gently onto your nail surface without dragging it. The key is to make a straight downward motion and lift the tool cleanly to release a perfect round dot. Practice on a piece of paper first to get comfortable with the pressure needed. Start with your dominant hand to build confidence before switching to the more challenging non-dominant hand.
Clean your dotting tool between colors using nail polish remover. This prevents color mixing and ensures each dot maintains its intended shade. Work quickly while the polish is still wet for the smoothest application.
Experiment with Different Dot Sizes
Varying dot sizes creates visual depth and professional-looking dimension. We suggest starting with larger dots as your focal points, then filling gaps with smaller dots for balance. Use the larger end of your dotting tool first, then switch to the smaller end for accent dots.
Place three to five large dots randomly across each nail. Avoid creating perfect patterns initially, as random placement looks more natural and forgiving for beginners. Space larger dots evenly to create a foundation for your design.
Fill empty spaces with smaller dots using a different tool size. This layering technique prevents your nails from looking sparse while maintaining visual interest. Medium-sized dots work well as transition elements between large and small dots.
Try Two-Color Dot Combinations
Contrasting colors make polka dots pop against your base shade. We recommend pairing light dots on dark bases or vice versa for maximum impact. Classic combinations include white dots on navy blue, black dots on pink, or gold dots on burgundy.
Layer smaller dots inside larger ones for sophisticated depth. Apply the larger base dot first and let it dry completely before adding the smaller contrasting dot in the center. This technique creates a bull’s-eye effect that looks complex but requires only basic skills.
Experiment with metallic accents to elevate your design. Silver or gold dots add glamour to any color combination and catch light beautifully. Apply metallic dots sparingly as accent pieces rather than the main design element to avoid overwhelming the overall look.


Practice Basic Striping Techniques for Clean Lines

Striping transforms nail art from amateur to professional with clean, precise lines that elevate any design. We’ll master three essential techniques that create stunning geometric patterns and sophisticated finishes.
Use Striping Tape for Perfect Edges
Striping tape delivers razor-sharp lines that make geometric patterns look professionally crafted. We start by applying our base color and letting it dry completely before cutting thin strips of striping tape. Position the tape precisely where you want clean edges or geometric shapes on your nail surface.
Paint over the tape with a contrasting polish color while maintaining steady brush strokes. Remove the tape immediately while the polish remains wet to prevent peeling or jagged edges. Finish with a top coat to seal the design and create a smooth surface that protects your artwork.
Create Freehand Lines with Thin Brushes
Freehand striping develops your artistic control and opens unlimited design possibilities. We use a fine detail or nail art brush dipped lightly into polish to draw precise lines and shapes. Load the brush with minimal polish since too much product causes uneven lines or unwanted smudges.
Practice simple shapes like stripes, zigzags, and minimal geometric lines to build confidence and muscle memory. Rest your painting hand on a steady surface for improved control and cleaner results. Clean the brush frequently to prevent polish buildup and maintain sharp, precise lines throughout your design process.
Design Simple Geometric Patterns
Geometric patterns combine striping tape and freehand techniques to create sophisticated nail art designs. We layer different elements like triangles, squares, or chevrons by starting with one shape at a time. Build complexity gradually by adding contrasting colors for bold visual impact or neutral tones for understated elegance.
Use bobby pins or dotting tools to add simple dots and accent points that complement your geometric design. Let each layer dry completely before applying tape or adding the next polish layer to prevent smudging. Clean edges with a small brush dipped in acetone to perfect sharp lines and create polished, professional-looking results.


Learn Easy Gradient and Ombre Effects

Gradient and ombre effects transform plain nails into stunning, professional-looking designs that rival salon work. We’ll show you how to master these techniques using simple tools you likely already have at home.
Sponge Technique for Smooth Blending
Sponge application creates the smoothest gradient transitions compared to other blending methods. We recommend using small cosmetic sponges because they provide better control and precision for nail-sized surfaces.
Paint stripes of your chosen colors side by side directly onto the sponge surface, making sure each color slightly overlaps the next. This overlapping creates the seamless blending effect that makes gradients look professional.
Tap the sponge gently onto your nail using a dabbing motion rather than pressing hard. Rolling the sponge slightly from side to side helps blend the colors together naturally as you work.
Multiple sponge applications deepen the gradient effect and create richer color saturation. We suggest starting with light pressure and building up the intensity gradually through repeated tapping motions.
Clean up excess polish around your nails using a small brush dipped in nail polish remover after each application. This step ensures your gradient looks crisp and intentional rather than messy.
Choose Complementary Color Combinations
Complementary colors that sit opposite each other on the color wheel create the most striking gradient effects. Pink to orange, blue to purple, and yellow to red combinations produce vibrant, eye-catching results.
Colors close in shade create subtle, sophisticated gradients perfect for everyday wear. We recommend trying light pink to deep rose, pale blue to navy, or cream to champagne for elegant looks.
Analogous colors that sit next to each other on the color wheel blend most naturally together. Purple to blue, orange to red, and green to yellow combinations flow seamlessly without harsh transitions.
Monochromatic gradients using different shades of the same color offer foolproof results for beginners. Light to dark pink, various blues, or multiple purples guarantee harmonious blending every time.
Seal with Top Coat for Professional Finish
Top coat application smooths out the texture created by the sponge technique and eliminates any roughness. We apply top coat generously to fill in gaps and create an even surface across the entire nail.
Clear top coat adds essential shine that makes gradient effects pop and appear more vibrant. The glossy finish catches light beautifully and enhances the color transitions you’ve worked to create.
Quality top coats extend the life of your gradient design by protecting against chips and wear. We recommend choosing fast-drying formulas that won’t smudge your carefully blended colors during application.
Multiple thin coats of top coat work better than one thick application for achieving that salon-quality finish. Allow each layer to dry completely before adding the next to prevent bubbling or streaking.


Create Simple Floral Designs Using Basic Strokes

Floral nail art transforms ordinary manicures into beautiful garden-inspired designs that anyone can master. We’ll show you how to create stunning flower patterns using basic brush techniques that build confidence while developing your artistic skills.
Paint Basic Flower Petals
Start with simple petal shapes by using a fine nail art brush or dotting tool to create curved strokes radiating from a central point. We recommend beginning with 4 to 5 petals for each flower to keep the design manageable and balanced.
Create rounded or oval petal shapes by applying gentle pressure with your brush and pulling outward in short, curved motions. Position each petal around an imaginary center point on your nail, spacing them evenly for a natural flower appearance.
Practice your brush control by making consistent petal sizes and maintaining steady hand movements. We suggest starting with larger flowers first, then gradually working toward smaller blooms as your technique improves.
Build multiple flowers across your nail surface by varying their placement and sizes for visual interest. Position some flowers partially off the nail edge to create depth and movement in your floral design.
Add Leaves and Stems
Paint slender stems using a thin brush with green polish to connect your flowers naturally. Draw these lines from the base of each flower downward, creating gentle curves that mimic real plant growth patterns.
Create small leaf shapes beside your stems using simple pointed oval forms with a detail brush. We recommend making leaves in pairs along the stems, alternating their placement for a realistic botanical look.
Vary your leaf sizes to add dimension and prevent your design from looking too uniform. Mix larger leaves near the flower bases with smaller ones further down the stems for natural variation.
Connect design elements by ensuring stems flow logically between flowers and leaves, creating cohesive pathways that guide the eye across your nail art.
Use Contrasting Colors for Definition
Choose flower petal colors that contrast well with your base color to make your design pop visually. Light backgrounds work beautifully with bold flower colors, while darker bases showcase pastels and metallics effectively.
Add texture details using darker shades of your petal color or white polish to create small lines or dots on flower centers. These subtle touches bring your blooms to life and add professional-looking dimension.
Highlight leaves and stems with lighter or darker green tones to create depth and separation from other design elements. We often use a darker green for stems and a lighter shade for leaf highlights.
Layer colors strategically by allowing each element to dry completely before adding contrasting details. This prevents colors from bleeding together and maintains clean, defined edges throughout your floral masterpiece.


Try Beginner-Friendly French Tip Variations

French tips remain one of the most elegant and achievable nail art styles for beginners. We’ll guide you through mastering this timeless look with modern twists that showcase your growing skills.
Classic White French Tips
Start with proper nail preparation by cleaning and shaping your nails before applying a protective base coat. Apply a sheer pink or nude polish as your foundation color and allow it to dry completely for best results.
Create crisp tip lines using circle band aids as stencils for professional looking edges. Place the band aid just below your nail tip and paint the exposed area with white polish. Remove the band aid immediately while the polish remains wet to achieve that perfect French tip line.
Clean any imperfections around the edges using a small brush dipped in acetone for precision touch ups. Seal your design with a clear top coat to protect the manicure and add brilliant shine that lasts.
Colorful French Tip Alternatives
Transform traditional French tips by swapping white polish for pastel or bright colors that reflect your personality. Follow the same stencil method described above to maintain those clean professional lines we all desire.
Experiment with upside down French tips by painting color near the cuticle area instead of the nail tip for a chic modern twist. This technique creates visual interest while remaining simple enough for nail art beginners to master.
Try gradient French tips using the sponge technique from our previous gradient section to blend two colors seamlessly at the tip. This approach combines multiple techniques you’ve already learned for stunning results.
Add Simple Decorative Elements
Use dotting tools or improvised household items like bobby pins dipped in polish to create charming decorative accents on your French manicure. These simple additions transform basic French tips into personalized nail art masterpieces.
Create adorable daisies by making five white dots in a circle for petals then adding a contrasting center dot with your dotting tool. This floral touch brings spring vibes to any French tip design.
Add playful polka dots over your French tip area using colorful small dots for a fun twist on the classic style. Vary dot sizes using different tools to create visual depth and movement across your nails.
Design tiny hearts on your French manicure using a detail brush and dotting tool to draw two dots side by side. Connect them with small V shaped lines to form perfect heart shapes that add romantic charm to your nail art.


Master the Art of Clean-Up and Finishing Touches

Even the most beautiful nail art design needs professional finishing touches to truly shine. We’ll show you how to perfect your manicure with essential clean-up techniques that transform amateur attempts into salon-quality results.
Remove Excess Polish from Skin
Polish spillover happens to everyone, but removing it properly makes all the difference in your final look. We recommend using a small brush or cotton swab dipped in nail polish remover to gently clean the edges around each nail. This step sharpens your design and gives a neat, professional appearance that elevates any nail art pattern.
Dip your brush lightly to avoid oversaturating it with remover. Work carefully around each nail’s perimeter to eliminate any polish mishaps without disturbing your main design. Cotton swabs work perfectly for larger cleanup areas, while fine brushes handle detailed work near intricate patterns.
Apply Top Coat for Durability
Sealing your design with a clear top coat protects your artwork and extends its lifespan significantly. We always apply top coat once the nail art is completely dry to prevent smudging or texture issues. This protective layer adds brilliant shine while preventing chipping and fading that can ruin your hard work.
Choose a high-quality top coat that flows smoothly across your nail surface. Apply it in thin, even strokes to avoid creating bubbles or streaks that diminish your design’s appearance. The top coat also helps smooth out any texture from multiple polish layers, creating that coveted glass-like finish.
Clean Up Cuticle Areas
Precise edges near your cuticles require special attention to achieve that professional manicured look. We use a tiny angled brush dipped in nail polish remover to carefully clean this delicate area. Avoid flooding the cuticle with polish during application by working with thin layers throughout your design process.
Take your time with cuticle cleanup since this area frames your entire nail art piece. Clean lines here prevent the messy appearance that immediately signals amateur work. The angled brush allows for controlled removal without accidentally wiping away parts of your main design.


Conclusion
We’ve shown you that creating stunning nail art doesn’t require years of training or expensive salon visits. With the right tools basic techniques and a bit of practice you can transform your nails into beautiful works of art right at home.
Remember that every nail artist started as a beginner. Don’t worry if your first attempts aren’t perfect – each design is an opportunity to improve your skills and develop your unique style.
The techniques we’ve covered from simple dots to elegant French tips give you a solid foundation to build upon. As you grow more confident experiment with combining different methods to create your own signature looks.
Most importantly have fun with the process! Nail art is about self-expression and creativity so let your personality shine through your designs. Your nails are now your canvas – go create something amazing.
Frequently Asked Questions
What supplies do I need to start doing nail art at home?
You’ll need essential nail polish colors (neutrals, bold primaries, metallics, and pastels), precision tools like detail brushes and dotting tools, plus base and top coats. These basic supplies create a versatile foundation for various designs without breaking the bank.
How do I properly prepare my nails for nail art?
Start by removing old polish and washing your hands. Trim and file nails into your preferred shape, gently push back cuticles, then apply a base coat. This preparation creates a smooth canvas and helps your nail art last longer.
What’s the easiest nail art design for beginners?
Polka dots are perfect for beginners because they’re forgiving and create stunning results. Use dotting tools to create perfect circles, experiment with different sizes for visual depth, and try two-color combinations for added impact.
How do I create clean lines and geometric patterns?
Use striping tape for perfect edges and apply contrasting polish over the tape. For freehand lines, practice with fine brushes to develop control. Combine both techniques and focus on layering and precision for professional-looking geometric designs.
What’s the sponge technique for gradient nails?
Apply different nail polish colors on a makeup sponge, then dab it onto your nails to create smooth color transitions. Choose complementary or analogous color schemes for the best results, and always seal with a top coat.
How can I make my nail art look more professional?
Focus on clean-up and finishing touches. Remove excess polish from skin using a small brush, apply a quality top coat for shine and durability, and carefully clean cuticle areas. These steps transform amateur attempts into salon-quality results.
Can I create floral designs as a beginner?
Yes! Start with basic flower petals using simple brush strokes, add leaves and stems, and use contrasting colors for definition. Focus on brush control, vary flower sizes for interest, and layer colors strategically for clean edges.
How do I modernize a classic French manicure?
Try colorful alternatives instead of white tips, create upside-down or gradient French tips, and add decorative elements like dots or small flowers. Use stencils for crisp lines and experiment with different color combinations.