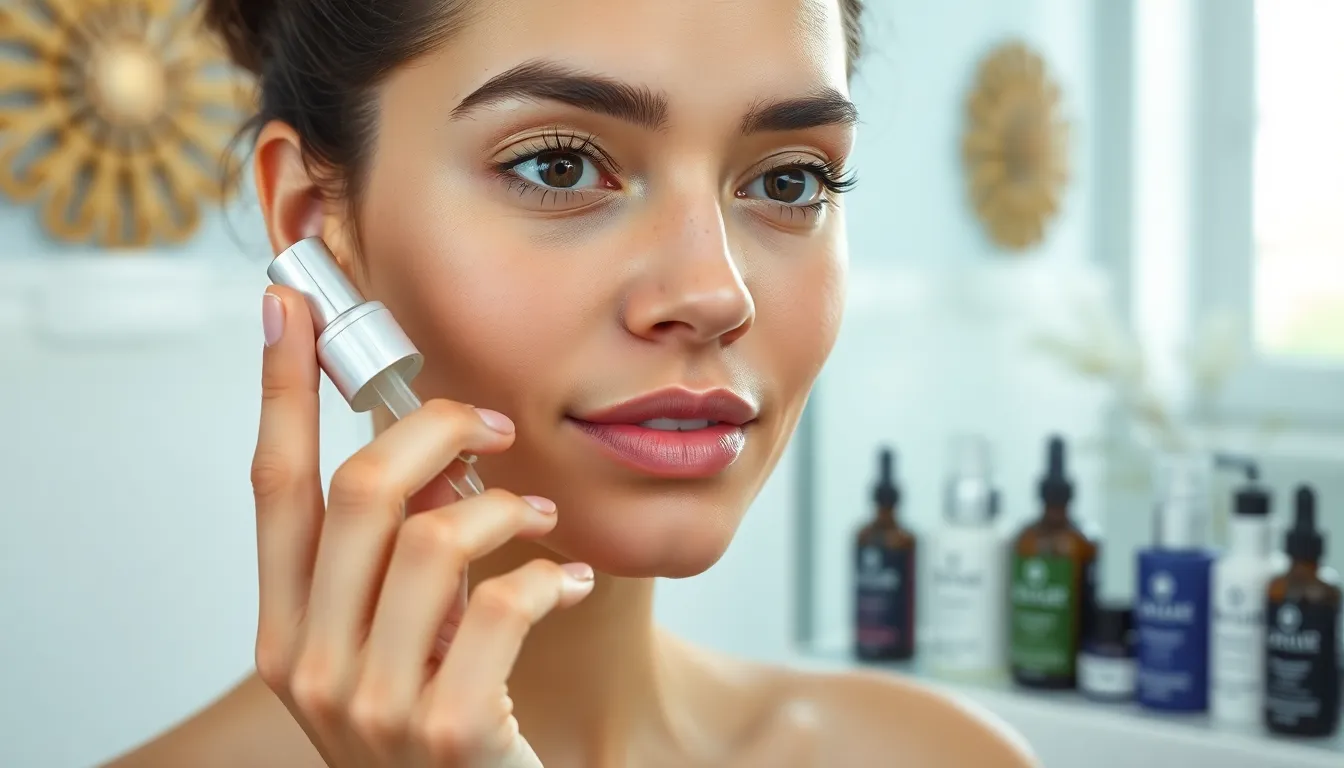
We’ve all stood in front of our bathroom mirrors wondering if we’re doing our skincare routine correctly. With countless products lining store shelves and conflicting advice flooding social media, it’s easy to feel overwhelmed about creating an effective face care regimen that actually works.
The truth is, achieving healthy glowing skin doesn’t require expensive treatments or complex 12-step routines. What matters most is consistency and understanding the proper order of application. When we layer products correctly and choose the right ingredients for our skin type, we can transform our complexion in just a few weeks.
Whether you’re a complete beginner or looking to refine your current routine, we’ll guide you through each essential step of an effective skincare regimen. From cleansing to moisturizing and everything in between, you’ll discover exactly when and how to apply each product for maximum results.
Step 1: Start With a Gentle Cleanser to Remove Daily Impurities
Cleansing forms the foundation of every effective skincare routine. We recommend starting with this crucial step to prepare your skin for the products that follow.
Choose the Right Cleanser for Your Skin Type
Oily skin benefits from gel or foaming cleansers containing salicylic acid or benzoyl peroxide. These ingredients help control excess sebum production while unclogging pores.
Dry skin requires cream or lotion cleansers with hydrating ingredients like ceramides, glycerin, or hyaluronic acid. These formulations maintain your skin’s natural moisture barrier during cleansing.
Sensitive skin responds best to fragrance-free, pH-balanced cleansers with minimal ingredients. Look for products containing chamomile, aloe vera, or colloidal oatmeal to soothe irritation.
Combination skin works well with gentle gel cleansers that don’t over-dry or over-moisturize. These balanced formulas address both oily and dry areas effectively.
Normal skin can use most cleanser types, but we suggest sticking with gentle, non-stripping formulas to maintain your skin’s healthy balance.
Apply Using Lukewarm Water and Gentle Circular Motions
Temperature matters when cleansing your face. Hot water strips away natural oils and can cause irritation, while cold water doesn’t effectively dissolve impurities.
Wet your face with lukewarm water before applying cleanser. This temperature opens pores slightly without causing damage or excessive dryness.
Dispense a small amount of cleanser into your palms. Most cleansers require only a dime-sized portion for your entire face.
Massage gently using circular motions for 30-60 seconds. Start from the center of your face and work outward, paying extra attention to areas prone to congestion like your T-zone.
Avoid scrubbing or applying excessive pressure. Your skin tissue is delicate and aggressive cleansing can cause micro-tears and inflammation.
Remove All Traces of Makeup and Sunscreen
Double cleansing ensures complete removal of makeup, sunscreen, and daily pollutants. Start with an oil-based cleanser or micellar water to break down makeup and SPF.
Oil cleansers effectively dissolve waterproof mascara, long-wearing foundation, and mineral sunscreens. These products work on the principle that “like dissolves like.”
Micellar water contains micelles that attract dirt, oil, and makeup without harsh rubbing. This gentle option works well for sensitive skin or quick cleansing sessions.
Follow with your regular cleanser to remove any remaining residue and thoroughly clean your pores. This second step ensures your skin is completely prepared for treatment products.
Pay attention to stubborn areas like the hairline, jawline, and around the nose where makeup and sunscreen commonly accumulate. Use a soft washcloth if needed for complete removal.
Step 2: Exfoliate Weekly to Reveal Fresh, Smooth Skin
Exfoliation removes dead skin cells that can clog pores and create a dull complexion. We recommend incorporating this step once or twice weekly to maintain healthy skin without causing irritation.
Select Between Physical and Chemical Exfoliants
Physical exfoliants work by mechanically scrubbing away dead skin cells using granular particles or brushes. These scrubs provide immediate tactile feedback and work well for those who prefer feeling their skincare working. Popular options include sugar scrubs, rice bran powders, and gentle facial brushes.
Chemical exfoliants dissolve dead skin cells using acids rather than physical friction. Alpha-hydroxy acids (AHAs) like glycolic and lactic acid work on the skin’s surface to improve texture and brightness. Beta-hydroxy acids (BHAs) such as salicylic acid penetrate deeper into pores, making them ideal for oily or acne-prone skin.
Beginners should start with chemical exfoliants at lower concentrations to gauge skin tolerance. Sensitive skin types often respond better to gentle AHAs, while those with blackheads and enlarged pores benefit from BHA formulations.
Focus on T-Zone and Problem Areas
Target your T-zone first, as this area typically produces more oil and accumulates more dead skin cells. Gently massage the exfoliant across your forehead, nose, and chin using circular motions. These areas often show the most improvement with regular exfoliation.
Address exact problem areas like rough patches on your cheeks or texture around your jawline. Spend extra time on areas where you notice blackheads, whiteheads, or uneven skin texture. Areas prone to makeup buildup also benefit from focused exfoliation attention.
Apply gentle pressure throughout the process, allowing the exfoliant to do the work rather than scrubbing vigorously. Over-aggressive techniques can damage the skin barrier and cause micro-tears that lead to irritation.
Avoid Over-Exfoliating to Prevent Irritation
Limit exfoliation frequency to once or twice weekly maximum, regardless of your skin type. Daily exfoliation strips away healthy skin cells along with dead ones, leading to redness, sensitivity, and compromised skin barrier function.
Watch for warning signs of over-exfoliation including persistent redness, stinging sensations, or increased sensitivity to other products. Flaking, peeling, or a tight feeling after exfoliation indicates you’re overdoing it and should reduce frequency.
Adjust based on seasons and skin changes, as your exfoliation needs may vary throughout the year. Winter months often require less frequent exfoliation due to drier conditions, while summer’s increased oil production might allow for slightly more regular treatment.
Step 3: Apply Toner to Balance Your Skin’s pH Levels
Toner serves as the crucial bridge between cleansing and moisturizing in our skincare routine. This step restores our skin’s natural pH balance after cleansing and prepares it to better absorb the products that follow.
Use a Cotton Pad or Pat Directly With Clean Hands
Cotton pad application offers the most controlled and hygienic method for distributing toner evenly across our face. Pour a small amount of toner onto a cotton pad and gently sweep it across our face in upward motions, avoiding the delicate eye area. Start from the center of our face and work outward to ensure complete coverage.
Direct hand application provides a more gentle approach that’s perfect for sensitive skin types. Wash our hands thoroughly and pour a few drops of toner into our palms. Gently pat the toner onto our face using light pressing motions, allowing our skin’s natural warmth to help with absorption. This method also reduces product waste and gives us better control over pressure.
Look for Alcohol-Free Formulas With Hydrating Ingredients
Alcohol-free toners prevent the drying and irritation that traditional alcohol-based formulas can cause. These gentler options maintain our skin’s natural moisture barrier while still providing the pH-balancing benefits we need.
Hyaluronic acid stands out as a powerhouse ingredient that can hold up to 1,000 times its weight in water. This humectant draws moisture from the environment into our skin, providing instant hydration that lasts throughout the day.
Glycerin works as another effective hydrating ingredient that attracts moisture to our skin’s surface. This gentle humectant helps maintain our skin’s softness and prevents the tight feeling that can occur after cleansing.
Allow Toner to Fully Absorb Before Next Step
Complete absorption typically takes 30 to 60 seconds, depending on our skin type and the toner’s consistency. We’ll know our skin is ready for the next step when the toner no longer feels wet or tacky to the touch.
Proper timing ensures that each product in our routine can perform at its best without interference. Rushing this step can cause products to pill or prevent proper absorption of subsequent treatments.
Visual cues help us determine when our skin has fully absorbed the toner. Our complexion should appear fresh and slightly dewy, but not shiny or wet, indicating that it’s time to move forward with serums or moisturizers.
Step 4: Target Specific Concerns With Serums and Treatments
Now that we’ve prepared our skin with cleansing, exfoliation, and toning, it’s time to address exact skin concerns with targeted treatments. This step allows us to customize our routine based on individual needs and goals.
Layer Serums From Thinnest to Thickest Consistency
Applying serums in order of consistency ensures maximum absorption and effectiveness. We should start with the lightest formulations, such as antioxidant serums or vitamin C treatments that target dark spots and uneven skin tone. These water-based formulas penetrate easily when applied first.
Following the thin-to-thick rule prevents product interference. Heavier serums containing ingredients like retinol or peptides for anti-aging concerns should come next. Oil-based treatments and thicker formulations create a barrier that can block lighter products from reaching the skin when applied in reverse order.
Visual consistency helps determine application sequence. Watery serums, gel-like treatments, and cream-based formulas naturally follow this progression. We can easily identify the proper order by observing texture and viscosity differences between our products.
Address Acne, Dark Spots, or Anti-Aging Goals
Acne-targeting serums with salicylic acid effectively treat active blemishes and prevent future breakouts. These beta hydroxy acid treatments penetrate deep into pores to dissolve oil buildup and reduce inflammation. We should focus application on problem areas rather than the entire face to avoid over-drying healthy skin.
Dark spot correctors containing niacinamide or vitamin C help fade hyperpigmentation and even skin tone. Niacinamide reduces melanin production while vitamin C brightens existing discoloration. Both ingredients work synergistically when layered properly, with vitamin C applied in the morning and niacinamide in the evening.
Anti-aging serums with retinol reduce fine lines and improve skin texture over time. These vitamin A derivatives stimulate cellular turnover and collagen production. We should introduce retinol gradually, starting with lower concentrations twice weekly and increasing frequency as our skin builds tolerance.
Give Each Product Time to Penetrate the Skin
Allowing 30 seconds to one minute between each application ensures optimal absorption. This timing prevents products from mixing together and diluting their effectiveness. We can use this interval to apply serum to other areas like the neck and décolletage.
Proper absorption timing maximizes active ingredient delivery. Each serum needs adequate time to penetrate the skin barrier before we layer the next product. Rushing this process reduces the benefits of our carefully selected treatments.
Visible and tactile cues indicate when skin is ready for the next step. Our skin should feel smooth and no longer tacky or wet before applying additional products. This ensures each treatment has properly absorbed and won’t interfere with subsequent applications.
Step 5: Lock in Moisture With a Quality Face Moisturizer
After allowing your treatments to fully absorb, we’re ready to seal in all that goodness with the right moisturizer. This crucial step creates a protective barrier that prevents water loss while delivering essential hydration to maintain healthy skin throughout the day or night.
Choose Oil-Free or Rich Formulas Based on Skin Type
Dry skin requires rich creams or balms that provide intensive hydration and repair the skin barrier. We recommend looking for ingredients like ceramides, shea butter, and hyaluronic acid that deliver deep moisture and prevent transepidermal water loss.
Oily skin benefits from oil-free or lightweight moisturizers that hydrate without adding excess shine or clogging pores. Gel-based formulas and water-based moisturizers work exceptionally well for controlling sebum production while maintaining proper hydration levels.
Normal and combination skin types can use thicker creams or fluid moisturizers depending on seasonal needs and personal preference. We suggest adjusting your formula weight based on climate changes and how your skin feels throughout different times of the year.
Apply Using Upward Strokes and Gentle Pressure
Warming the moisturizer between your palms activates the formula and makes application smoother across your face. We always recommend starting with a small amount and building coverage as needed to avoid overwhelming your skin with product.
Applying moisturizer with upward strokes helps promote circulation and prevents tugging that can contribute to premature aging. Gentle pressure ensures the product penetrates effectively without causing irritation or displacing previous skincare layers.
Starting from the center of your face and working outward creates even distribution and prevents missing important areas around your hairline and jawline. We find this technique maximizes coverage while using the least amount of product necessary.
Don’t Forget Your Neck and Décolletage
Extending your moisturizing routine to include your neck and chest area provides comprehensive hydration for these often-neglected zones. These areas contain thinner skin that shows signs of aging just as quickly as your face, making consistent care essential.
We recommend using the same upward motion technique on your neck, starting from the base and working toward your jawline. This approach helps maintain skin elasticity and prevents the formation of horizontal neck lines over time.
Your décolletage deserves the same attention as your face since this area receives important sun exposure and environmental stress. Applying moisturizer here creates a seamless transition and ensures all visible skin receives proper protection and hydration.
Step 6: Protect Your Skin With Broad-Spectrum Sunscreen Daily
Sunscreen application serves as the final and most crucial step in our morning skincare routine. Daily protection against harmful UV rays prevents premature aging and maintains the healthy skin we’ve worked to achieve through proper cleansing and moisturizing.
Apply SPF 30 or Higher Every Morning
Choose SPF 30 or higher for optimal protection against both UVA and UVB rays that cause skin damage. Broad-spectrum sunscreens shield our skin from the full range of harmful ultraviolet radiation that penetrates clouds and windows throughout the day.
Apply sunscreen generously using about a teaspoon for your face and neck area to ensure adequate coverage. Most people use only 25% of the recommended amount, which significantly reduces the product’s effectiveness and leaves skin vulnerable to UV damage.
Wait for complete absorption before applying makeup or heading outdoors to allow the sunscreen to form a protective barrier. This timing ensures that our skin receives maximum protection while preventing the product from pilling or interfering with other cosmetics.
Reapply Throughout the Day for Continued Protection
Reapply every two hours when spending extended time outdoors or after swimming and sweating to maintain consistent protection. Sunscreen effectiveness diminishes over time due to natural breakdown from UV exposure and physical activities.
Use powder sunscreens or setting sprays for convenient touch-ups over makeup without disrupting your look. These formulations make it easier to maintain protection throughout busy days when traditional cream reapplication isn’t practical.
Increase application frequency during peak sun hours between 10 AM and 4 PM when UV rays are strongest. Extra protection during these times prevents the most important damage and helps preserve the results of our comprehensive skincare routine.
Use Separate Eye Cream With SPF for Delicate Areas
Apply specialized eye cream with SPF to protect the thin skin around our eyes that’s more susceptible to sun damage and premature aging. Regular sunscreen can be too harsh for this delicate area and may cause irritation or stinging.
Extend protection to the eyelids using gentle patting motions to cover areas that regular sunscreen might miss. The skin around our eyes shows signs of aging first, making targeted protection essential for maintaining a youthful appearance.
Choose fragrance-free formulations specifically designed for sensitive eye areas to prevent irritation while ensuring comprehensive UV protection. These products balance effectiveness with gentleness, completing our daily skincare routine with optimal protection for every facial area.
Step 7: Customize Your Evening Routine for Overnight Repair
Building on your established daytime routine, evening skincare requires a specialized approach that maximizes your skin’s natural repair cycle. Nighttime presents the perfect opportunity to address exact concerns while your skin regenerates during sleep.
Remove Makeup Thoroughly Before Cleansing
Beginning with complete makeup removal sets the foundation for effective overnight repair. We recommend using gentle makeup remover or micellar water to lift away all cosmetics, especially heavy makeup or waterproof products that regular cleansers struggle to eliminate.
Targeting stubborn eye makeup first prevents tugging and irritation around this delicate area. Apply your chosen remover with cotton pads using gentle pressing motions rather than harsh rubbing movements.
Following makeup removal, your facial cleanser can work more effectively to wash away remaining residue and impurities. This two step process ensures your skin receives the deep cleansing necessary for optimal overnight recovery.
Double cleansing becomes particularly important after long days wearing makeup or sunscreen. Oil based cleansers excel at breaking down makeup while preparing your skin for water based cleansers that complete the purification process.
Incorporate Retinol or Night Treatments as Needed
Applying retinol or prescribed night treatments addresses exact concerns like fine lines, acne, or hyperpigmentation during your skin’s most receptive hours. We suggest starting with a pea sized amount and gradually increasing frequency as your skin builds tolerance.
Retinol works by promoting cell turnover and collagen production, making it ideal for evening application when sun sensitivity isn’t a concern. Begin with twice weekly applications before progressing to nightly use for most skin types.
Alternative active ingredients like AHAs or BHAs can substitute retinol for those with sensitive skin or exact concerns. Chemical exfoliants remove dead skin cells while you sleep, revealing smoother texture by morning.
Layering active treatments requires careful timing between applications. Allow each product to absorb completely before applying the next step to prevent irritation and maximize effectiveness.
Use a Heavier Night Moisturizer for Extra Hydration
Switching to richer, more emollient night creams supports your skin’s barrier repair function while you sleep. We recommend thicker formulations that provide intensive hydration without feeling heavy or greasy during application.
Night moisturizers typically contain higher concentrations of nourishing ingredients like ceramides, peptides, and hyaluronic acid. These components work synergistically to restore moisture levels depleted throughout the day.
Applying your night cream using upward strokes helps promote circulation while ensuring even distribution. Focus extra attention on areas prone to dryness like the cheeks, forehead, and around the eyes where skin tends to show aging signs first.
Sealing moisture with a few drops of face oil works exceptionally well for very dry skin types. But, we advise skipping this final step if you’re acne prone or have naturally oily skin to prevent clogged pores overnight.
Conclusion
We’ve walked you through a comprehensive seven-step skincare routine that’s designed to work for everyone regardless of experience level. Remember that consistency beats complexity every time – it’s better to stick with a simple routine daily than to overwhelm your skin with too many products.
The key to success lies in understanding your unique skin type and choosing products that support your exact needs. Don’t feel pressured to incorporate every step immediately; start with the basics and gradually build your routine as your skin adjusts.
Most importantly listen to your skin’s responses and adjust accordingly. What works for others might not work for you and that’s perfectly normal. Give each new product at least 4-6 weeks to show results before making changes.
Your skin is an investment that pays dividends for years to come. With patience dedication and the right approach you’ll develop a routine that keeps your complexion healthy glowing and protected for the long term.
Frequently Asked Questions
What is the proper order for applying skincare products?
The correct order is: cleanse, exfoliate (1-2 times weekly), tone, apply serums/treatments (thinnest to thickest), moisturize, and finish with sunscreen in the morning. This sequence ensures optimal absorption and effectiveness of each product while building layers from lightest to heaviest consistency.
How often should I exfoliate my skin?
Exfoliate once or twice weekly to remove dead skin cells without causing irritation. Beginners should start with lower concentrations of chemical exfoliants or gentle physical scrubs. Over-exfoliating can damage your skin barrier, so adjust frequency based on your skin’s response and seasonal changes.
What type of cleanser should I use for my skin type?
Choose gel or foaming cleansers for oily skin, cream or lotion cleansers for dry skin, fragrance-free options for sensitive skin, and gentle gel cleansers for combination skin. Normal skin can use most gentle, non-stripping formulas. Always use lukewarm water and gentle circular motions.
Do I need to use toner in my skincare routine?
Yes, toner restores your skin’s natural pH balance and prepares it for better product absorption. Choose alcohol-free formulas with hydrating ingredients like hyaluronic acid and glycerin. Apply with a cotton pad or pat directly with clean hands, allowing full absorption before the next step.
How should I layer multiple serums?
Apply serums from thinnest to thickest consistency for maximum absorption. Start with light formulations like vitamin C or antioxidant serums, then move to heavier treatments containing retinol or peptides. Allow each serum to fully penetrate before applying the next product.
What SPF should I use daily?
Use broad-spectrum sunscreen with SPF 30 or higher every morning. Apply generously and allow absorption before makeup application. Reapply every two hours, especially during peak sun hours, using powder sunscreens or setting sprays for convenient touch-ups throughout the day.
Should my evening routine be different from my morning routine?
Yes, evening routines focus on repair and recovery. Remove makeup thoroughly, consider double cleansing, incorporate retinol or night treatments for specific concerns, and use heavier night moisturizers. The evening is ideal for active ingredients that may increase sun sensitivity.
How do I know if I’m over-exfoliating my skin?
Signs of over-exfoliation include redness, irritation, increased sensitivity, dryness, or breakouts. If you experience these symptoms, reduce exfoliation frequency and focus on gentle, hydrating products. Your skin should feel smooth and refreshed after exfoliating, not tight or irritated.


