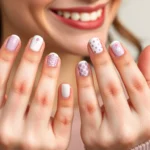
We’ve all admired those stunning nail art designs on social media and wondered if we could ever create something that beautiful ourselves. The truth is you don’t need years of practice or expensive equipment to achieve gorgeous nail art – you just need the right beginner-friendly techniques.
Starting your nail art journey doesn’t have to be overwhelming or intimidating. With a few basic tools and simple designs we’ll share with you today you can transform your plain nails into works of art. Whether you’re looking to save money on salon visits or simply want to express your creativity these easy techniques will give you professional-looking results from day one.
We’re here to prove that nail art isn’t just for professionals. From classic polka dots to elegant stripes and fun geometric patterns we’ll walk you through step-by-step instructions that anyone can follow. Let’s jump into these simple yet stunning designs that’ll have your friends asking where you got your nails done.
Essential Tools and Supplies for Simple Nail Art
Building your nail art toolkit doesn’t require very costly or hunting for specialized equipment. We’ve compiled a comprehensive list of affordable essentials that’ll transform your nails into stunning canvases.
Basic Nail Polish Colors
White polish forms the foundation of countless nail art designs, serving as both a base coat and accent color for patterns like polka dots and French tips. We recommend investing in a high-quality opaque white that covers evenly in two coats.
Black polish creates striking contrast and defines geometric patterns, stripes, and outline work with precision. This versatile shade works exceptionally well for creating negative space designs and adding dramatic flair to any look.
Red polish offers classic elegance and pairs beautifully with white for patriotic themes or vintage-inspired designs. Choose a true red shade that complements your skin tone for maximum impact.
Neutral tones like nude, beige, and soft pink provide subtle sophistication and serve as perfect canvases for accent nails. These shades work wonderfully for minimalist designs and professional settings.
Metallic shades including gold, silver, and rose gold add instant glamour to simple designs without requiring advanced techniques. We love using metallics for accent stripes and geometric details.
Nail Art Brushes and Dotting Tools
Striping brushes feature ultra-thin bristles that create precise lines and detailed patterns with minimal effort. We recommend starting with a size 0 or 1 brush for maximum control and versatility.
Dotting tools come in various sizes and create perfect circles, flowers, and textured patterns instantly. These double-ended tools typically feature different sized balls on each end for design variety.
Detail brushes with short, firm bristles excel at creating small accents, filling in tiny spaces, and adding intricate touches to your designs. Look for synthetic bristles that maintain their shape after multiple uses.
Fan brushes produce beautiful gradient effects and can create unique textures when used with different polish colors. We find these particularly useful for creating sunset and ombre effects.
Household Items as DIY Tools
Bobby pins work surprisingly well as makeshift dotting tools and can create various sized circles depending on which end you use. Simply dip the rounded end in polish and press onto your nail for instant dots.
Toothpicks serve as excellent detail tools for creating fine lines, marbling effects, and cleanup work around the cuticle area. We prefer wooden toothpicks over plastic ones for better control.
Tape helps create sharp, clean lines for geometric patterns and can be cut into various shapes for unique designs. Use painter’s tape or striping tape for best results and easy removal.
Sponges create stunning gradient effects and textured finishes when dabbed with different polish colors. Makeup sponges work particularly well for ombre and color blending techniques.
Plastic wrap produces interesting textured effects when pressed into wet polish, creating unique patterns that resemble stone or marble. This technique adds visual interest without requiring artistic skill.
Polka Dot Nail Art Design
 1")
Polka dot patterns offer the perfect starting point for beginners because they require minimal tools and deliver maximum visual impact. We’ll explore three versatile approaches that transform simple dots into stunning nail art designs.
Classic Single Color Dots
Single color dots create timeless elegance with just two contrasting polish shades. We recommend choosing a light base color paired with a darker dot color, or vice versa, to ensure your dots stand out beautifully. Apply your base color first and allow it to dry completely before adding dots.
Dotting tools make this process incredibly simple, but bobby pins work just as effectively. Position your tool perpendicular to the nail surface and gently press down to create perfectly round dots. Space your dots evenly across each nail for a professional appearance, starting with the center dot and working outward.
Steady hands matter more than expensive tools for this beginner friendly technique. Practice on a piece of paper first to get comfortable with the pressure and spacing. Most beginners find that 5-7 dots per nail creates the ideal balance without overwhelming the design.
Rainbow Gradient Dots
Rainbow gradients transform basic polka dots into vibrant, eye catching masterpieces. We suggest starting with a white base coat to make your rainbow colors appear more vivid and true to their original shades. Allow the base to dry thoroughly before applying your colorful dots.
Different colored polishes arranged in rows create stunning gradient effects. Begin with red dots on one side of the nail, then progress through orange, yellow, green, blue, and purple as you move across the nail surface. This technique works beautifully on longer nails where you have more space to display the full spectrum.
Scattered rainbow dots offer a more playful alternative to structured rows. Place dots randomly across each nail using different colors, ensuring you maintain good color distribution. This approach feels more organic and works well for shorter nails where space is limited.
Accent Nail Variations
Accent nails featuring different polka dot styles add visual interest without complicating your entire manicure. We recommend choosing one or two nails per hand to showcase unique dot patterns while keeping the remaining nails consistent. This creates a balanced look that draws attention without appearing overwhelming.
Larger dots on accent nails create dramatic focal points. Use the blunt end of a makeup brush or a small sponge to create oversized dots that contrast beautifully with smaller dots on your other nails. This size variation adds depth and dimension to your overall design.
Heart shaped dots and clustered patterns elevate accent nails beyond basic circles. Create heart shapes by placing two small dots close together and dragging a toothpick downward from the center point. Clustered dots involve grouping 3-5 small dots together in irregular patterns for a more organic, textured appearance.
Striped Nail Art Design
 2")
Striped nail art offers one of the most beginner-friendly techniques while delivering professional-looking results. We’ll explore three essential striping methods that transform basic manicures into stylish designs.
Horizontal Stripes Using Tape
Creating horizontal stripes becomes effortless with proper tape application techniques. Start by painting your nails with a base color and allow it to dry completely before proceeding. Apply thin nail art tape or regular scotch tape cut into strips horizontally across each nail at your desired intervals. Paint over the tape with a contrasting polish color, ensuring even coverage across all exposed areas.
Remove the tape carefully before the second polish layer dries completely to achieve clean, crisp horizontal lines. We recommend using quick-drying polish for the top layer to prevent smudging during tape removal. Practice steady hand placement when positioning tape strips to maintain consistent spacing across all nails.
Vertical Stripes with Brushes
Vertical stripe creation requires a thin, fine-tipped nail art brush or nail art pen for optimal results. Apply your base coat first and let it dry thoroughly before beginning the striping process. Paint straight vertical lines from the cuticle area to the nail tip using steady, controlled movements.
Vary stripe thickness and colors throughout your design to create different visual effects and add personal flair. When you don’t have specialized brushes available, use the existing polish brush carefully to create thin vertical stripes with patience and precision. Rest your painting arm against a stable surface for better control while drawing vertical lines across each nail.
Diagonal Stripe Patterns
Diagonal stripes follow similar techniques to horizontal methods but create more ever-changing visual appeal. Position tape or draw lines diagonally across each nail surface, then paint over the covered areas with your chosen contrast color. We suggest combining diagonal stripes with solid base colors or incorporating other simple patterns for enhanced design complexity.
Experiment with tape placement for crisp diagonal edges or try freehand painting if you’re confident in your brush control abilities. These diagonal patterns work exceptionally well when alternated between nails or combined with different stripe directions for geometric nail art effects.
French Tip Variations for Beginners
 3")
French manicures offer the perfect starting point for nail art beginners who want elegant, customizable designs. We’ll explore three simple variations that transform this classic look into personalized masterpieces.
Classic White French Tips
Classic white French tips create the timeless foundation every beginner should master first. We recommend starting with a natural or nude base color that complements your skin tone. The traditional white tip provides clean contrast that works for any occasion.
Creating perfect curved lines becomes easier when you use the nail polish brush itself. We suggest painting the tip area with steady, sweeping motions from one side to the other. French tip stickers or guides help beginners achieve professional looking results without specialized tools.
Practice makes this technique second nature for most people. We find that holding your hand steady against a flat surface reduces shakiness. The key lies in taking your time and allowing each layer to dry completely before applying the next.
| French Tip Element | Recommended Approach | Drying Time |
|---|---|---|
| Base coat | Apply thin, even layer | 2-3 minutes |
| Nude/natural base | Two thin coats | 3-4 minutes each |
| White tips | Steady brush strokes | 4-5 minutes |
| Top coat | Seal entire nail | 5-6 minutes |
Colored French Tips
Colored French tips let you experiment with seasonal shades and personal preferences beyond traditional white. We love using bright pinks for spring, ocean blues for summer, or warm oranges for fall. This variation maintains the classic French structure while adding personality.
Multiple colors create stunning rainbow effects or ombre transitions across your fingertips. We suggest choosing 3-4 complementary shades and alternating them across your nails. Bold contrasts work beautifully, but subtle tone variations offer sophisticated elegance.
Application remains identical to classic French tips with one key difference. We simply replace white polish with your chosen colors. Metallic shades like gold or silver add glamorous touches for special events.
Reverse French Manicure
Reverse French manicures flip the traditional design by coloring the base near your cuticles instead of the tips. We paint the lunula area with contrasting polish while keeping tips natural or clear. This modern twist catches attention while remaining workplace appropriate.
Detail brushes make creating neat lines much easier for beginners attempting this style. We recommend using small, precise brushes to define the curved base area cleanly. Dotting tools also help create smooth transitions between colored and natural sections.
Color combinations become more adventurous with reverse French techniques. We enjoy pairing bright base colors with neutral tips, or using glitter accents in the lunula area. This variation offers endless creative possibilities while maintaining sophisticated appeal.
Floral Nail Art Design
 4")
Floral designs bring nature’s beauty to your fingertips while remaining surprisingly accessible for beginners. We’ll explore three stunning flower patterns that require only basic polish colors and simple tools you likely already own.
Simple Daisy Patterns
Daisy patterns serve as the perfect starting point for floral nail art since they require minimal brushstrokes and deliver maximum impact. Begin with a neutral or pastel base coat like soft pink or mint green and allow it to dry completely. Create small white dots arranged in a circle using a dotting tool or bobby pin dipped in white polish. Add a contrasting yellow dot in the center using the same technique for an instant daisy effect.
Space your daisies evenly across the nail or concentrate them near the cuticle area for an accent design. Try creating clusters of three small daisies on your ring finger while keeping other nails solid for a balanced look. Vary the size by making some petals longer with tiny brush strokes extending from the dots. This charming pattern works beautifully for spring weddings or everyday wear when you want something fresh and feminine.
Easy Rose Designs
Rose nail art becomes achievable when we simplify the technique to basic spiral shapes and curved lines. Start with a light pink or nude base coat and let it cure completely before beginning your roses. Use a thin brush or the polish bottle’s own brush to draw small spiral patterns starting from the center and working outward. Create the rose shape by adding curved lines around the spiral to represent layered petals.
Choose a red or deeper pink polish for contrast against your base color to make the roses pop. Practice the spiral motion on paper first to get comfortable with the brush movement. Position roses asymmetrically on each nail or create a single statement rose on your accent nail. Add tiny green dots or short lines near the roses to represent leaves for extra detail. This romantic design elevates any outfit while staying within beginner skill levels.
Minimalist Leaf Accents
Leaf accents add trendy botanical touches without overwhelming your design or requiring advanced techniques. Apply a clear or neutral base polish and allow complete drying time before adding leaf elements. Use a fine brush, toothpick, or even a mechanical pencil tip to draw simple green leaf shapes on one or two accent nails. Focus on creating basic oval or teardrop shapes with a single line down the center for the vein.
Keep your leaf designs sparse and intentional rather than covering the entire nail surface. Try placing single leaves at the base of your nail near the cuticle or floating them in the upper corner. Experiment with different green shades from sage to forest green depending on your outfit or season. These elegant accents work perfectly for professional settings while still showing your creative side. Combine leaf accents with nude or clear polish for an understated nature inspired look that’s always appropriate.
Geometric Nail Art Design
 5")
Geometric patterns offer the perfect entry point for beginners because they rely on clean lines and simple shapes that create striking visual impact. We’ll show you three fundamental geometric designs that require minimal tools while delivering professional-looking results.
Triangle Patterns
Triangle nail art transforms your nails with bold angular shapes that catch the light beautifully. Start by applying your chosen base color and allowing it to dry completely before moving to the next step. Place striping tape or nail vinyls across your nail to create triangle sections, ensuring the edges align properly for clean lines.
Apply a contrasting polish color inside or outside the taped areas, depending on your desired effect. Remove the tape while the polish is still slightly wet to prevent peeling or chipping. We recommend experimenting with different triangle sizes and angles to create unique patterns that suit your personal style.
The versatility of triangle patterns makes them suitable for all nail shapes and lengths. You can create single large triangles, multiple small ones, or even layered triangle designs for added dimension.
Square Grid Designs
Square grid patterns create a neat checkerboard effect that’s surprisingly easy to achieve with basic tools. Begin with your base coat and chosen background color, allowing each layer to dry thoroughly. Use striping tape to mark horizontal lines across all nails, spacing them evenly for the most polished appearance.
Once the horizontal tape is in place, add vertical strips to create your grid pattern. Paint over the exposed squares with your contrasting color, working carefully to avoid bleeding under the tape edges. The key to success lies in letting each layer dry completely before applying the next color or removing tape.
This design provides a sophisticated plaid-like appearance that works beautifully with both bold and subtle color combinations. We find that metallic accents or glitter polish can elevate square grid designs for special occasions.
Simple Chevron Stripes
Chevron stripes bring ever-changing V-shaped patterns to your nails with surprisingly simple techniques. Create this trendy design by placing two pieces of striping tape in a V formation across each nail after your base color has dried. The angle of your V determines the final chevron appearance, so experiment with different positions.
Paint inside or outside the taped V shape with your accent color, maintaining steady pressure for even coverage. Remove the tape immediately after painting to ensure crisp, clean edges that define your chevron pattern. Multiple chevrons on a single nail create an eye-catching zigzag effect that’s perfect for statement nails.
We suggest starting with one or two accent nails to practice this technique before applying chevrons to your entire manicure. The visual impact of chevron stripes makes them ideal for both everyday wear and special events when you want your nails to stand out.
Gradient Ombre Nail Art
 6")
Gradient ombre nail art creates stunning visual effects by seamlessly blending two or more colors across your nails. This beginner-friendly technique produces professional-looking results with minimal tools and practice.
Two-Color Gradient Technique
Selecting complementary colors forms the foundation of successful gradient ombre designs. We recommend choosing contrasting shades like blue and white or analogous colors such as pink and purple for smooth transitions. Beginners often achieve the most striking results by pairing light and dark versions of the same color family.
Positioning your chosen colors correctly ensures a balanced gradient effect. Apply the lighter shade as your base color first, allowing it to dry completely. The darker color will then blend into the lighter one during the sponging process, creating that coveted fade effect.
Testing color combinations on a practice surface saves time and polish. We suggest trying different shade pairings on nail wheels or even paper before committing to your final design. This preview helps you visualize the final result and adjust your color choices if needed.
Sponge Application Method
Using a makeup sponge or nail art sponge delivers the smoothest gradient transitions. Apply thin strips of your chosen polish colors directly onto the sponge, positioning them side by side where you want the blend to occur. The sponge texture naturally creates the blending effect when transferred to your nail.
Dabbing gently onto the nail transfers the gradient pattern without disturbing the blend. Press the sponge firmly but avoid dragging or sliding motions that can smudge the design. We find that 3 to 4 gentle dabs build up the opacity while maintaining the smooth transition between colors.
Repeating the application process intensifies the gradient effect. Allow each layer to dry slightly before applying the next round of sponging. This layering technique helps achieve the rich color saturation seen in professional nail art while keeping the gradient smooth and even.
Cleaning excess polish from surrounding skin keeps your manicure neat. Use a small brush dipped in nail polish remover or acetone to carefully clean the skin around your nails. We recommend using a peel-off base coat or applying tape around your nails before starting to make cleanup even easier.
Glitter Gradient Effects
Adding glitter polish enhances your gradient with sparkling dimension. Apply glitter polish to either the tips or base of your nails after your color gradient has completely dried. This technique creates a subtle fading glitter effect that adds glamour without overwhelming the base design.
Controlling glitter placement gives you precision over the final look. We use a fan brush or small makeup sponge to apply glitter polish exactly where we want it. Start with light coverage and build up gradually until you achieve your desired sparkle intensity.
Layering different glitter sizes creates depth in your gradient design. Combine fine glitter with larger hexagonal pieces for texture variation. Apply the fine glitter first, then add larger pieces strategically for maximum visual impact.
Finishing with a clear top coat smooths the entire design and adds professional shine. The top coat also helps secure any loose glitter particles and extends the life of your gradient ombre nail art. We recommend using a slightly thicker top coat when working with glitter to ensure complete coverage.
Marble Nail Art Design
 7")
Marble nail art creates sophisticated stone-like patterns that elevate any manicure from ordinary to extraordinary. We’ll explore three beginner-friendly techniques that require minimal tools while delivering professional-looking results.
Water Marble Technique
Water marble technique involves dropping different nail polish colors onto water’s surface to create swirling patterns. We start by filling a small cup with room temperature water and selecting two to three complementary polish colors.
Drop one color into the center of the water, then immediately add the second color into the middle of the first drop. Continue alternating colors to create concentric circles on the water’s surface. Use a toothpick to gently swirl the colors together, creating your desired marble pattern.
Tape around your nail to protect the skin, then slowly dip your nail straight down into the water at a 45-degree angle. Clean up any excess polish on the water’s surface with a toothpick before lifting your finger out. This technique requires patience and practice but produces stunning results that mimic natural marble stone patterns.
Dry Brush Marble Effect
Dry brush marble effect offers a simpler alternative that doesn’t require water or special preparation. We recommend this method for absolute beginners who want to experiment with marble textures using basic tools.
Start with a base coat in your lightest chosen color and let it dry completely. Dip a clean, dry brush lightly into your second polish color, removing most of the product by wiping it on a paper towel. Gently drag the brush across your nail in long, sweeping motions to create streaky lines.
Layer additional colors using the same technique, varying the pressure and direction of your brush strokes. This creates natural-looking veining that resembles marble stone. The dry brush method allows for more control over the final design and lets you build up the marble effect gradually.
Plastic Wrap Marble Method
Plastic wrap marble method uses household items to create textured marble effects with minimal cleanup. We love this technique because it’s accessible and allows for creative experimentation with color layering.
Apply your base color and let it dry completely before starting the marble effect. Crumple a small piece of plastic wrap into a loose ball, then lightly dab it into your second polish color. Gently press the plastic wrap onto your nail in a dabbing motion, rotating it slightly between applications.
Add additional colors using the same dabbing technique, building up layers for depth and complexity. The plastic wrap creates unique texture patterns that vary with each application, making every nail slightly different. This method works particularly well with metallic polishes that catch light and enhance the marble effect.
Negative Space Nail Art
 8")
Negative space nail art takes advantage of your natural nail color by leaving strategic areas unpainted to create stunning visual contrasts. This modern technique offers endless design possibilities while requiring minimal polish and tools.
Half-Moon Designs
Half-moon manicures showcase the crescent-shaped area at your nail base as the star of the design. We recommend starting with reinforcement stickers or small pieces of tape to mask off the half-moon shape before applying your chosen polish color. Position the sticker about 2-3mm from your cuticle area to create a clean, professional-looking curve.
Classic half-moon designs work beautifully with nude or clear bases paired with bold accent colors. Apply your base coat first, then place your stickers and paint the remaining nail area with your contrasting shade. Remove the stickers while the polish is still slightly wet to prevent peeling or chipping along the edges.
Color combinations like black and gold, navy and silver, or coral and cream create striking visual impact. We suggest experimenting with different finishes such as matte and glossy textures on the same nail for added dimension. This timeless design complements both short and long nail lengths perfectly.
Cutout Geometric Shapes
Geometric cutout designs transform simple tape into professional-looking nail art tools. Start by applying your base color and allowing it to dry completely before placing thin striping tape in triangular, diamond, or square patterns. Press the tape edges down firmly to prevent polish from bleeding underneath.
Triangle patterns offer the easiest introduction to geometric negative space art. We recommend using two pieces of tape to create a triangle at your nail tip or center, then painting over the entire nail with your accent color. Once dry, carefully remove the tape to reveal your geometric shape in the base color.
Square and diamond shapes require slightly more precision but deliver stunning results. Cut small pieces of tape into your desired geometric shape, or use nail art stencils for consistent results across all nails. Apply 2-3 thin coats of your accent color for even coverage and opacity.
Minimalist Line Patterns
Simple line designs create elegant negative space effects using just your regular polish brush. We suggest starting with vertical lines by dragging the brush from cuticle to tip in one smooth motion, leaving spaces between each line to show your natural nail. This technique works especially well on nude or clear base coats.
Horizontal line patterns offer a modern twist on traditional French tips. Paint thin horizontal stripes across your nail at varying intervals, creating negative space bands between each line. Use the tip of your polish brush for thinner lines or a nail art brush for more precise control.
Diagonal and intersecting line patterns add geometric interest to your negative space design. Cross diagonal lines to create diamond shapes, or alternate the direction of your lines for a chevron effect. We recommend practicing on a nail wheel first to perfect your brush control and spacing before applying to your actual nails.
Essential Tips for Nail Art Success
 9")
Mastering the fundamentals will transform your nail art from amateur attempts to professional-looking designs. We’ve compiled the most crucial techniques that’ll guarantee stunning results every time.
Proper Base and Top Coat Application
Base coats create the foundation for long-lasting nail art by protecting your natural nails from staining and providing a smooth surface for polish application. We recommend applying a thin, even layer and allowing it to dry completely before adding any color or design elements.
Top coats seal your artwork and add either glossy shine or sophisticated matte effects while extending the wear time of your designs. Apply the top coat in thin layers, ensuring complete coverage over all design elements including dots, stripes, and geometric patterns.
Quality base and top coats prevent chipping and maintain the vibrancy of your polka dots, French tips, and gradient designs for up to a week longer than unprotected nail art.
Drying Time and Patience
Rushing through the drying process ruins even the most carefully crafted designs and leads to smudging, denting, and frustration. We suggest waiting at least 2-3 minutes between each layer of polish or design element.
Patience becomes especially important when creating multi-layered designs like marble effects, ombre gradients, or detailed floral patterns that require multiple color applications. Each stripe, dot, or geometric shape needs adequate drying time to maintain clean lines and prevent bleeding.
Testing the surface with a gentle tap helps determine if the polish has set properly before proceeding to the next step in your design process.
Practice and Experimentation
Developing your nail art skills requires consistent practice with basic techniques like creating even dots, straight stripes, and clean French tip lines. We encourage starting with simple designs using just the polish brush before investing in specialized dotting tools or striping brushes.
Experimenting with different color combinations expands your creative possibilities and helps you discover which shades work best for your skin tone and personal style. Try combining neutrals with bold accents, or mix warm and cool tones in your geometric patterns and floral designs.
Building confidence through repetition allows you to tackle more complex techniques like water marble effects, negative space designs, and intricate chevron patterns with greater success and enjoyment.
Conclusion
Starting your nail art journey doesn’t have to be overwhelming or expensive. With just a few basic tools and simple techniques we’ve shared you can create stunning designs that rival professional salon work.
Remember that practice makes perfect and every nail artist started as a beginner. Don’t be afraid to experiment with different color combinations and techniques until you find your personal style.
The key to successful nail art lies in patience and consistency. Take your time with each step and allow proper drying time between coats for the best results.
We encourage you to start with one or two designs that caught your attention and gradually expand your skills. Before you know it you’ll be creating beautiful nail art that reflects your unique personality and saves you money on salon visits.
Frequently Asked Questions
What supplies do I need to start doing nail art at home?
You don’t need expensive tools to begin nail art. Essential supplies include basic nail polish colors (white, black, red, and neutrals), nail art brushes or dotting tools, a base coat, and top coat. You can even use household items like bobby pins, toothpicks, or small brushes as alternatives to specialized tools.
Which nail art designs are best for beginners?
Polka dots are perfect for beginners due to their simplicity and forgiving nature. Stripes, basic French tips, and simple geometric patterns are also excellent starting points. These designs require minimal tools and techniques while still creating professional-looking results that build confidence.
How long should I wait between coats when doing nail art?
Patience is crucial for successful nail art. Allow each coat to dry completely before applying the next layer, typically 2-3 minutes for thin coats. Rushing the drying process can cause smudging, bubbling, or uneven application that ruins your design.
Can I create nail art without professional brushes?
Absolutely! Household items work great as alternatives to professional tools. Use bobby pins for dots, toothpicks for fine lines, makeup brushes for gradients, or even cotton swabs for blending. These everyday items can help you create beautiful designs while you’re building your nail art toolkit.
How do I make my nail art last longer?
Proper preparation is key to long-lasting nail art. Always apply a base coat before your design to protect nails and improve polish adhesion. Finish with a quality top coat to seal your artwork and add shine. Avoid using nails as tools and wear gloves when cleaning to prevent chipping.
What’s the easiest way to fix nail art mistakes?
Keep a small brush dipped in nail polish remover handy for quick touch-ups. For minor mistakes, wait for the polish to dry completely, then carefully remove the error with the brush and reapply. Practice makes perfect, so don’t worry about imperfections as you’re learning.
How do I create smooth gradient or ombre effects?
Use a makeup sponge to create gradient effects. Apply different polish colors to the sponge, then dab gently onto your nail while the polish is still wet. Blend the colors by dabbing repeatedly, then clean up excess polish around the nail with a brush and remover.
Should I practice nail art on fake nails first?
Practicing on nail wheels or fake nails is a great way to build skills without committing to your natural nails. This allows you to experiment with techniques, test color combinations, and perfect your designs before applying them to your actual nails.