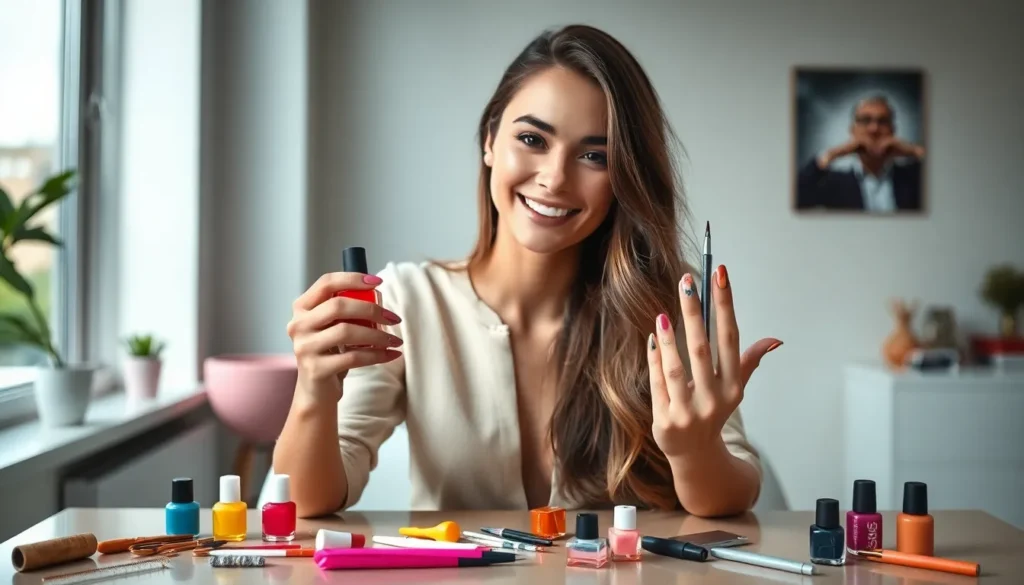
We’ve all admired those stunning nail designs on social media and wondered how professionals create such intricate art. The good news? You don’t need years of training or expensive salon visits to achieve gorgeous nails at home. With the right step-by-step nail tutorials, anyone can master beautiful manicures from their own living room.
Nail tutorial videos have revolutionized how we learn nail art techniques. These visual guides break down complex designs into manageable steps that beginners can easily follow. Whether you’re looking to master classic French tips or explore trendy ombré effects, video tutorials provide the perfect learning platform.
We’ve discovered that the key to nail art success lies in starting with beginner-friendly tutorials that build your confidence and skills gradually. From basic tools and preparation techniques to advanced design methods, these videos offer comprehensive guidance that transforms nail art from intimidating to achievable.
Essential Tools and Supplies Every Beginner Needs for Nail Art
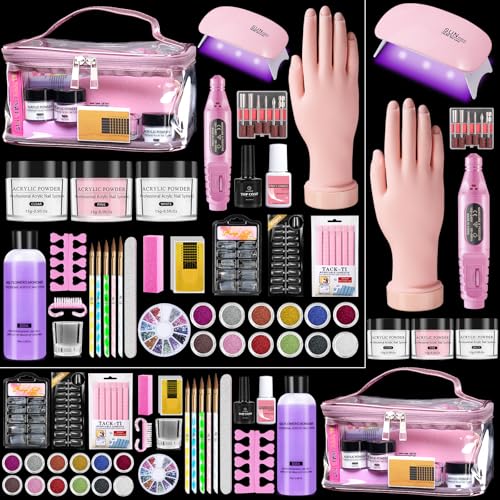
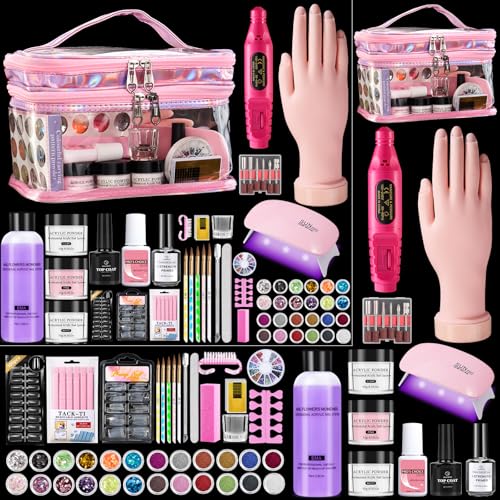
Building your nail art toolkit doesn’t require very costly or overwhelming yourself with hundreds of products. We’ve compiled the most essential items that will set you up for success in your nail art journey.
Basic Nail Care Kit Essentials
Nail files form the foundation of any good manicure routine. We recommend starting with a medium grit file (180/240) for shaping and a fine buffer for smoothing rough edges. Glass files work exceptionally well because they create less damage to your nail plate compared to metal alternatives.
Cuticle pushers help create clean nail beds that make your designs look professional. Orange wood sticks or metal cuticle pushers both work effectively for beginners. Push cuticles back gently after soaking your hands in warm water for 2-3 minutes.
Base coat and top coat protect your natural nails and extend the life of your designs. Base coats prevent staining and create better adhesion for polish. Top coats seal in your artwork and add shine that lasts up to 7 days longer than unprotected designs.
Nail clippers should be sharp and appropriately sized for your nails. We suggest investing in quality clippers that won’t crack or split your nails during trimming. Clean cuts reduce the need for extensive filing afterward.
Must-Have Nail Polish Colors for Beginners
Clear polish serves multiple purposes in nail art tutorials. You can use it as a base coat, top coat, or mixing medium for creating custom colors. Clear polish also helps thin out thick polishes that have become difficult to apply.
Black and white polishes create the foundation for countless nail art designs. These colors help you practice basic techniques like dots, lines, and geometric patterns. Most nail tutorial videos for beginners start with these versatile shades because they show contrast clearly.
Red polish remains a classic choice that photographs well in tutorial videos. We recommend choosing a true red rather than orange or blue toned versions for your first purchase. Red polish helps you practice steady application since mistakes show more obviously.
Nude or pink shades match most skin tones and work well for French manicures or subtle designs. These colors forgive minor application errors better than bold shades. Start with one nude that’s closest to your natural nail color.
Specialized Tools for Creating Nail Art Designs
Dotting tools come in various sizes and create perfect circles every time. You can purchase a set with 5 different tip sizes for under $10. These tools work with regular nail polish, acrylics, and gel polishes equally well.
Thin brushes allow you to paint fine lines and intricate details. Look for brushes labeled as “nail art brushes” or “liner brushes” with synthetic bristles. We recommend having at least 3 different brush sizes: fine, medium, and wide.
Nail tape creates crisp, straight lines without requiring steady hands. You can find nail tape in various widths and colors at beauty supply stores. Remove tape while polish is still slightly wet to prevent peeling.
Tweezers help place small decorations like rhinestones, studs, or nail stickers precisely. Choose tweezers with fine tips that won’t slip when handling tiny objects. Quality tweezers last for years and improve your design accuracy significantly.


Simple French Manicure Tutorial Videos for Perfect Classic Nails

French manicures remain one of the most elegant and timeless nail designs that beginners can master with the right video tutorials. We’ll explore the best step by step video guides that make creating salon quality French nails achievable at home.
Traditional White Tip French Manicure
Classic French Manicure by CutePolish offers comprehensive guidance for achieving the perfect traditional look. This step by step tutorial covers essential product selection and demonstrates proper techniques for painting precise French tips that look professionally done.
Dot Technique White Tips provides an innovative approach for beginners struggling with steady lines. The creator shows how to use a simple dot method to create smooth curves and perfectly straight lines along the nail tips.
Full Cover Tips Application presents a quick alternative method using pre made nail tips. This beginner friendly tutorial eliminates the need for freehand painting while still achieving that classic French manicure appearance without bubbles or imperfections.
| Tutorial Type | Duration | Difficulty Level | Key Technique |
|---|---|---|---|
| Classic French | 15-20 min | Beginner | Brush application |
| Dot Method | 10-15 min | Easy | Dotting tool |
| Full Cover Tips | 8-12 min | Very Easy | Tip application |
Colored French Manicure Variations
Rainbow French Tips tutorials demonstrate how to substitute traditional white with vibrant colors like pink coral or electric blue. These videos show color selection techniques that complement different skin tones and personal styles.
Seasonal French Variations include tutorials for holiday themed tips using colors like burgundy for fall or pastels for spring celebrations. Content creators share color matching secrets and seasonal design inspiration throughout these step by step guides.
Ombre French Tips videos teach the gradient technique that blends multiple colors seamlessly across the nail tip. These advanced beginner tutorials combine traditional French structure with modern color blending methods.
Troubleshooting Common French Manicure Mistakes
Uneven Tip Lines occur when beginners rush the application process or lack proper brush control. Video tutorials demonstrate using steady hand techniques and fine brush methods to draw consistently straight tip lines across all nails.
Bubble Formation happens when nail glue or topcoat gets applied too quickly or in thick layers. Step by step videos show the proper application speed and thin layer techniques that prevent air bubbles from forming under tips.
Incorrect Tip Angles result from improper nail tip positioning during application. Tutorial creators emphasize checking the natural nail curve and matching the tip angle accordingly for the most realistic finished appearance.
Streaky Polish Application stems from using low quality products or incorrect brush techniques. Video guides recommend exact polish brands and demonstrate proper brush loading and stroke patterns for smooth even coverage.


Basic Nail Shaping and Filing Techniques for Beginners

Now that we’ve covered essential tools and French manicure techniques, let’s jump into the fundamental skills every beginner needs: proper nail shaping and filing. These techniques form the foundation for all successful nail art projects.
Understanding Different Nail Shape Options
Choosing the right nail shape depends on your lifestyle, nail length, and personal preference. Round shapes work perfectly for short nails and create a soft, natural appearance that’s easy to maintain. We recommend this classic option for beginners who want a low-maintenance look.
Oval shapes flatter most nail types and create the illusion of longer, more elegant fingers. This versatile option works well for both short and medium-length nails, making it our top choice for everyday wear.
Squoval shapes combine the practicality of square nails with the softness of oval edges. We love this hybrid approach because it adds a modern edge while remaining suitable for most activities.
Square shapes feature straight edges and sharp corners, making them ideal for longer nails that can support the dramatic look. These work best when you have strong, healthy nails that won’t break easily.
Almond shapes taper to a narrow, pointed tip that creates a sophisticated, fashion-forward appearance. We suggest this elegant option for special occasions or when you want to make a statement with your nail art.
Step-by-Step Filing Methods
Start by gathering your essential tools: nail clippers, a 100-grit file for shaping, and a 240-grit file for smoothing. We always begin with clean, dry nails to ensure the best results.
Preparation involves trimming nails to your desired length using sharp clippers. Cut straight across first, then shape the corners to prevent ingrown nails or painful splits.
Shaping requires filing in one direction only to prevent nail splitting and damage. Position the file straight against the sidewalls of your nail, then gently angle it to taper the sides according to your chosen shape. We recommend starting at the cuticle and moving toward the tip with smooth, consistent strokes.
Smoothing comes next using your higher grit file to eliminate ridges and rough spots. Move the buffer across the nail surface in gentle motions to achieve a silky, even texture that’s ready for polish application.
| Filing Step | Grit Level | Purpose | Direction |
|---|---|---|---|
| Initial Shaping | 100 grit | Remove length, create basic shape | One direction only |
| Refining | 240 grit | Smooth edges, perfect shape | One direction only |
| Buffing | 400+ grit | Create shine, eliminate ridges | Gentle circular motions |
How to Fix Broken or Uneven Nails
Small breaks respond well to nail glue applied directly to the crack. Press the broken pieces together firmly and hold for 30 seconds, allowing the adhesive to create a strong bond.
Larger breaks require specialized nail repair kits that include silk wraps or fiberglass patches. We suggest following the kit instructions carefully, as these products create temporary fixes that can last several days.
Filing damaged areas helps prevent further splitting once you’ve completed the repair. Use gentle strokes with a fine-grit file to smooth any rough edges around the repair site.
Buffing the repair creates a seamless finish that blends with your natural nail. We recommend using light pressure to avoid disturbing the glue or patch material underneath.
Emergency repairs work best when you address breaks immediately before they worsen. Keep nail glue in your toolkit for quick fixes that can save a manicure until you have time for proper nail care.


Easy Gradient and Ombre Nail Art Video Tutorials

Building on foundational nail art skills, gradient and ombre techniques create stunning visual effects that appear professionally done. Popular YouTube channels like CutePolish and Nails by Miri offer comprehensive step-by-step demonstrations that make these advanced-looking designs accessible to beginners.
Sponge Technique for Smooth Color Transitions
Sponge application delivers the most seamless gradient effects for beginners starting their ombre journey. We recommend using wedge-shaped or triangular makeup sponges for precision and minimal mess during application. Apply two or more nail polish colors directly onto the sponge, positioning them side by side without mixing. Press the loaded sponge onto your nail surface using a gentle dabbing motion to transfer the colors. Blend the colors by rolling the sponge slightly while maintaining contact with the nail. Clean your sponge between applications to prevent muddy color mixing. Most tutorial videos demonstrate this technique with slow-motion segments that clearly show the pressing and blending motions.
Brush Blending Methods for Ombre Effects
Brush techniques offer more controlled blending for detailed gradient work on smaller nail surfaces. Start by painting your entire nail with your base color choice. Apply the second color to either the tip or base area while the first coat remains wet. Use a small detail brush or clean toothpick to gently blend where the two colors meet. Work quickly before the polish begins to set for optimal blending results. Tutorial creators often include close-up footage and slow-motion replays to demonstrate proper brush angles and pressure. This method works exceptionally well for subtle transitions and professional-looking finishes.
Color Combinations That Work Best for Beginners
Strategic color selection simplifies the blending process and ensures attractive results for first-time gradient attempts. Pink and white combinations create classic, clean gradients that hide minor blending imperfections. Blue and turquoise pairings produce vibrant, ocean-inspired looks with natural color harmony. Purple and pink offer soft, feminine gradients that blend effortlessly due to their similar undertones. Neutral combinations using beige, brown, and nude shades provide professional appearance while being forgiving of technique errors. These recommended pairings feature either high contrast or complementary tones that naturally work together, making them ideal choices for building confidence in gradient nail art techniques.


Beginner-Friendly Dotting Tool Nail Art Designs

Dotting tools open up a industry of creative possibilities for nail art beginners who want to achieve professional-looking designs without complex techniques. We’ll explore three essential categories that’ll help you master this versatile tool and create stunning manicures at home.
Simple Polka Dot Patterns and Variations
Classic polka dots serve as the perfect starting point for beginners learning dotting tool techniques. Start by applying your base color and letting it dry completely before creating dots with contrasting polish colors. Varying dot sizes creates visual interest—use the larger end of your dotting tool for statement dots and the smaller end for delicate accents.
Experimenting with different color combinations transforms basic polka dots into sophisticated designs. Try white dots on navy blue for a nautical theme or gold dots on burgundy for an elegant evening look. Spacing matters significantly—evenly distributed dots create a structured appearance while random placement offers a more playful vibe.
Creating gradient polka dot effects adds depth to your designs without requiring advanced skills. Begin with larger dots in your primary color and fill spaces with progressively smaller dots in complementary shades. This technique works exceptionally well with monochromatic color schemes like different shades of pink or blue.
Flower Designs Using Dotting Tools
Daisy patterns represent one of the most beginner-friendly flower designs you can create with dotting tools. Begin by creating a small yellow or white center dot then add five to six white petal dots around it in a circular pattern. YouTube tutorials from channels like NaiNZid provide excellent step-by-step guidance for mastering these charming floral motifs.
Building confidence with simple daisies prepares you for more elaborate flower designs like roses and cherry blossoms. Create rose centers by making a slightly larger dot in a deep color then add lighter colored dots around the perimeter to form petals. Cherry blossoms require tiny pink dots clustered together with small brown dots for branch details.
Mixing flower sizes across your nails creates a garden-like effect that’s both sophisticated and achievable for beginners. Place larger flowers on accent nails while scattering smaller blooms across remaining nails for balanced visual weight. Adding small green dots as leaves completes the natural look and ties your design together.
Geometric Patterns with Dots and Lines
Quatrefoil patterns showcase how dotting tools can create intricate geometric designs that appear complex but remain beginner-friendly. Start by creating four dots in a square formation then connect them with curved lines using a thin brush or nail pen. This classic pattern works beautifully as an accent design on ring fingers.
Combining dots with straight lines opens up countless geometric possibilities for creative nail art. Create triangle patterns by placing three dots and connecting them with lines or design diamond shapes using four strategically placed dots. These structured designs appeal to those who prefer clean, modern aesthetics over organic patterns.
Progressive geometric complexity builds your skills while maintaining achievable goals for beginners. Begin with simple dot grids or checkerboard patterns before advancing to more intricate designs like honeycomb structures or interconnected circles. Mastering these foundational shapes prepares you for advanced geometric nail art techniques while building confidence with your dotting tool control.


Step-by-Step Striping Tape Nail Art Tutorials

Striping tape opens up endless possibilities for creating precise, professional-looking nail designs that rival salon quality. We’ll guide you through three essential striping tape techniques that’ll transform your nail art skills and give you the confidence to experiment with more complex patterns.
Creating Clean Straight Lines and Patterns
Start by applying your chosen base color and allowing it to dry completely before moving to the next step. We recommend waiting at least 10 minutes to ensure the polish won’t smudge when you apply the tape. Cut small pieces of striping tape and carefully place them on your nails in horizontal, vertical, or diagonal patterns depending on your desired design.
Apply the contrasting polish color over the entire nail, covering both the tape and exposed base color with smooth, even strokes. Wait a few moments until the polish begins to set but hasn’t fully dried yet – this timing is crucial for achieving those crisp, clean lines we’re after.
Remove the striping tape gently but quickly by peeling it off at a 45-degree angle while the top polish is still slightly tacky. This technique prevents the polish from chipping or creating jagged edges along your lines. Seal your design with a quality top coat to ensure durability and add professional shine to your finished manicure.
Chevron and Zigzag Designs
Paint your nails with a solid base color and let them dry completely before attempting any tape placement. We suggest using lighter base colors like nude or white to make your chevron patterns pop against darker overlay shades.
Arrange your striping tape in zigzag or chevron formations across each nail, pressing down firmly to prevent polish from bleeding underneath. Create uniform angles by using the tape to form consistent V-shapes or continuous zigzag patterns that flow naturally across your nail surface.
Cover the entire nail with your overlay color, painting right over the tape with confident strokes to ensure even coverage. Work quickly but carefully to maintain smooth application without disturbing the tape placement underneath your polish.
Peel off the tape immediately before the overlay polish has a chance to fully dry, revealing sharp, geometric lines that create stunning visual impact. Apply a clear top coat to smooth any slight ridges and protect your zigzag masterpiece from daily wear.
Color Blocking Techniques with Tape
Begin with a neutral base color application on all nails and allow complete drying time before proceeding with your color blocking design. We recommend using tape to map out your desired geometric sections first, which helps visualize the final result.
Use striping tape to divide each nail into distinct blocks or sections, creating squares, triangles, or rectangles based on your preferred geometric style. Press the tape edges down firmly to create clean barriers between each color section you’ll be painting.
Paint each blocked section with different colors, allowing proper drying time between each application to prevent colors from mixing or smudging. Choose complementary or contrasting shades that work well together, such as navy and gold or coral and mint green combinations.
Remove all tape carefully after the final color application dries, revealing crisp lines that separate each color block with professional precision. Finish with a high-quality top coat to blend any slight texture differences and create a smooth, salon-quality finish that showcases your color blocking skills.


Water Marble Nail Art Techniques for Beginners

We’ll explore one of the most mesmerizing nail art techniques that creates unique swirled patterns by transferring designs from water onto your nails. This method produces stunning marbleized effects that are impossible to replicate identically.
Basic Water Marble Setup and Materials
Gathering your supplies is crucial for successful water marble nails. We recommend starting with these essential materials:
| Category | Required Items |
|---|---|
| Base Materials | Room temperature water in disposable cup, base coat, white or light base polish |
| Polish Selection | Multiple nail polish colors (preferably new, high-quality brands) |
| Design Tools | Toothpick or needle for pattern creation |
| Protection | Scotch tape for skin protection around nails |
| Cleanup | Q-tips, cotton swabs, nail polish remover |
| Finishing | Top coat for sealing designs |
Preparation steps ensure cleaner results and easier application. Start by applying a base coat to protect your natural nails from staining. Follow with a white or light-colored base coat that makes marble colors appear more vibrant. Tape around each nail before beginning the water marble process to minimize cleanup time later.
Room temperature water works best for polish spreading. Fill your disposable cup with water that’s neither too hot nor too cold, as temperature affects how well the polish disperses on the surface.
Simple Two-Color Marble Patterns
Beginning with two colors simplifies the learning process significantly. Drop alternating colors onto the water surface quickly to form concentric rings that spread naturally. Choose contrasting colors like black and white or complementary shades for striking visual impact.
Creating basic swirl patterns requires minimal technique. Use your toothpick to drag through the polish rings in straight lines or gentle curves. Start from the outer edge and pull toward the center, or create wave patterns by moving the toothpick back and forth.
Two-color designs offer elegance without overwhelming complexity. These patterns provide beautiful contrast while being much easier to manage than multi-color designs. Focus on mastering the timing and pressure of your toothpick movements before advancing to more colors.
Tips for Achieving Clean Water Marble Results
Using fresh nail polish ensures optimal spreading on water. Old or thick polish won’t create the smooth rings necessary for marble patterns. Test each color by dropping a small amount into practice water before starting your manicure.
Working quickly prevents polish from drying prematurely. Open all your chosen polish bottles before beginning and work through the entire process without pausing. The longer you wait, the thicker the polish becomes on the water surface.
Strategic tape placement catches excess polish effectively. Apply tape generously around each nail, leaving only the nail surface exposed. This technique reduces cleanup time and prevents polish from staining your skin.
Practice different toothpick techniques before applying to nails. Experiment with various patterns in practice water or on paper to understand how different movements create exact designs. Try dragging from different angles and using varying pressure levels.
Quality base and top coats enhance design longevity. A good base coat prevents staining and provides better adhesion, while a glossy top coat seals the design and adds professional shine. Apply thin coats to avoid bubbling or smudging your marble pattern.


Stamping Nail Art Video Guides for First-Time Users

We’re moving into one of the most versatile nail art techniques that creates intricate designs in seconds. Stamping allows us to achieve professional-looking patterns that would take hours to paint by hand.
Choosing the Right Stamping Plates and Polish
Stamping plates contain the designs we’ll transfer to our nails. These metal plates feature etched patterns ranging from delicate florals to bold geometric shapes. We can find plates with full nail designs that cover the entire nail surface or individual images perfect for accent nails.
Quality matters when selecting stamping plates. Look for plates with deep etching that holds polish well and transfers cleanly. Popular brands offer themed collections like holidays, animals, or abstract patterns to match any style preference.
Stamping polish differs significantly from regular nail polish. This specialized formula contains higher pigment concentration and thicker consistency than standard lacquers. We need this enhanced opacity to create vibrant transfers that show up clearly against base colors.
Testing polish opacity helps ensure successful stamping. Before starting our manicure, we should test the polish on the plate to verify it picks up completely and transfers without gaps or streaks.
Proper Stamping Technique and Pressure
Preparation sets the foundation for clean stamping results. We’ll need a stamper, scraper, and acetone with paper towels for cleanup. Remove any protective film from new plates before the first use to ensure proper polish adhesion.
Applying polish requires a generous but controlled amount. Roll the stamping polish across the chosen design using steady pressure to fill all etched areas completely. We want enough polish to cover the pattern without creating thick pools.
Scraping removes excess polish at a 45-degree angle. Use firm, consistent strokes to clear the plate surface while leaving polish only in the etched design. This step determines the clarity of our final transfer.
Timing affects transfer quality significantly. Pick up the design immediately after scraping using a rolling motion with the stamper. Press firmly but don’t drag the stamper across the plate, which can smudge the pattern.
Transferring to the nail requires gentle, even pressure. Roll the stamper onto the nail surface starting from one side and moving across smoothly. We shouldn’t press too hard or the design may distort or create double images.
Layering Stamped Designs with Base Colors
Base coats protect natural nails and improve polish adhesion. Apply a thin, even layer and allow complete drying before adding any color. This foundation prevents staining and helps our manicure last longer.
Base colors create depth and visual interest in stamped designs. We can use any regular nail polish as our base layer, choosing colors that complement or contrast with our stamping polish. Light bases make dark stamps pop, while dark bases create dramatic effects with metallic stamps.
Stamping over dried base colors produces the best results. Wait until the base polish feels completely dry to the touch before stamping. Wet or tacky base coats can cause the stamped design to smudge or blend unintentionally.
Multiple stamp layers build complex designs. After the first stamped layer dries, we can add additional patterns using different plates and colors. This technique creates unique, personalized nail art that looks professionally designed.
Sealing stamped designs preserves the artwork. Apply a quality top coat using gentle brush strokes to avoid smudging the stamped patterns. This final layer adds shine and extends the wear time of our detailed nail art.
Quick and Easy Nail Sticker Application Methods

Nail stickers and decals offer beginners the perfect way to achieve stunning nail art without requiring advanced painting skills. We’ll guide you through selecting quality products and mastering application techniques for professional-looking results.
Selecting Quality Nail Stickers and Decals
Material quality makes all the difference when choosing nail stickers for your manicure projects. We recommend opting for thin, flexible materials that conform easily to your nail’s natural curve and provide better adhesion for longer wear.
Design variety becomes essential when building your nail art collection. We suggest choosing reputable brands that offer extensive design options like floral patterns, geometric shapes, and seasonal themes to fuel your creativity and personal style.
Durability features separate high-quality stickers from cheaper alternatives that peel within days. We look for products specifically designed for extended wear that resist chipping, peeling, and water damage throughout daily activities.
Proper Application Techniques for Long-Lasting Results
Nail preparation forms the foundation of successful sticker application. We start by cleaning and drying our nails thoroughly, removing any old polish and gently pushing back cuticles for a smooth surface.
Base coat application creates the perfect foundation for sticker adhesion. We apply a clear nail polish or base coat to help stickers bond better while protecting our natural nails from potential damage.
Sticker selection requires matching each decal to the corresponding nail size and shape. We choose stickers that closely fit our nail dimensions to minimize trimming and ensure a professional appearance.
Application technique determines the final quality of your manicure. We carefully lift stickers using tweezers or nail pushers, place them gently on the nail center, and smooth outward to eliminate air bubbles and wrinkles.
Trimming excess material ensures a perfect fit around nail edges. We use sharp scissors, nail files, or cuticle nippers to remove overhanging portions for clean, precise results.
Sealing and Protecting Sticker Designs
Top coat application provides essential protection for your sticker designs. We apply two coats of clear polish or gel top coat to seal each nail, extending wear time and preventing premature peeling.
Edge smoothing creates a seamless finish that feels natural on your nails. We use the top coat to blend sticker edges flush with the nail surface, eliminating any raised areas that might catch on fabric or hair.
Protective barriers help maintain your manicure’s appearance throughout daily wear. We ensure complete coverage over sticker designs to shield them from water exposure, cleaning chemicals, and normal wear patterns.


Professional Finishing Techniques and Top Coat Application

Creating salon-quality nails at home requires mastering the finishing touches that separate amateur work from professional results. We’ll explore the essential techniques that transform basic nail art into polished, long-lasting manicures.
Base Coat Application for Better Polish Adhesion
Start with completely clean, dry nails before applying any base coat. Moisture or oils on the nail surface can prevent proper adhesion and cause your manicure to chip within days. We recommend using a nail dehydrator or rubbing alcohol to ensure your nails are perfectly prepped.
Apply a thin layer of base coat to each nail, covering the entire surface from cuticle to free edge. Thick applications can cause bubbling and uneven texture, so less is definitely more when it comes to base coat. The base coat improves nail polish adhesion significantly and helps protect your natural nail from staining.
Allow the base coat to dry completely before proceeding with color application. Rushing this step can cause dragging when you apply polish, leading to streaky or uneven coverage. We suggest waiting at least 2-3 minutes for regular base coats or following manufacturer curing times for gel formulas.
Proper Top Coat Techniques for Shine and Protection
Apply your top coat using similar even strokes as your base coat, sealing the color completely. Start from the cuticle area and move toward the free edge, ensuring you seal the tip of your nail for maximum longevity and protection. This technique prevents chipping and extends your manicure’s lifespan significantly.
Avoid rushing your top coat application, especially with gel formulas. Take time to clean up any product that flows into the cuticle area using a lint-free brush or cleanup stick before curing under your UV or LED lamp. This attention to detail prevents lifting and ensures professional results every time.
Encapsulate colored designs with a clear protective layer for added durability. For acrylic applications, build up the apex area for strength while tapering toward the free edge for a natural appearance. We recommend applying top coat in thin layers rather than one thick application to prevent bubbling and ensure even coverage.
Cuticle Care and Final Cleanup Steps
Use a small brush dipped in nail polish remover to clean excess polish from your cuticles and surrounding skin. This step makes the difference between a DIY look and salon-quality finish. We prefer using a flat eyeliner brush or specialized cleanup brush for precision work around the nail bed.
Moisturize your cuticles with cuticle oil after completing your manicure. This prevents dryness and irritation while maintaining healthy nail growth. Apply the oil using gentle circular motions to increase blood circulation and absorption.
Clean the entire surface around your nails for a professional finish. Remove any residual oils or cleanup products that might interfere with your top coat’s performance. We suggest using a lint-free wipe with a small amount of rubbing alcohol to ensure your nails are completely clean and ready to showcase your beautiful nail art.


Conclusion
We’ve equipped you with everything needed to start your nail art journey from home. These step-by-step video tutorials make professional-looking designs achievable regardless of your current skill level.
Remember that practice makes perfect. Start with basic techniques like polka dots and French manicures before moving on to more complex designs like water marbling and stamping. Each method we’ve covered builds upon the previous one.
Your nail art toolkit doesn’t need to be expensive or extensive. Focus on quality basics and gradually add specialized tools as your skills develop. With patience and the right tutorials you’ll be creating stunning manicures that rival any salon.
The best part? You can learn at your own pace and experiment with endless color combinations and patterns. Your creative journey starts now.
Frequently Asked Questions
What basic tools do I need to start nail art at home?
Essential tools include medium grit nail files, cuticle pushers, sharp nail clippers, base and top coats, and must-have polish colors (clear, black, white, red, nude). For more intricate designs, add dotting tools, thin brushes, nail tape, and tweezers. This basic kit provides everything needed to create beautiful nail art without expensive salon visits.
How do I create a perfect French manicure at home?
Start with a base coat, then apply your chosen base color. Use nail tape or freehand technique to create clean tip lines with white or colored polish. Focus on maintaining even spacing and avoiding bubble formation. Finish with a top coat for durability and professional appearance.
What’s the best nail shape for beginners?
Round and oval shapes are most beginner-friendly as they’re easier to file and maintain. Use a nail file in one direction, avoiding back-and-forth motions that can cause splitting. Start with your natural nail shape and gradually experiment with square, squoval, or almond shapes as your skills improve.
How do I create gradient and ombre nail effects?
Use the sponge technique with wedge-shaped sponges for best results. Apply different colored polishes to the sponge, then dab onto nails while blending quickly before polish sets. Start with simple color combinations like pink and white or blue and turquoise for easier blending and attractive results.
What are dotting tools and how do I use them?
Dotting tools create perfect circles and patterns for professional-looking designs. Start with simple polka dots, focusing on color combinations and even spacing. Progress to flower designs like daisies and roses, or geometric patterns. Mix different dot sizes for balanced, visually appealing nail art.
How does water marble nail art work?
Water marble involves dropping nail polish into room temperature water, creating swirl patterns with a toothpick, then transferring the design to your nail. Use tape to protect skin, apply base coat first, and work quickly with fresh polish. Practice timing and technique for best results.
Is nail stamping difficult for beginners?
Nail stamping is actually beginner-friendly, allowing intricate designs in seconds. Choose quality stamping plates and polish, use proper scraping technique, and transfer designs quickly. Layer stamped designs over base colors for depth, and always seal with top coat for longevity and professional appearance.
How long do nail stickers last?
Quality nail stickers can last 7-14 days with proper application. Choose thin, flexible materials that conform to nail curves. Apply over base coat, trim excess carefully, and seal with top coat. Proper nail preparation and sealing techniques significantly extend wear time and maintain appearance.
What’s the importance of base and top coats?
Base coats improve polish adhesion, prevent staining, and create smooth application surfaces. Top coats protect designs, add shine, prevent chipping, and extend manicure life. These finishing products are essential for achieving salon-quality results and making your nail art last longer at home.
How do I fix common nail art mistakes?
For uneven lines, use nail tape or thin brushes for precision. Fix bubbles by applying thin polish coats and avoiding shaking bottles. For broken nails, use nail glue for small breaks or specialized repair kits for larger damage. Always practice techniques before attempting complex designs.