Short nails don’t mean you have to sacrifice style or creativity when it comes to nail art. We’ve all been there – scrolling through stunning nail designs only to feel disappointed because they seem impossible to recreate on shorter nails. The truth is, short nails offer their own unique canvas for beautiful and practical nail art that’s actually easier to maintain and perfect for everyday wear.
Whether you’re dealing with naturally short nails, recovering from a nail break, or simply prefer the convenience of shorter lengths, we’ve got you covered. From simple geometric patterns to elegant minimalist designs, there are countless ways to make your short nails look absolutely stunning without requiring advanced nail art skills or expensive salon visits.
The best part? Most of these designs can be created at home with basic nail tools and colors you probably already own. Let’s explore some gorgeous and achievable nail ideas that’ll transform your short nails into works of art.
Classic French Manicure With a Twist
French manicures remain timeless for short nails because they create the illusion of length while maintaining elegance. We’ll show you how to modernize this classic look with creative variations that work perfectly on shorter nail beds.
Mini French Tips
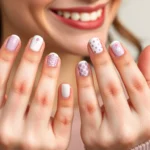
Mini French tips work beautifully on short nails by creating thin white lines across just the very edge of each nail. We recommend using a fine nail art brush or striping tape to achieve precise lines that are half the width of traditional French tips. This delicate approach prevents the white tips from overwhelming your short nail canvas while still delivering that classic sophisticated appearance.
Start by applying a nude or clear base coat and let it dry completely. Use white nail polish with a thin brush to paint narrow lines across each nail tip, keeping them uniform in width. The key is making these tips no more than 2mm wide so they complement rather than compete with your short nail length.
Colored French Tips
Colored French tips transform the traditional white into vibrant hues that match your mood or outfit perfectly. We love using pastels like soft pink, lavender, or mint green for spring looks, while deeper shades like burgundy or navy work wonderfully for fall and winter. These colorful variations add personality to your short nails without requiring complex nail art skills.
Apply your chosen colored polish in the same thin line technique as traditional French tips. Bold colors like coral or electric blue create striking contrasts against nude base coats, while metallic shades like gold or silver add glamorous touches to your short nail design. This approach gives you endless color combinations to explore.
Reverse French Manicure
Reverse French manicures flip the script by placing the accent color at the base of your nail near the cuticle instead of the tip. We find this technique particularly flattering on short nails because it draws attention to the nail bed and creates visual interest without overwhelming the limited space. The contrast between your natural nail color and the accent shade creates a modern, chic appearance.
Create this look by carefully painting a curved line at the base of each nail using your chosen accent color. Keep the line thin and follow your natural cuticle shape for the most polished result. This technique works exceptionally well with metallic polishes or bold colors that pop against your natural nail tone.
Simple Geometric Patterns
 1")
Geometric patterns offer the perfect starting point for short nail art because they create clean, modern looks that complement smaller nail beds. We’ll show you how tape, stickers, or a thin brush can help you achieve professional-looking designs with contrasting colors or subtle hues.
Minimalist Lines
Minimalist lines transform simple manicures into sophisticated nail art with just a few strategic strokes. We recommend using a thin brush or striping tape to create straight lines along the nail edge, curved lines down the center, or diagonal lines at an angle. These designs work beautifully in metallic finishes like gold or silver against neutral base colors.
Creating these looks requires minimal supplies and can be completed quickly at home. We suggest starting with a single line placement before experimenting with multiple lines or intersecting patterns. The key is maintaining clean, precise lines that enhance rather than overwhelm your short nails.
Tiny Triangles
Tiny triangles add geometric interest without requiring extensive nail space or advanced skills. We position these small shapes near the cuticle area or at the nail tip using tape guides or a small detail brush. Solid colored triangles create bold contrast while gradient filled triangles offer a softer, more subtle effect.
This design elevates plain manicures with minimal effort and maximum impact. We find that placing triangles strategically at one corner creates an asymmetrical look that’s both modern and wearable. The small size makes them perfect for short nails while still providing that geometric edge.
Half-Moon Designs
Half-moon designs create classic elegance by painting either the bottom or top half of each nail in contrasting colors. We achieve sharp, clean curves using nail guides or small stickers to section off the desired area. This technique leaves the remaining portion bare or painted in a complementary shade.
The design works exceptionally well on short nails because it doesn’t require length to make a statement. We recommend starting with the traditional placement at the nail base before experimenting with reverse half-moons at the tips. These patterns are beginner friendly and consistently appear in 2025 nail art collections for their timeless appeal.
Quick Gradient and Ombre Effects
 2")
Creating stunning gradient effects on short nails is surprisingly achievable with the right techniques. These methods work exceptionally well on fingertip length nails since the small surface area makes blending easier and more manageable.
Two-Color Fade
Applying a white or light base color first ensures our gradient appears vibrant and true to the chosen shades. We start by selecting two favorite polish colors that complement each other well.
Next, we apply dots or short stripes of both colors side by side on a clean makeup sponge. Dabbing the sponge onto the nail creates the initial blend, and we repeat this motion 2-3 times to build up opacity and achieve the desired color intensity.
Cleaning up excess polish becomes effortless when we use liquid latex around the nail beforehand. We finish by removing any remaining polish with a small brush dipped in acetone, then seal everything with a top coat for durability and shine.
Glitter Gradient
Starting with either a solid base color or our completed two-color fade provides the perfect foundation for adding sparkle. We can create dramatic effects by choosing contrasting glitter or subtle elegance with matching tones.
While the base coat remains slightly tacky, we gently press loose glitter onto the tip or half of the nail surface. Gradually fading the glitter concentration toward the cuticle creates a natural gradient effect that draws attention to the nail tips.
Sealing the design with a quality top coat secures the glitter particles and smooths the surface for a professional finish. This technique works particularly well on short nails because the compact area prevents glitter from becoming overwhelming.
Sponge Technique
Protecting our skin with liquid latex or a peel-off barrier before starting saves important cleanup time later. We apply the barrier carefully around each nail, ensuring complete coverage of the surrounding skin.
Using a makeup sponge, we blend two or more polish colors directly onto the nail surface for seamless transitions. Repeating the sponging process builds up the desired opacity, with each layer requiring about one minute of drying time.
Removing the latex barrier reveals clean, professional edges that require minimal touch-ups. We complete the look by cleaning any remaining imperfections and applying a top coat for enhanced shine and extended wear time.
Easy Nail Art With Tape
 3")
Tape transforms simple nail polish into professional looking designs with crisp, clean lines. This technique creates geometric patterns that appear complex but require only basic supplies and minimal skill.
Striped Patterns
Striped designs offer endless possibilities for customizing your short nail art. We recommend starting with horizontal stripes by applying nail tape across the nail at even intervals, then painting over with your chosen color. Vertical stripes elongate the appearance of short nails and can be created using the same taping method turned 90 degrees.
Mix thick and thin stripes together for a modern, contemporary look that adds visual interest without overwhelming small nail surfaces. Multiple colors create a rainbow effect, while alternating between two complementary shades produces a classic, sophisticated appearance. Remove the tape while the polish remains slightly wet to prevent chipping and ensure sharp, defined lines.
Color Blocking
Color blocking divides your nail into distinct sections using contrasting or complementary colors. We suggest using nail tape to create clean divisions between color sections, applying one color at a time and allowing each to dry completely. Bold, contrasting colors like navy and coral or black and white make the design pop against short nail beds.
Geometric shapes work particularly well for color blocking on shorter nails since they don’t require extensive space to create impact. Try dividing nails diagonally, creating triangular sections, or blocking off the tips for a modern French manicure variation. This technique allows you to incorporate multiple favorite colors into one cohesive design.
Negative Space Designs
Negative space designs leave portions of your natural nail exposed to create striking patterns. We create these by applying tape in exact shapes or patterns, painting over the entire nail, then removing the tape to reveal the bare nail underneath. Dots, lines, and geometric cutouts work exceptionally well on short nails.
Nail art brushes help add intricate details around the negative spaces for more complex designs. The contrast between painted and unpainted areas creates visual depth that makes short nails appear longer and more elegant. This technique works best with bold, opaque colors that provide strong contrast against your natural nail color.
Effortless Polka Dots and Spots
 4")
Polka dots remain one of our most beloved nail art designs for short nails because they’re simple to create and instantly add charm to any manicure. These playful patterns work exceptionally well on shorter nail surfaces since they don’t require extensive space to make a visual impact.
Dotting Tool Technique
Dotting tools give us perfectly round spots every time and create evenly spaced patterns across our short nails. Start by applying your base color and allowing it to dry completely before adding dots. Dip the dotting tool into your chosen polish color and gently press it onto the nail surface without dragging. We recommend practicing the pressure on paper first to achieve consistent dot sizes. Clean the tool between different colors to prevent muddy results. Space your dots approximately one dot width apart for the most balanced look on short nails.
Bobby Pin Method
Bobby pins serve as excellent alternatives when we don’t have professional dotting tools available. Select a clean bobby pin and dip the rounded tip into nail polish to create small, precise dots. This household item works particularly well for creating tiny accent dots that complement short nail proportions. Press the bobby pin tip straight down onto the nail and lift directly up to avoid smearing. We’ve found that using the larger rounded end creates standard sized dots while the smaller tip produces delicate micro dots perfect for detailed work.
Varied Size Dots
Mixing different dot sizes adds visual depth and prevents our polka dot designs from looking too uniform or predictable. Create larger dots using the bigger end of your dotting tool and smaller ones with the tip for ever-changing contrast. We suggest starting with larger dots as focal points and filling in spaces with smaller ones for balance. Try clustering three small dots around one larger dot for an interesting bubble effect. Alternating between two different sizes in a checkerboard pattern also creates sophisticated geometric appeal that enhances short nail designs beautifully.
Single Accent Nail Ideas
 5")
Single accent nails offer the perfect solution for adding visual interest to your short nail manicure without overwhelming the limited nail space.
Glitter Accent
Glitter accent nails transform one nail into a sparkling focal point that catches light beautifully. We recommend applying clear glitter polish over your base color on just your ring finger for maximum impact. Pre-made glitter nail stickers provide an even easier alternative that eliminates mess and drying time. Choose fine glitter for subtle shimmer or chunky glitter for bold statement looks. Apply a quality topcoat to seal the glitter and prevent chipping throughout your wear time.
Metallic Foil
Metallic foil wraps create striking mirror-like finishes that make short nails appear more dramatic and sophisticated. We suggest using foil strips that you can press onto tacky polish or nail adhesive for best results. Silver and gold foils work beautifully as classic choices, while rose gold and copper tones offer trendy alternatives. Press the foil firmly across the entire nail surface to avoid bubbles or wrinkles. Seal your metallic accent with a clear topcoat to protect the foil and extend its longevity.
Rhinestone Details
Rhinestone details add luxury and elegance to short nails with minimal effort required. We find that placing 2-3 small rhinestones near the cuticle area creates the most balanced look on shorter nail beds. Nail glue provides the strongest hold for individual rhinestones, while rhinestone stickers offer convenience for quick application. Clear or neutral-colored stones complement any base polish color, while colored rhinestones can match or contrast your chosen shade. Position rhinestones while your base coat is still slightly tacky for better adhesion and finish with topcoat to secure them in place.
Neutral Tones and Nude Shades
 6")
Neutral tones offer the perfect foundation for short nail designs that work with any outfit or occasion. We find these understated shades particularly flattering because they complement the natural nail bed while creating an elongated appearance.
Beige and Cream Combinations
Beige base with cream accents creates a sophisticated two-tone look that’s surprisingly easy to achieve. We recommend painting your entire nail with a warm beige shade, then adding cream highlights to the tip or center for subtle contrast. Creamy French tips offer a softer alternative to traditional white tips, giving your short nails a more natural and modern appearance. This combination works beautifully for professional settings or everyday wear.
Soft Pink Variations
Baby pink glaze delivers a barely-there color that enhances your natural nail tone without overpowering short lengths. We suggest applying this light pink shade over a clear base coat for the most subtle and elegant result. Pink ombre techniques transition seamlessly from light to darker pink shades, creating depth and visual interest on compact nail surfaces. Start with the lightest pink at your cuticle and gradually blend to a deeper rose tone at the tip.
Matte Finish Options
Matte neutral polishes in beige or cream shades provide a chic, contemporary finish that photographs beautifully. We love how matte textures make short nails appear more sophisticated and intentional rather than simply practical. Matte pink finishes in soft, dusty tones create an unexpectedly modern twist on traditional feminine nail colors. Apply your chosen shade normally, then finish with a matte top coat to achieve that velvety, non-reflective surface that’s currently trending in nail salons everywhere.
Bold Solid Colors
 7")
Bold solid colors transform short nails into striking statement pieces that demand attention. We’ve curated the most impactful single-shade options that work beautifully on shorter nail lengths.
Bright Summer Hues
Light blue milky nails deliver a soft and refreshing appearance that’s perfect for warm weather styling. We love how this dreamy shade creates an effortless summer vibe without overwhelming short nail proportions.
Sky blue oval nails offer a bright and uplifting option that instantly elevates any summer outfit. This vibrant shade works exceptionally well on shorter nails because it creates the illusion of length while maintaining a playful aesthetic.
Yellow accent nails bring cheerful energy to your manicure and can be paired with complementary colors for added visual interest. We recommend using this sunny shade as a statement color that brightens your entire look.
Classic Red Options
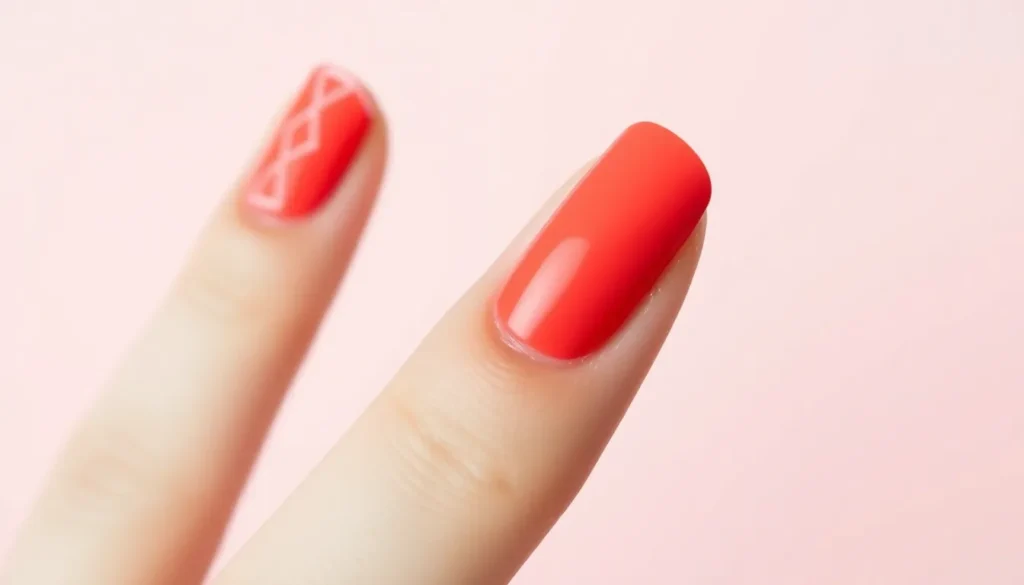
Cardinal red provides a timeless elegance that never goes out of style on short nails. This classic shade adds sophistication to any occasion while maintaining the perfect balance of boldness and refinement.
Cherry red creates a vibrant and bold statement that’s ideal for making an impression. We find this shade particularly effective on short nails because it draws attention to the beautiful shape without requiring additional length.
Grape red offers a deeper and richer alternative for those who prefer less bright tones. This sophisticated variation provides all the glamour of traditional red while adding subtle complexity to your manicure.
Deep Winter Shades
Deep green delivers bold drama that perfectly complements winter fashion and creates stunning contrast against lighter skin tones. We appreciate how this rich shade adds depth and sophistication to shorter nail shapes.
Cobalt blue makes a striking statement that works beautifully with winter outfits and creates eye-catching contrast. This intense shade transforms short nails into focal points that enhance your overall winter styling.
Rich burgundy provides a sophisticated warmth that’s perfect for cold winter days and formal occasions. We recommend this luxurious shade for its ability to make short nails appear more elegant and polished.
Textured Nail Techniques
 8")
Adding texture to your short nails creates visual interest and transforms simple polish into sophisticated nail art. These techniques work particularly well on shorter nails because they’re easier to maintain and less likely to catch on daily activities.
Matte Top Coat
Matte finishes instantly elevate any nail color by creating a soft, velvety appearance that eliminates shine. We love how this technique works on bold colors like deep burgundy or classic black, giving them a modern, sophisticated edge. Simply apply your chosen base color and let it dry completely before adding the matte top coat. The transformation is immediate and dramatic, turning glossy polish into a chic, understated finish. Dark colors show the matte effect most dramatically, while lighter shades create a subtle, powdery look that’s perfect for everyday wear.
Sand Texture Polish
Sand effect polishes contain tiny particles that create a gritty, sparkly finish once dry. These special formulas eliminate the need for additional tools or techniques since the texture develops naturally as the polish dries. We recommend applying sand texture polish in thin, even coats to avoid clumping and achieve the best sparkly effect. The gritty finish catches light beautifully and adds dimension to short nails without requiring artistic skills. Popular sand texture shades include silver, gold, and jewel tones that create an instant statement look.
Velvet Finish
Velvet powder creates the softest, most luxurious texture by transforming wet polish into a fuzzy, fabric like surface. Apply your base color and while it’s still tacky, gently press velvet powder or flocking powder onto the nail using a small brush or cotton swab. Short nails are ideal for this technique because the smaller surface area makes application easier and the finish more manageable. The velvet effect works beautifully with rich colors like burgundy, navy, or emerald green, creating a sophisticated look that’s surprisingly easy to achieve. Seal the edges carefully with a thin layer of clear top coat to prevent the powder from lifting.
Quick Stamping Designs
 9")
Stamping designs offer an efficient way to create professional-looking nail art on short nails in minutes. We’ll explore three popular stamping categories that work exceptionally well on shorter nail lengths.
Floral Stamps
Floral stamps transform short nails into elegant canvases with delicate botanical designs. We recommend choosing smaller floral patterns that complement your nail proportions rather than overwhelming the limited space. Rose stamps create romantic looks perfect for special occasions, while daisy patterns add a fresh, cheerful vibe to everyday manicures.
These versatile designs work beautifully with soft pastels like blush pink or lavender, creating a feminine and sophisticated appearance. Bold colors like deep purple or emerald green can make floral stamps pop against lighter base coats. We find that single flower motifs placed strategically on accent nails create the most balanced look on short nails.
Geometric Stamps
Geometric stamps deliver modern, crisp designs that make short nails appear longer and more polished. Chevron patterns create upward visual movement that elongates the appearance of your nails naturally. Triangle stamps offer bold geometric impact without requiring precise hand painting skills.
We love how these stamps work with contrasting color combinations like black and white or gold and navy. Hexagon patterns add contemporary flair while maintaining professional appeal for workplace settings. Striped geometric stamps can be aligned vertically to create the illusion of longer nail beds, making them particularly flattering for shorter lengths.
Abstract Patterns
Abstract patterns provide creative freedom to experiment with unique designs that don’t require perfect symmetry. Swirling motifs create ever-changing movement across short nails, adding visual interest without cluttering the space. Futuristic patterns with curved lines and organic shapes offer a contemporary artistic touch.
We suggest using abstract stamps with metallic polishes to create striking focal points on accent nails. These designs work exceptionally well when combined with solid colors on remaining nails, creating balanced contrast. Marble-effect stamps deliver sophisticated abstract looks that mimic expensive salon techniques with minimal effort and time investment.
Conclusion
Short nails don’t limit your creativity – they actually open up a industry of stylish possibilities that are both practical and beautiful. We’ve shown you that stunning nail art isn’t reserved for longer nails and that simple techniques can create professional-looking results at home.
The key is choosing designs that complement your nail length rather than fighting against it. Whether you’re drawn to minimalist elegance or bold statement colors these techniques will help you achieve salon-quality results with basic tools and a little practice.
Remember that the best nail art is the one that makes you feel confident and reflects your personal style. Start with the techniques that appeal to most to you and gradually experiment with new designs as you build your skills and discover what works best for your lifestyle.
Frequently Asked Questions
Can you do nail art on short nails?
Absolutely! Short nails provide an excellent canvas for beautiful nail art designs. They’re actually easier to maintain and offer practical advantages while still allowing for creative expression. From geometric patterns to elegant minimalist styles, short nails can showcase stunning designs that are both stylish and functional.
What are the best nail art designs for short nails?
Popular designs for short nails include French manicures with modern twists, geometric patterns, minimalist lines, polka dots, and single accent nails. These designs work well because they complement the proportions of shorter nails while creating visual interest without overwhelming the limited space.
How do you make short nails look longer with nail art?
Use vertical elements like striped patterns, elongated geometric shapes, or gradient effects that draw the eye upward. Avoid horizontal lines that can make nails appear wider. Light colors and nude shades can also create the illusion of length, while negative space designs help maximize visual impact.
What colors work best on short nails?
Both bold and neutral colors work beautifully on short nails. Bright colors like light blue, yellow, and classic red create striking statement looks. Neutral tones like beige, cream, and soft pink provide versatility and sophistication. The key is choosing colors that complement your style and the occasion.
Can you do French manicures on short nails?
Yes! French manicures are perfect for short nails. Try mini French tips, colored French tips, or reverse French manicures for modern variations. These techniques enhance the elegance of short nails while allowing for creative expression beyond the traditional white-tip look.
What tools do I need for short nail art?
Basic tools include nail polish in various colors, a thin brush or toothpick for details, dotting tools or bobby pins for polka dots, and tape for clean lines. For more advanced techniques, consider stamping plates, matte top coats, or textured polishes to create professional-looking designs at home.
Are textured finishes good for short nails?
Textured finishes are excellent for short nails because they add visual interest and sophistication without requiring complex designs. Matte top coats, sand texture polishes, and velvet finishes are easy to apply and create depth. These textures work particularly well with rich, bold colors on shorter nails.
How do you create accent nails on short nails?
Choose one nail per hand (typically the ring finger) and apply a different design or color while keeping the other nails simple. Popular accent options include glitter polish, metallic foil wraps, or rhinestone details. This approach adds visual interest without overwhelming the limited space of short nails.