Short square nails aren’t just practical – they’re the perfect canvas for stunning nail art that’ll make you forget all about length limitations. We’ve discovered that these compact gems offer incredible versatility for creative designs that actually stay intact longer than their lengthy counterparts.
Whether you’re dealing with naturally short nails or you’ve recently trimmed them down for a fresh start, we’re here to prove that size doesn’t determine style potential. From minimalist geometric patterns to bold statement designs, short square nails provide the ideal foundation for nail art that’s both chic and functional.
We’ll show you how to maximize every millimeter of your nail real estate with techniques specifically customized for shorter lengths. Get ready to transform your manicure game with designs that celebrate compact elegance while delivering maximum visual impact.
Choose the Right Base Colors for Short Square Nails
The foundation of exceptional nail art lies in selecting the perfect base color that complements your short square shape. Strategic color choices can transform your manicure from ordinary to extraordinary.
Neutral Tones That Elongate
Nude shades work magic on short square nails by creating an illusion of length and sophisticated elegance. We recommend choosing nude tones like beige, taupe, or soft pink that match your skin undertones for the most flattering effect. Light colors such as creamy whites, pale grays, and champagne hues reflect light beautifully and make your nails appear longer than they actually are.
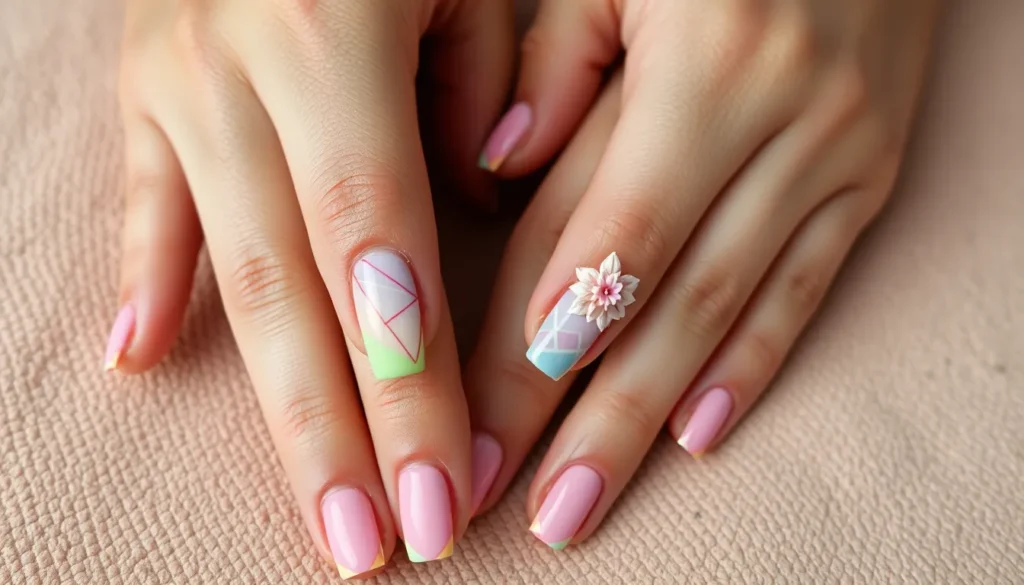
Soft pastels like lavender, mint green, and powder blue offer delicate alternatives that maintain the lengthening effect while adding subtle personality. These colors provide the perfect canvas for intricate nail art designs without overwhelming your short square shape. Clear or sheer bases with hints of color create depth while preserving the natural nail appearance.
Bold Colors That Make a Statement
Rich jewel tones like emerald green, sapphire blue, and ruby red create stunning focal points on short square nails. We’ve found that these saturated colors work exceptionally well because they draw attention to the nail art rather than the nail length. Deep burgundy, midnight navy, and forest green offer sophisticated alternatives that complement both professional and casual settings.
Bright colors such as coral, fuchsia, and electric blue make powerful statements on shorter nails. These vibrant shades create visual impact that compensates for limited nail real estate. Classic black provides the ultimate dramatic backdrop for metallic accents, geometric patterns, and contrast designs that pop against the dark base.
Seasonal Color Palettes
Spring collections feature fresh pastels like soft yellow, lavender, and mint that perfectly complement the season’s renewal energy. We embrace these lighter shades because they create an airy, optimistic feeling while improving the clean lines of square nails. Cherry blossom pink and sage green capture spring’s essence beautifully on shorter nail beds.
Summer calls for vibrant coral, turquoise, and sunshine yellow that reflect the season’s bold energy. These tropical inspired colors work wonderfully with beach themed nail art and geometric patterns. Autumn brings rich burgundy, burnt orange, and deep plum that create cozy, sophisticated looks perfect for transitional weather.
Winter palettes include deep navy, forest green, and classic burgundy that complement holiday celebrations and formal occasions. Silver and gold metallics add glamorous touches that sparkle against darker seasonal bases. Icy blues and pearl whites capture winter’s crisp beauty while maintaining elegance on short square nails.


Master Simple Geometric Patterns

Geometric patterns transform short square nails into stunning canvases that showcase precision and creativity. We’ll explore how these structured designs enhance your manicure with clean lines and bold shapes.
Classic French Tips with a Twist
French tips with bold accent colors revolutionize the traditional manicure for short square nails. We recommend painting the tip in vibrant shades like emerald green or electric blue instead of classic white. Reverse French tips create modern appeal by coloring the base of the nail while keeping tips neutral.
Color blocking techniques work exceptionally well on square shapes, allowing us to experiment with contrasting hues. Metallic French tips add glamour using gold, silver, or rose gold polishes. We can also create asymmetrical French tips by painting diagonal lines instead of straight horizontal ones.
Minimalist Line Designs
Horizontal lines across short square nails create the illusion of width and balance. We achieve these clean designs using nail art brushes or striping tape for precise application. Vertical lines elongate the appearance of shorter nails while maintaining sophistication.
Diagonal lines add ever-changing movement to the nail surface, creating visual interest without overwhelming the limited space. Single accent lines work perfectly as subtle details, while multiple parallel lines create bold geometric statements. We can vary line thickness to create depth and dimension on each nail.
Negative space designs incorporate bare nail areas between colored lines, maximizing the impact of minimal elements. Color coordination between lines and base colors ensures cohesive looks across all nails.
Triangle and Diamond Shapes
Triangle accents positioned at the nail base or tip create striking focal points on short square nails. We can paint these shapes freehand using angled brushes or apply nail stickers for consistent results. Diamond patterns work beautifully as center focal points, drawing attention to each nail’s geometric precision.
Geometric patterns using triangles and diamonds can cover entire nails or serve as accent elements on select fingers. Metallic triangle tips replace traditional French manicures with contemporary edge. We recommend using contrasting colors to make these angular shapes pop against base tones.
Layered diamond designs create optical illusions of depth on flat nail surfaces. Triangular negative space cutouts reveal natural nail color while maintaining bold geometric aesthetics.


Create Eye-Catching Accent Nails

Transform your short square nails into conversation starters by focusing attention on exact fingernails. We’ll show you how strategic accent placement can maximize visual impact while maintaining elegance.
Single Statement Nail Techniques
Bold Colors make one nail the star of your manicure by painting it in a vibrant, attention-grabbing shade. Choose bright colors like electric blue, hot pink, or emerald green to create dramatic contrast against neutral base colors. Apply this technique to your ring finger for maximum impact, as it naturally draws the eye.
Glitter Accents add instant glamour when you overlay glitter on just one nail per hand. Select fine glitter for subtle sparkle or chunky glitter for bold texture that catches light beautifully. Layer glitter over your base color or apply it directly to create a completely different finish from your other nails.
Textured Finishes create visual interest through matte topcoats applied to single nails while keeping others glossy. This contrast technique works especially well with darker colors like deep burgundy or navy blue. Alternate between matte and glossy finishes across your nails for a sophisticated, modern look.
Mix and Match Color Combinations
Monochromatic Schemes use different shades of the same color family to create cohesion with variety. Paint each nail a slightly different tone, from light to dark, creating an ombre effect across your hand. This technique works beautifully with blues, pinks, or purples for a harmonious yet interesting appearance.
Complementary Colors pair opposite colors from the color wheel for striking visual contrast that makes your nails pop. Combine orange with blue, purple with yellow, or red with green for bold combinations that demand attention. Apply these contrasting colors to alternating nails or use one as your base and the other as an accent.
Analogous Colors blend neighboring colors on the color wheel for a sophisticated, harmonious look that’s easier to wear daily. Try combinations like blue and purple, orange and red, or yellow and green for subtle variety that maintains visual flow. This approach creates depth without overwhelming your overall look.
Metallic Accent Applications
Metallic Tips replace traditional white French tips with gold, silver, or rose gold for a sleek, high-gloss finish. Apply metallic polish precisely along the nail edge using steady strokes for clean lines. This technique instantly elevates classic French manicures while maintaining their timeless appeal.
Metallic Designs incorporate intricate patterns using metallic paints or precision stickers for detailed artwork. Create geometric shapes, delicate lines, or small decorative elements that complement your base color. Gold works beautifully over dark colors, while silver pairs perfectly with cool tones like blues and purples.
Mixed Metal Accents combine different metallic finishes across your nails for a luxurious, layered effect. Pair gold and silver elements, or incorporate rose gold with traditional gold for warmth and dimension. This technique works especially well for special occasions when you want maximum glamour and sophistication.
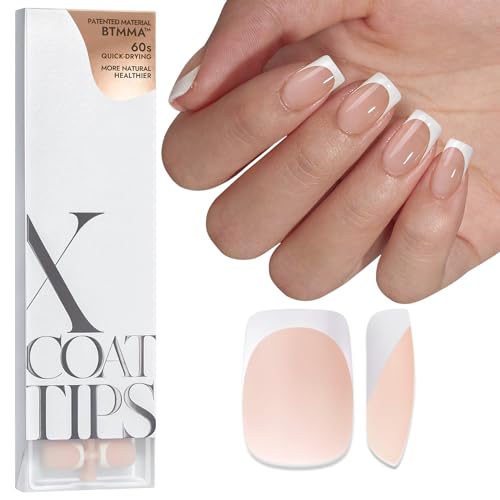
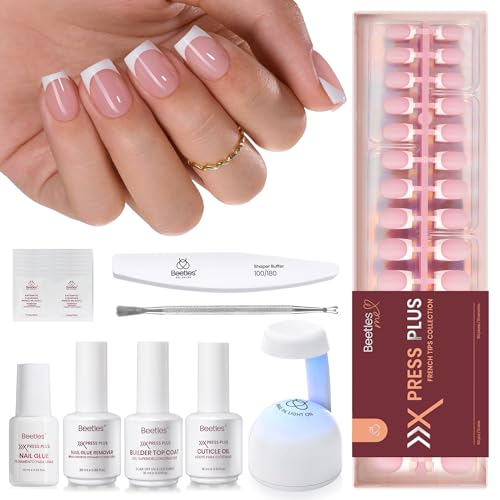
![[GLORS] Short Square Press On Nails, Nude Pink with Rose](https://m.media-amazon.com/images/I/41ZR9kWab0L._SL500_.jpg)
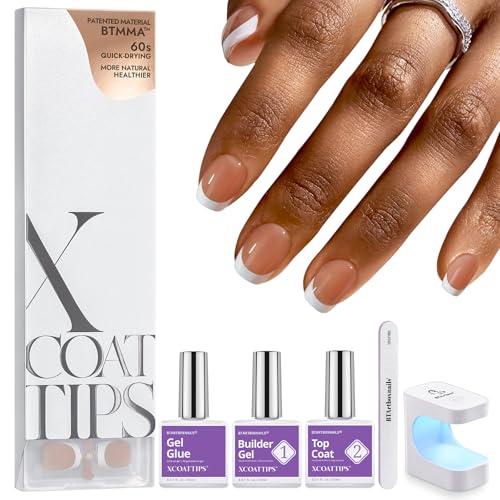
![[GLORS] Christmas Press-On Nails, Short Square Handmade 3D Festive Design,](https://m.media-amazon.com/images/I/41YnMWjYI8L._SL500_.jpg)


Apply Easy Dotting Techniques

Dotting techniques offer one of the most beginner-friendly approaches to nail art for short square nails. We’ll explore three versatile methods that create stunning results with minimal effort.
Polka Dot Variations
Classic polka dots transform short square nails into playful canvases using simple dotting tools. We create uniform spacing by placing dots in a grid pattern across the nail surface. Different sized dots add visual interest—combine large dots with smaller ones for a ever-changing look.
Scattered dot placement creates a more organic, modern appearance than traditional grid patterns. We recommend using 2-3 coordinating colors to maintain cohesion while adding depth. Metallic dots over matte base colors provide striking contrast that enhances the square nail shape.
Color blocked dots involve creating sections of different colored dots rather than mixing them randomly. We divide each nail into two or three sections and use contrasting dot colors in each area. This technique works particularly well on short square nails because the defined edges complement the nail’s natural shape.
Gradient Dot Effects
Ombre dot transitions create smooth color gradients using dots of varying sizes and opacity. We start with larger, more opaque dots at one end of the nail and gradually decrease size and opacity toward the other end. This technique makes short square nails appear longer by drawing the eye vertically.
Density gradient effects involve placing dots closer together in some areas and farther apart in others. We typically create denser dot clusters near the cuticle area and sparse them toward the nail tip. This creates visual movement that adds sophistication to simple designs.
Multi-color dot blending combines three or more colors in a seamless gradient effect. We place dots of each color in rows, then use a clean dotting tool to gently blend where colors meet. The square nail shape provides the perfect canvas for this technique since it offers more surface area than rounded nails.
Flower Petal Designs Using Dots
Simple daisy patterns emerge from arranging 5-6 dots in a circular formation with a center dot in a contrasting color. We create multiple daisies of different sizes across the nail surface for a garden-inspired look. White petals with yellow centers work beautifully on pastel base colors.
Cherry blossom effects use pink and white dots arranged in clusters of 3-5 to mimic flowering branches. We add tiny brown dots to represent stems connecting the flower clusters. This delicate design particularly suits the clean lines of short square nails.
Abstract floral arrangements combine different sized dots to suggest flower shapes without creating literal representations. We use warm colors like coral, peach, and gold to create sunset-inspired floral motifs. The geometric nature of square nails provides an interesting contrast to these organic, flowing designs.


Experiment with Negative Space Art

Negative space art creates modern, minimalist designs by strategically leaving portions of your natural nail exposed. This contemporary technique works exceptionally well on short square nails because it utilizes the nail’s geometric shape to enhance visual impact.
Cut-Out Heart and Star Shapes
Cut-out hearts and stars add playful charm to your short square manicure while maintaining an airy, lightweight aesthetic. We recommend positioning these shapes near the cuticle area or nail tips to maximize their visual effect on shorter nail beds. Creating these designs using negative space techniques keeps them from overwhelming small canvases while delivering maximum style impact.
Start by applying your base color completely, then use nail art brushes or stencils to carefully remove polish in heart or star formations. Bold colors enhance these cut-out designs dramatically, making them perfect for both casual everyday wear and special occasions. The geometric nature of square nails provides clean lines that complement these whimsical shapes beautifully.
Geometric Negative Space Patterns
Geometric patterns combined with negative space create visually striking and edgy designs that feel both modern and minimalist. Lines, triangles, and angular shapes work particularly well on short square nails because they echo the nail’s natural geometric form. These intricate patterns can transform simple manicures into sophisticated statement pieces.
Consider creating diagonal stripes that leave sections of natural nail visible, or try interlocking triangular patterns that play with positive and negative space. Bold colors make these geometric designs pop against bare nail sections, while neutral tones create subtle elegance. The key lies in balancing filled and empty spaces to achieve maximum visual interest without overwhelming the smaller nail surface.
Half-Moon and Chevron Designs
Half-moon designs focus attention on the cuticle area, creating elegant curves that soften the angular edges of square nails. We love how these classic patterns can be adapted using negative space or enhanced with bold accent colors for contemporary appeal. Traditional half-moons typically feature curved lines near the nail base, but modern interpretations can include multiple crescents or inverted designs.
Chevron patterns bring ever-changing energy to short square nails through their distinctive V-shaped formations. These zigzag designs can cover entire nails with modern flair or be incorporated as accent elements using negative space techniques. Bold colors create striking chevron statements, while subtle tones offer sophisticated geometric interest that complements the square nail shape perfectly.


Try Beginner-Friendly Stamping Methods

Stamping transforms short square nails into professional-looking works of art without requiring advanced freehand skills. This technique uses pre-designed metal plates with engravings that transfer intricate patterns onto your nails using a scraper and stamping polish.
Choosing the Right Stamp Plates
Select plates with small, delicate patterns that complement the limited canvas of short square nails. Mini or petite-labeled plates offer the most suitable sizes for your nail dimensions, ensuring designs transfer cleanly without overwhelming the surface.
Focus on narrow borders and geometric shapes that fit perfectly within your nail bed. Small florals, minimal abstract patterns, and delicate line work create stunning results on shorter nails while maintaining proportion and balance.
Avoid large, sprawling designs that may not transfer completely or could extend beyond your nail edges. These oversized patterns often appear cramped or distorted on short square nails, reducing the overall visual impact.
Application Tips for Short Nails
Align the stamping plate image with the center of your nail before making contact to ensure even placement. This positioning technique helps maximize the design’s visibility while maintaining symmetry across your manicure.
Use a firm, quick scraping motion to remove excess polish from the plate for crisp, clean transfers. Practice this technique on a silicone mat or practice nails first to develop muscle memory and confidence.
Apply stamping polish sparingly to prevent smudging and maintain sharp design edges. Too much product can cause bleeding or unclear pattern details that diminish the professional appearance you’re aiming for.
Press the stamper straight down and lift without rolling or dragging motions that could blur the design. Quick, decisive movements produce the clearest results on your short square nail surface.
Layering Stamped Designs
Start with neutral or pastel base colors as your foundation, which are both trendy and forgiving for beginners. These softer tones provide excellent contrast for stamped designs while remaining versatile for daily wear.
Apply your first stamp in a contrasting color once the base coat is completely dry to prevent mixing or smudging. Bold contrasts create dramatic effects, while subtle tone variations offer sophisticated elegance.
Add glitter accents or metallic highlights as your final layer to introduce depth and visual interest. These finishing touches elevate simple stamped designs into salon-quality manicures perfect for special occasions.
Ensure each layer dries completely before proceeding to the next step to maintain clean lines and prevent color bleeding. Patience during this process guarantees professional results that showcase your attention to detail.


Add Texture with Simple Tools

Creating stunning textured nail art doesn’t require expensive equipment or professional skills. We can achieve impressive results using common household items and basic nail tools that most of us already have at home.
Sponge Gradient Techniques
Makeup sponges transform ordinary nail polish into beautiful gradient effects that add depth to short square nails. We dip a clean makeup sponge into our chosen nail polish and gently dab it onto the nail surface, creating seamless color transitions that make nails appear longer.
Creating Perfect Gradients:
- Apply base color and let it dry completely before sponging
- Dab the sponge lightly to avoid streaky application
- Build up color gradually with multiple light layers
- Blend different shades by overlapping sponge placement
Summer themed ombre looks work particularly well on short square nails, as the gradient effect draws the eye upward and creates visual length. We recommend using three complementary shades for the most dramatic effect.
Tape and Sticker Applications
Nail tape serves as our precision tool for creating crisp geometric patterns and clean lines on short square nails. We apply the tape to dry base color, paint over it with our accent color, then remove it while the polish is still slightly wet for the sharpest edges.
Geometric Pattern Ideas:
- Horizontal stripes that widen the nail bed
- Vertical lines that elongate the nail appearance
- Diagonal patterns that add ever-changing movement
- Grid designs for modern minimalist looks
Nail stickers offer instant results for those who want professional looking designs without the time investment. We position stickers on clean, dry nails and seal them with a quality top coat to ensure longevity.
Toothpick Detail Work
Toothpicks become our precision instruments for creating intricate details that would be impossible with regular nail brushes. We use the pointed tip to apply small dots by dipping it in nail polish and gently touching the nail surface.
Detailed Design Techniques:
- Polka Dot Patterns: Dip toothpick in contrasting polish and create evenly spaced dots
- Minimalist Lines: Drag the toothpick through wet polish to create thin, delicate lines
- Floral Accents: Use dots as flower centers and drag outward for petal shapes
- Abstract Art: Combine dots and lines for unique artistic expressions
The key to successful toothpick work lies in working quickly while the polish remains workable and cleaning the toothpick between each application to maintain crisp details.


Incorporate Trending Minimalist Styles

Minimalist nail art brings sophisticated elegance to short square nails while maintaining the clean aesthetic that’s perfect for any occasion. These trending styles emphasize simplicity and allow your nail’s natural beauty to shine through effortless design elements.
Single Line Accent Nails
Single line designs transform your short square nails into modern masterpieces with just one strategic stroke. We recommend placing thin or slightly thicker lines across one or two nails to create visual interest without overwhelming the compact canvas. Contrasting colors like black on white or white on pastel create the most striking effects that draw attention to your manicure.
Placement Options for Maximum Impact:
| Position | Visual Effect | Best Color Combinations |
|---|---|---|
| Horizontal | Widens nail appearance | Black on nude, white on pastels |
| Vertical | Creates length illusion | Gold on deep colors, silver on neutrals |
| Diagonal | Adds ever-changing energy | Contrasting bold colors |
Accent nails work best when you highlight just one or two fingers per hand for understated flair. Professional nail artists often choose the ring finger or thumb as focal points since these naturally draw the eye.
Tiny Symbol Designs
Tiny symbols add delicate charm to short square nails without competing for space with your nail’s natural proportions. Hearts, stars, and minimalist geometric shapes work beautifully when applied near the cuticle, tip, or center of the nail. These small embellishments complement the nail’s compact size while creating sophisticated focal points.
Popular Symbol Placement Techniques:
- Cuticle area: Creates a crown effect with tiny stars or dots
- Nail tip: Mimics classic French manicure with symbol accents
- Center positioning: Draws focus to the nail’s heart for maximum impact
Airbrush techniques deliver smooth, gradient looks when incorporating tiny motifs into your design. We’ve found that symbols measuring 2-3mm work perfectly for short square nails, providing visibility without overwhelming the surface area.
Color Block Techniques
Color blocking creates bold, graphic sections that transform short square nails into contemporary art pieces. This technique adapts perfectly to compact nails by using smaller blocks of color or dividing each nail into halves or thirds. Modern color blocking often features sharp contrasts that make a statement while maintaining clean lines.
Effective Color Block Strategies:
- Half and half: Split nails vertically or horizontally with two contrasting shades
- Triple sections: Divide nails into three equal parts using complementary colors
- Corner blocks: Place small squares of color in nail corners for subtle accents
White and black combinations create timeless appeal, while vibrant primary colors deliver eye-catching modern effects. We suggest using nail tape to achieve crisp, professional lines that define each color block perfectly. The geometric nature of square nails naturally enhances these sharp divisions, making color blocking an ideal technique for this nail shape.


Use Nail Stickers and Decals Effectively

Nail stickers and decals offer an effortless way to transform short square nails into stunning works of art. They’re perfect for achieving professional-looking designs without advanced nail art skills.
Placement Tips for Square Nails
Center positioning creates the most balanced look on short square nails, drawing attention to the design while maintaining proportional harmony. We recommend placing your main decal directly in the center of each nail to maximize visual impact on the limited space.
Align decal edges with your nail tips to maintain the clean geometric symmetry that makes square nails so appealing. This alignment technique ensures your design looks intentional and polished rather than randomly placed.
Leave adequate space around the edges to prevent your decals from appearing crowded or overwhelming the nail surface. The compact canvas of short nails requires careful spacing to avoid a cluttered appearance.
Consider asymmetrical placement for accent nails to create visual interest across your manicure. Placing decals slightly off center on one or two nails can add ever-changing energy to your overall design.
Combining Multiple Decal Types
Mix geometric patterns with floral motifs to create a sophisticated contrast that works beautifully on short square nails. This combination balances the structured edges of your nail shape with softer design elements.
Alternate between bold and delicate designs across your fingers to maintain visual interest without overwhelming the smaller nail surface. We suggest using statement decals on accent nails while keeping the remaining nails more subtle.
Layer different sized decals to add depth and dimension to your nail art. Small accent decals can complement larger focal pieces, creating a layered effect that maximizes the design potential of short nails.
Coordinate color schemes across different decal types to ensure your mixed designs look cohesive rather than chaotic. Stick to a consistent color palette of two to three shades for the most polished result.
Sealing Techniques for Longevity
Apply a thin layer of clear top coat over your decals to protect them from chipping and extend their lifespan. This protective barrier prevents the edges from lifting and maintains the crisp appearance of your designs.
Use UV or LED light curing for the longest lasting finish, especially when working with gel top coats. The curing process creates a durable seal that can withstand daily wear and tear better than air dried alternatives.
Avoid direct sunlight and harsh chemicals to prevent fading and deterioration of your decal designs. Common household cleaners and prolonged sun exposure can cause colors to fade and adhesive to weaken.
Schedule regular touch ups as needed to keep your nail art looking fresh and vibrant throughout the wear period. Quick maintenance can extend the life of your decals significantly with minimal effort.


Finish with Professional Top Coat Applications

We complete our nail art journey by ensuring longevity and protection through professional top coat applications. Quality top coats transform beautiful designs into lasting masterpieces that withstand daily wear.
Choosing the Right Top Coat
Durability becomes our primary focus when selecting top coats for short square nails. We recommend choosing formulas that offer chip resistance and long-lasting protection for intricate nail art designs.
Finish options allow us to customize the final appearance of our manicures. Glossy finishes enhance vibrant colors and make geometric patterns pop, while matte finishes create sophisticated looks perfect for minimalist designs. Satin finishes offer a balanced middle ground between the two extremes.
Formula considerations help us match top coats to exact nail art techniques. Fast-drying formulas work best for layered designs like stamped patterns, while UV-curing options provide superior durability for textured finishes and accent nails.
Application Techniques for Durability
Thin layer application ensures even coverage without disturbing underlying nail art. We apply top coat in smooth, controlled strokes that follow the natural curve of short square nails from cuticle to tip.
Tip sealing prevents premature chipping by creating a protective barrier. We carefully brush the top coat across the nail tip’s edge, ensuring complete coverage of exposed nail art elements like French tips and geometric patterns.
Drying time varies between formula types and requires patience for optimal results. Base coats typically need 2-3 minutes between applications, while final top coats require 5-10 minutes before captivating in activities that might damage the finish.
Temperature control affects application quality and drying speed. We recommend applying top coats in room temperature environments away from direct heat sources or cold drafts that can cause bubbling or uneven coverage.
Maintenance Tips for Long-Lasting Art
Chemical exposure threatens nail art longevity through daily activities. We minimize contact with harsh cleaning products, acetone-based removers, and other chemicals that can break down top coat protection and fade nail art colors.
Regular inspection helps us identify areas needing attention before major damage occurs. We check our manicures every 2-3 days for small chips or wear patterns that can be addressed with quick touch-ups.
Cuticle care supports overall nail health and appearance. We moisturize cuticles daily with nourishing oils or creams to prevent dryness and cracking that can compromise the nail art’s professional appearance.
Touch-up timing determines whether repairs enhance or detract from the original design. We address minor chips within 24-48 hours using matching colors and fresh top coat applications to maintain seamless coverage.


Conclusion
We’ve shown you that short square nails offer endless possibilities for creative expression. From simple geometric patterns to textured finishes and professional stamping techniques these compact canvases can showcase stunning designs that rival any longer nail length.
The key lies in choosing the right techniques and colors that complement your nail shape. Whether you prefer minimalist elegance or bold statement pieces we’ve provided you with the tools and knowledge to create salon-quality results at home.
Remember that proper preparation and quality top coats are essential for long-lasting nail art. With these techniques in your toolkit you’ll never feel limited by your nail length again. Your short square nails are ready to become your next masterpiece.
Frequently Asked Questions
What makes short square nails good for nail art?
Short square nails provide a versatile canvas that’s both practical and stylish. Their compact surface allows for intricate designs while being functional for daily activities. The geometric shape naturally complements various nail art techniques, from minimalist patterns to bold statements, making them perfect for showcasing creativity without compromising on practicality.
Which base colors work best for short square nails?
Neutral tones like nude shades, light colors, and soft pastels are ideal as they create a lengthening effect and complement intricate designs. Bold colors including rich jewel tones and bright shades make statement looks. Seasonal palettes work well too: fresh pastels for spring, vibrant hues for summer, rich tones for autumn, and deep colors with metallics for winter.
What are some beginner-friendly nail art techniques for short square nails?
Simple geometric patterns, classic French tips with modern twists, minimalist line designs, and easy dotting techniques are perfect for beginners. Nail stamping methods and using stickers or decals also provide professional-looking results without advanced skills. These techniques allow for creative expression while being manageable for those new to nail art.
How can I create accent nails on short square nails?
Focus on single statement nail techniques using bold colors on one nail for contrast. Add glitter accents for glamour, or use textured finishes to create visual interest through matte and glossy contrasts. Metallic accents can replace traditional French tips or be incorporated into intricate designs for a luxurious effect.
What tools do I need for textured nail art on short nails?
Basic tools include sponges for gradient effects, tape and stickers for crisp geometric patterns, and toothpicks for detailed work like dots and lines. Nail stamps with small, delicate plates work well for short nails. These simple tools allow you to create professional-looking textured designs without expensive equipment.
How can I make my nail art last longer on short square nails?
Apply a high-quality top coat with chip resistance and your preferred finish (glossy, matte, or satin). Use thin layer application and seal the tips properly. Regular maintenance includes minimizing chemical exposure, inspecting for touch-ups, and maintaining proper cuticle care. UV curing can also extend the longevity of your nail art designs.
Are negative space designs suitable for short square nails?
Yes, negative space art works beautifully on short square nails by leaving portions of the natural nail exposed, creating modern, minimalist designs. Cut-out shapes like hearts and stars add playful charm, while geometric negative space patterns create striking, edgy looks. These designs enhance visual impact while maintaining elegance.
What are the best color combinations for short square nail art?
Monochromatic schemes create sophisticated looks, while complementary colors provide striking contrast. Analogous colors offer harmonious, elegant appearances. For seasonal appeal, try fresh pastels in spring, vibrant combinations in summer, rich earth tones in autumn, and deep colors with metallic accents in winter for maximum visual impact.