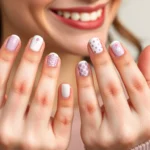
Creating beautiful nail art on tiny fingernails doesn’t have to be a challenging job. We’ve all watched our little ones admire pretty painted nails and ask for their own special manicure. The truth is that small nails actually offer unique advantages for nail art – they’re quick to paint perfect for short attention spans and require minimal supplies.
We understand that working with kids’ small nail beds comes with its own set of challenges. From keeping little hands still to choosing age-appropriate designs that won’t chip within hours – there’s definitely an art to mastering miniature manicures. The key lies in selecting simple techniques that deliver maximum impact without requiring advanced skills or expensive tools.
Simple Dot Patterns Perfect for Tiny Fingernails
Dots make the perfect starting point for small nail canvases because they require minimal precision and create maximum visual impact. Children love the satisfying process of creating perfect circles while building their fine motor skills.
Polka Dot Designs Using Cotton Swabs
Cotton swabs transform into the ideal dotting tool for beginners working on small fingernails. We recommend dipping the cotton end into polish and gently pressing it onto the nail surface to create uniform circles.
Start with a base coat in light pink or white to make the dots pop against the background. Choose contrasting colors like bright blue dots on yellow base or purple dots on mint green for eye-catching results. Space the dots evenly across the nail by creating a mental grid pattern before applying.
Practice on paper first to help kids understand pressure control and dot spacing. This technique works exceptionally well because cotton swabs are inexpensive, disposable, and create consistently sized dots every time.
Rainbow Dots with Water-Based Polish
Water-based polish offers the safest option for creating colorful dot patterns on children’s nails. These formulas dry quickly and remove easily with soap and water, making cleanup effortless for parents.
Create rainbow patterns by applying dots in ROYGBIV order across each nail. Start with red dots at the cuticle area, followed by orange, yellow, green, blue, indigo, and violet toward the nail tip. This method teaches color theory while creating stunning nail art.
Apply one color at a time and allow each layer to dry completely before moving to the next shade. Water-based polishes work perfectly for this technique because they won’t smudge when layered properly. Kids can safely handle these polishes without worry about harmful chemicals or strong fumes.
Animal Spots Using Dotting Tools
Dotting tools create precise animal spot patterns that bring tiny fingernails to life with playful designs. We suggest starting with leopard spots using golden yellow base polish and adding irregular brown dots with smaller black accents.
Transform nails into ladybug designs by applying red base color and adding small black dots randomly across the surface. Create cow print patterns using white base polish with large black irregular spots for a fun farmyard theme.
Zebra-inspired dots work beautifully when you alternate black and white spots in curved lines across the nail. Professional dotting tools cost under $5 and include multiple tip sizes perfect for creating varied spot dimensions. These tools give children better control than makeshift alternatives and produce professional-looking results on small nail surfaces.
Easy Stripe Designs That Work on Small Surfaces
 1")
Stripes offer the perfect solution for kids with small nails because they’re forgiving and create stunning visual impact with minimal effort. We’ll show you three foolproof stripe techniques that work beautifully on tiny nail surfaces.
Horizontal Stripes with Tape
Tape becomes your best friend when creating crisp horizontal stripes on small nails. Start by applying a protective base coat to prevent staining the natural nail underneath. Place nail tape strips horizontally across the nail surface, leaving even spaces between each strip for your color application.
Paint different colors between the tape sections using quick, smooth strokes. We recommend using gel polish for kids because it dries quickly and lasts longer than regular polish. Remove the tape immediately after applying the color but before it completely dries to achieve clean, professional looking lines.
Vertical Lines Using Thin Brushes
Thin nail brushes create beautiful vertical stripes that make small nails appear longer and more elegant. Dip your brush in nail polish and draw straight lines from the base of the nail to the tip using steady, controlled movements. Practice on a piece of paper first to get comfortable with the brush pressure and paint flow.
Add small dots using a dotting tool between the vertical lines for extra detail and visual interest. These dots can match the stripe colors or contrast them for a more playful effect that kids absolutely love.
Diagonal Patterns for Playful Looks
Diagonal lines bring ever-changing energy to small nail designs and they’re surprisingly easy to master. Use a thin brush to draw diagonal lines across the nail surface, starting from one corner and extending to the opposite side. Alternate between different colors to create a multi colored rainbow effect that catches the light beautifully.
Create small dots at the intersections where diagonal lines meet for added texture and complexity. This technique works especially well with bright, contrasting colors that appeal to children’s preferences for bold and vibrant designs.
Fun Animal Faces Scaled for Little Nails
 2")
We’ll transform those tiny canvases into adorable animal masterpieces that perfectly fit small nail surfaces. Creating animal faces on kids’ nails becomes manageable when we focus on simplified features that capture the essence without overwhelming detail.
Simple Cat Faces with Minimal Details
Start with basic geometric shapes to create charming feline features that work beautifully on small nails. We use a light pink or white base coat, then add two small triangular ears at the top of each nail using a thin brush. The face takes shape with just a tiny circle for the nose and two dots for eyes.
Add whiskers using the finest brush available, drawing three short lines on each side of the nose. This technique works especially well with gel polish since it dries quickly and prevents smudging during the detail work. We keep the whiskers proportional to the nail size, making them shorter for smaller nails.
Choose contrasting colors like black details on white base or white features on pink background to ensure visibility. The entire cat face design takes less than five minutes per nail, making it perfect for kids’ short attention spans.
Easy Puppy Designs Using Basic Shapes
Create puppy faces using circles as the foundation for heads and bodies across the nail surface. We start with a beige or light brown base coat, then add a larger circle for the head positioned toward the tip of the nail. Two smaller circles become the ears, placed on either side of the main head circle.
Add facial features with simple dots and lines to bring the puppy design to life. A small black dot creates the nose, while two tiny dots above it form the eyes. We use a toothpick to add a small curved line below the nose for the mouth, keeping all features proportional to the nail size.
Finish with floppy ear details by adding small curved lines inside the ear circles to show depth. This puppy design works particularly well on thumbnail surfaces since they provide more space for the circular shapes to be clearly visible.
Cute Butterfly Wings on Thumb Nails
Paint butterfly wings using thumb nails as the perfect canvas for these delicate designs. We apply a light base color like yellow or pink, then create wing shapes by painting curved lines from the center of the nail outward. Each wing takes up roughly one quarter of the nail space.
Add colorful patterns within each wing section using small dots or tiny lines to create authentic butterfly markings. We recommend using water-based polish for safety and easy cleanup, applying different colors like purple, blue, and orange within each wing segment. The patterns don’t need to be identical since real butterfly wings have natural variations.
Create the butterfly body by drawing a thin vertical line down the center of the nail using a contrasting color. Two small antennae extend from the top of this line, completing the butterfly design. This approach works best on thumbs since they offer the most surface area for the wing details to be clearly visible.
Colorful Geometric Shapes for Beginner Artists
 3")
Geometric shapes offer the perfect starting point for kids exploring nail art on small nails. We’ll show you three foolproof techniques that create stunning results without requiring advanced painting skills.
Triangle Patterns Using Stencils
Triangles create dramatic visual impact on tiny nail surfaces using simple stencil techniques. We recommend positioning triangle stencils at different angles to form chevron patterns that look professionally done. Bright colors like electric blue and sunshine yellow make these geometric designs pop against neutral base coats.
Stencils eliminate the guesswork for young artists who want precise shapes every time. We’ve found that gel polish works exceptionally well with stencil applications because it dries quickly and prevents smudging. Kids can layer multiple triangle colors to create rainbow effects that showcase their creativity while building confidence.
Square Checkerboard Designs
Square checkerboard patterns transform small nails into miniature game boards that kids absolutely love. We start by painting alternating squares in contrasting colors like black and white or pink and purple for maximum visual appeal. This design technique requires only basic brush control and delivers impressive results in under ten minutes per hand.
Checkerboard designs work particularly well on thumbnail surfaces where there’s slightly more space to create defined squares. We suggest using tape to mark square boundaries for beginners who want perfectly straight lines. Quick drying products help maintain clean edges while preventing color bleeding between adjacent squares.
Circle and Oval Combinations
Circles and ovals combine beautifully to create playful patterns that suit every personality. We place larger circles as focal points and fill surrounding spaces with smaller ovals in complementary colors. This approach creates depth and movement that makes small nails appear more ever-changing and interesting.
Combining these shapes allows endless creative possibilities from flower petals to abstract art designs. We recommend starting with three colors maximum to avoid overwhelming the small nail surface. Water based polish ensures safe application while making cleanup effortless for parents and children alike.
Seasonal Themes Adapted for Small Nail Art
 4")
We’ve discovered that seasonal nail art keeps kids engaged throughout the year while celebrating special occasions. Adapting these designs for small nails requires focusing on simple shapes and bright colors that create maximum impact.
Halloween Pumpkins and Ghosts
Orange pumpkins transform tiny nails into festive canvases using minimal supplies. We start with orange polish as the base color and add small green dots at the top using a cotton swab to create stems. Black curved lines drawn with a thin brush complete the pumpkin shape in under three minutes per nail.
Ghost designs work perfectly on small nail surfaces using white polish and black accents. We apply white polish as the base and let it dry completely before adding two small black dots for eyes using a dotting tool. Simple wavy lines at the bottom edge create the floating effect that kids love.
Bat silhouettes offer dramatic Halloween flair using black polish on clear or colored backgrounds. We paint small wing shapes using a thin brush, keeping the design centered on each nail. The contrast between black bats and bright orange or purple base colors creates stunning visual impact.
Christmas Trees and Snowflakes
Green triangular trees bring holiday magic to small nails using simple geometric shapes. We create triangles using striping tape or freehand with a thin brush, then add colorful dots as ornaments using different colored polishes. Gold or silver polish works beautifully for star toppers applied with a dotting tool.
Snowflake patterns transform nails into winter wonderlands using white, silver, or blue polish. We draw simple six-pointed stars using thin brushes, then add small lines extending from each point. The delicate appearance works especially well on thumbnails where there’s slightly more space.
Candy cane stripes capture Christmas spirit using red and white alternating colors. We apply white base polish first, then use striping tape to create diagonal lines before painting red stripes. The quick-drying gel polish we recommend ensures clean lines without smudging.
Spring Flowers and Easter Eggs
Small daisies bloom beautifully on tiny nail surfaces using white petals and yellow centers. We create five small white dots arranged in a circle using a dotting tool, then add a yellow center dot. Pastel pink or light blue base colors make the flowers pop against the spring theme.
Easter egg designs celebrate spring renewal using colorful dots and simple stripes. We start with pastel base colors like pink, yellow, or blue, then add horizontal or vertical stripes using contrasting colors. Small dots applied with cotton swabs create polka dot patterns that kids find delightful.
Butterfly wings spread spring joy across thumbnail surfaces using symmetrical patterns. We paint two wing shapes on each side of the nail using bright colors, then add simple dots or lines for wing patterns. Water-based polish makes cleanup easy while providing the vibrant colors children prefer for their spring celebrations.
Kid-Friendly Tools and Techniques for Tiny Canvases
 5")
Working with specialized tools transforms nail art creation on small surfaces into an enjoyable and manageable experience. We’ve found that simple household items and child safe materials produce the most impressive results for tiny fingernails.
Toothpick Methods for Precision
Toothpicks offer exceptional control when creating detailed designs on small nail surfaces. We use wooden toothpicks to draw intricate patterns like flowers, swirls, and geometric shapes that would be impossible with regular brushes. Detailed line work becomes achievable when we dip the pointed end into contrasting polish colors and carefully trace designs across the nail bed.
Pattern creation works best when we use the toothpick to connect dots or create small hearts and stars. The precision tool allows us to add finishing touches like tiny dots around larger designs or create delicate borders along the nail edges. Clean application requires wiping the toothpick between colors to prevent muddy mixing and ensure crisp lines throughout the design process.
Sponge Dabbing for Texture Effects
Sponge techniques create beautiful dimensional effects that add visual interest to simple base colors. We tear small pieces of makeup sponges to dab multiple polish colors onto the nail surface for stunning gradient effects. Texture layering happens when we press the sponge gently against wet polish to create a stippled or cloudy appearance that looks professionally done.
Color blending works wonderfully when we load different shades onto various parts of the sponge and press onto the nail in overlapping motions. The technique adds depth to solid colors without requiring advanced artistic skills or expensive equipment. Cleanup becomes easy when we use water based polishes that wash off skin surfaces quickly after the sponge application process.
Sticker Application for Clean Lines
Nail stickers provide foolproof methods for achieving perfectly straight lines and complex patterns on tiny nail surfaces. We position decorative decals directly onto dry base coats to create instant professional looking designs without freehand drawing skills. Pattern consistency improves dramatically when we use geometric stickers to create repeating designs across multiple nails.
Application speed makes stickers ideal for children with short attention spans since the entire nail art process takes under two minutes per nail. The adhesive materials use non toxic formulations that peel off easily without damaging the natural nail underneath. Design variety expands our creative options with seasonal themes, animal shapes, and colorful patterns that would take hours to paint by hand.
Safety Tips for Nail Art on Children’s Small Nails
 6")
Creating beautiful nail art becomes even more rewarding when we prioritize our children’s safety and wellbeing throughout the process.
Non-Toxic Polish Selection
We must choose nail polishes specifically labeled as “non-toxic” to minimize health risks for our little ones. Many brands now manufacture polishes free from harmful chemicals, making them perfect for children’s delicate nail beds. Look for products that clearly state their non-toxic formulation on the packaging. Water-based polishes offer excellent safety benefits while providing vibrant colors that children love. These specialized formulas reduce chemical exposure while maintaining the fun factor of nail art creation.
Proper Ventilation and Application Time
Good airflow during application prevents children from inhaling harmful fumes that can cause respiratory issues or dizziness. We recommend opening windows or using fans to maintain fresh air circulation throughout the nail art session. Keep application sessions short and simple to match children’s limited attention spans and natural tendency to move frequently. Five to ten minutes per session works best for most kids, allowing them to enjoy the process without becoming restless. Plan quick touch-ups rather than lengthy detailed work to ensure everyone stays comfortable and engaged.
Easy Removal Methods
Nail stickers and strips provide the safest alternative to traditional polish, offering easy application and removal without chemical exposure risks. These products eliminate the need for harsh removal processes while delivering impressive visual results. Choose gentle polish removers specifically formulated for children’s nails when traditional polish is used. Acetone-free formulas protect developing nail beds from damage while ensuring complete removal. We suggest keeping removal sessions brief and using cotton pads soaked with gentle remover to minimize skin contact. Always moisturize little hands after removal to maintain healthy nail and cuticle condition.
Quick 5-Minute Designs for Busy Parents
 7")
We understand that time is precious when working with excited children, so these rapid designs deliver maximum impact with minimal effort.
Single Color with Glitter Accent
Single color bases create the perfect foundation for stunning glitter effects on small nails. We recommend applying one coat of your child’s favorite bright shade, then adding glitter polish to just the ring finger or thumb for an instant pop of sparkle. This technique works especially well because it requires only two polish colors and takes under 3 minutes per hand to complete.
Glitter accents catch light beautifully on tiny nail surfaces, making even the simplest design look professionally done. Water based polishes dry in 60 seconds, which means less waiting time for wiggly fingers. We’ve found that metallic glitters in gold or silver complement any base color choice.
French Tip Variations
French tips get a playful makeover when we use bold colors instead of traditional white. We paint the nail tips in bright pink, electric blue, or sunshine yellow to create an eye catching twist on this classic look. Nail guides make this process foolproof, even on the smallest fingernails.
Fun tip designs can include polka dots, tiny stripes, or even miniature hearts painted at the nail edge. We use thin brushes or toothpicks to add these details in under 2 minutes per nail. Stickers work perfectly for creating clean tip lines without the need for steady hands or advanced skills.
Stamping Techniques for Speed
Stamping tools revolutionize nail art creation by transferring intricate designs instantly onto small nail surfaces. We use stamp plates featuring stars, hearts, flowers, and cartoon characters that appeal to children’s preferences. Each stamped design takes approximately 30 seconds to apply, making this the fastest decorative technique available.
Professional nail stampers require minimal pressure and create consistent results across all ten tiny nails. We choose stamping polishes that show up clearly against light base coats for maximum visibility. Animal stamps work particularly well on thumbnail surfaces, while smaller geometric patterns suit pinky nails perfectly.
Speedy gel products cure in under 2 minutes, which keeps children engaged throughout the entire process. We focus on simple stamped motifs that capture attention without overwhelming the small nail canvas.
Conclusion
We’ve shown you that creating beautiful nail art on kids’ small nails doesn’t have to be complicated or time-consuming. With the right techniques and tools you can transform tiny fingertips into works of art that’ll make your little ones beam with pride.
Remember that the key to success lies in keeping things simple and safe. Whether you’re using toothpicks for precision work or trying out quick 5-minute designs we’ve shared the methods that work best for small canvases and short attention spans.
Most importantly nail art should be fun for both you and your child. Don’t worry about perfection – focus on the joy of creating something special together. Your kids will love showing off their colorful nails and you’ll love seeing their creativity flourish.
Frequently Asked Questions
What are the main advantages of doing nail art on small fingernails?
Small fingernails offer several benefits for nail art, including quick application times that suit children’s short attention spans, minimal supply requirements, and the ability to create impressive results without advanced skills or expensive tools. The small surface area makes designs appear more detailed and polished.
Which nail art techniques work best for beginners with small nails?
Simple dot patterns using cotton swabs, basic stripe designs with tape, and geometric shapes are ideal for beginners. These techniques require minimal precision and can be completed quickly, making them perfect for children who are just starting with nail art.
What tools are recommended for creating nail art on children’s small nails?
Kid-friendly tools include toothpicks for precision work, cotton swabs for dotting, sponges for texture effects, nail stickers for clean lines, and thin brushes for stripes. These household items are safe, accessible, and provide excellent control for small nail surfaces.
How can I ensure nail art is safe for children?
Always use non-toxic, water-based polishes that are easy to clean and remove. Ensure proper ventilation during application, keep sessions short to match children’s attention spans, and use acetone-free removers or nail stickers for easy cleanup without damaging young nails.
What are some quick nail art designs for busy parents?
Five-minute designs include single color bases with glitter accents, bold French tip variations using nail guides, and stamping techniques for intricate patterns. These methods deliver maximum visual impact with minimal time investment, perfect for busy schedules.
Which seasonal nail art themes work well for small nails?
Simple seasonal designs include Halloween pumpkins and ghosts, Christmas trees and snowflakes, and spring daisies and Easter eggs. Focus on basic shapes and bright colors that are easy to create and maintain children’s interest throughout different seasons.
How do I create animal designs on very small nail surfaces?
Use simplified features that capture the essence of animals without overwhelming detail. Cat faces can be made with basic geometric shapes, puppy designs use circles and dots, and butterfly wings work well on thumbnails using water-based polish for safety.
What’s the best way to keep children engaged during nail art sessions?
Keep sessions short (under 10 minutes), use bright colors and fun themes, allow children to choose their designs, and focus on simple techniques they can potentially try themselves. Quick-drying products and easy cleanup also help maintain their interest.