Valentine’s Day calls for nails that capture the romance and magic of the season. We’re here to help you create stunning gel nail designs that’ll make hearts flutter and turn heads wherever you go. From classic reds and pinks to modern interpretations with glitter accents and intricate patterns, there’s a perfect Valentine’s look waiting for your fingertips.
Gel nails offer the ideal canvas for Valentine’s Day artistry because they provide long-lasting color and durability that regular polish simply can’t match. Whether you’re planning a romantic dinner date or celebrating with friends, we’ve curated the most gorgeous and on-trend designs that’ll keep your manicure looking flawless throughout the entire holiday season.
Ready to fall in love with your nails? We’ll walk you through step-by-step techniques, color combinations, and pro tips that’ll help you achieve salon-quality results at home. Let’s jump into these irresistible Valentine’s Day gel nail designs that are guaranteed to steal the show.
Classic Red Gel Nail Designs That Never Go Out of Style
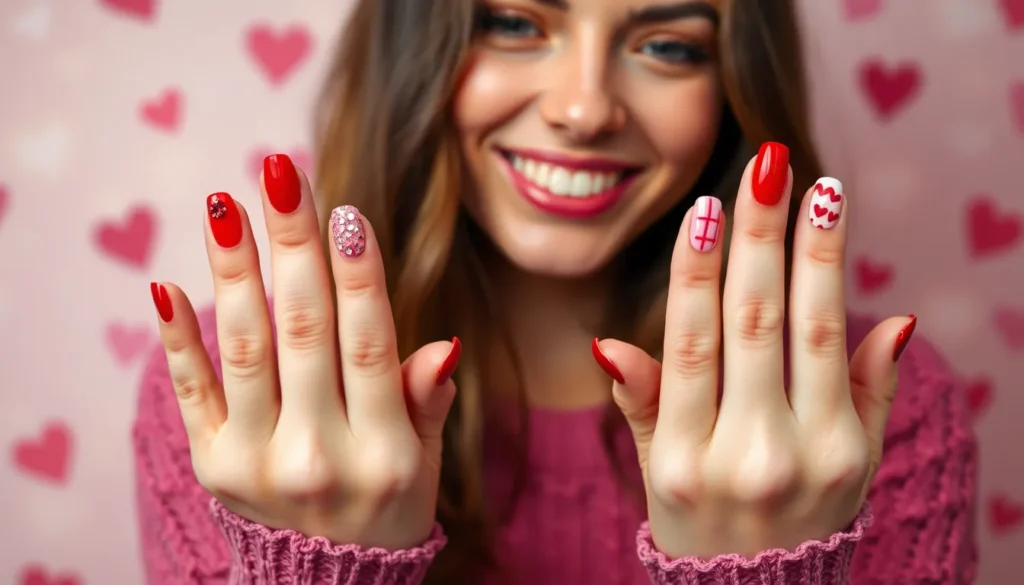
Red remains the ultimate Valentine’s Day nail color, offering timeless elegance that works for any romantic occasion. These classic gel nail designs provide sophisticated options that complement your Valentine’s Day look perfectly.
Solid Red with Gold Accent Nail
Apply a deep crimson gel base coat across all nails except your ring finger for this striking design. Choose luxurious shades like cherry red or burgundy that photograph beautifully in candlelight. Paint your ring finger with metallic gold gel polish to create an elegant focal point.
Add thin gold striping tape in geometric patterns over the red base for extra glamour. Consider using gold foil flakes pressed into the wet gel topcoat on your accent nail. Finish with a high-gloss topcoat to make the colors pop against your skin tone.
Red French Tips with Heart Details
Create classic French tips using bright red gel polish instead of traditional white for a Valentine’s twist. Shape your nails into almond or oval forms to elongate your fingers beautifully. Apply the red tips in thin, even strokes using a fine detail brush.
Draw tiny white or pink hearts along the smile line where the red meets your natural nail. Use a dotting tool to create perfectly sized hearts that won’t overpower the design. Seal everything with a crystal-clear topcoat to protect the delicate heart details from chipping.
Matte Red Finish with Glossy Heart Overlay
Transform your standard red gel manicure by applying a matte topcoat for sophisticated texture contrast. Select deep red shades like wine or cranberry that look stunning in matte finishes. Allow the matte topcoat to cure completely under your LED lamp.
Paint small glossy hearts over the matte base using regular topcoat and a fine brush. Place hearts strategically near your cuticles or nail tips for balanced visual appeal. Vary the heart sizes across different nails to create an organic, romantic pattern that catches light beautifully.
Pink and Rose Gold Combinations for Romantic Vibes

Pink and rose gold combinations offer the perfect balance of sweetness and sophistication for Valentine’s Day gel nails. These romantic color pairings create elegant designs that capture the essence of love while maintaining a refined aesthetic.
Blush Pink Ombre with Rose Gold Glitter
Blush pink ombre with rose gold glitter creates an elegant gradient effect that transitions beautifully from soft pink to shimmering metallics. We start with a light blush pink gel base coat and gradually blend deeper pink tones toward the nail tips. The rose gold glitter effect adds sophistication and catches light beautifully throughout the day.
Apply the blush pink base color first, then use a makeup sponge to dab on slightly deeper pink shades. Blend the colors while they’re still wet to achieve a seamless gradient. Finish with rose gold glitter concentrate on the tips and seal with a high gloss top coat. This design works particularly well on medium to long nail lengths where the ombre effect has more space to develop.
Dusty Rose Base with Metallic Accents
Dusty rose base with metallic accents provides a warm and inviting look that’s perfect for those who prefer minimalist yet stylish nail art. We begin with a rich dusty rose base coat that serves as the foundation for delicate metallic details. Rose gold accents can be applied as thin lines, dots, or geometric patterns depending on your preference.
Create clean metallic accents using a fine detail brush dipped in rose gold gel polish. Focus on one or two accent nails to maintain the minimalist aesthetic while adding visual interest. The dusty rose base offers excellent contrast against the metallic elements and creates depth in the overall design. This combination works beautifully on any nail shape and length.
Pink Chrome Finish with Heart Cutouts
Pink chrome finish with heart cutouts adds a playful and romantic touch that’s bold enough for festive Valentine’s Day celebrations. We apply a pink chrome powder over a black gel base to achieve that mirror like finish that’s become increasingly popular. Heart shaped cutouts reveal contrasting colors underneath for added dimension.
Achieve the chrome effect by applying black gel polish as your base coat, then dusting pink chrome powder over the tacky layer before curing. Create heart cutouts using vinyl stencils or nail art tape before applying the chrome powder. Remove the stencils immediately after dusting to reveal clean heart shapes. This design makes a statement while incorporating traditional Valentine’s Day motifs in a modern way.
Heart-Themed Gel Nail Art Ideas

Heart motifs remain the most popular choice for Valentine’s Day gel nail designs, offering countless ways to express romance through your manicure. Creating these enchanting looks requires the right techniques and tools to achieve professional results.
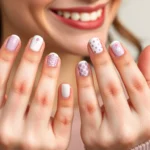
Simple Heart Decals on Nude Base
Nude base colors provide the perfect canvas for heart decal applications, creating an elegant and understated Valentine’s Day look. We recommend selecting neutral tones like beige, taupe, or soft pink to complement the romantic heart shapes without overwhelming the design.
Applying heart decals requires precision and patience for the best results. Start by curing your nude gel base coat completely, then position each decal carefully using tweezers or a cuticle pusher. The decals can be customized with different heart shapes and sizes to create visual interest across your nails.
Sealing the decals properly ensures longevity and prevents lifting during wear. Apply a thin layer of clear gel top coat over the entire nail, making sure to encapsulate the edges of each decal completely before curing under your LED lamp.
Hand-Painted Heart Patterns
Hand painting heart patterns allows for maximum creativity and personalization in your Valentine’s Day gel nail art. We suggest using a fine detail brush and high-quality gel polish to achieve clean, precise heart shapes that won’t smudge or bleed.
Creating consistent heart patterns requires practice and the right technique. Begin by dotting two small circles side by side with your brush, then drag downward from the center to form the heart’s point. The patterns can range from simple outlines to intricate designs filled with glitter or additional colors.
Layering different heart sizes creates depth and visual appeal in your design. Paint larger hearts first as your base pattern, then add smaller hearts in contrasting colors on top for a ever-changing, multi-dimensional effect.
3D Heart Embellishments and Charms
3D heart embellishments transform ordinary gel nails into eye-catching statement pieces perfect for Valentine’s celebrations. We recommend choosing charms that complement your base color scheme while adding texture and dimension to your overall design.
Securing 3D elements requires special adhesive or gel specifically designed for nail art applications. Apply a small amount of nail glue or builder gel to the back of each charm, then press firmly onto your cured base coat before sealing with top coat around the edges.
Placement strategy determines the success of your 3D heart design. Position larger charms on accent nails like the ring finger, while distributing smaller hearts across remaining nails for balanced visual weight that won’t interfere with daily activities.
Glitter and Sparkle Designs for Extra Glamour

We’ll elevate your Valentine’s Day nail game with dazzling glitter and sparkle designs that capture attention and add dramatic shine to your romantic look.
Red Glitter Gradient Nails
Red glitter gradient nails create an elegant yet festive appearance that perfectly blends holiday romance with modern nail artistry. We start with a deep red gel base color, then apply glitter in a gradient pattern from the cuticle to the tip or from the tip downward for stunning depth and dimension.
Application Technique:
- Apply your deep red gel base coat and cure completely
- Use a makeup sponge to dab glitter gel polish starting from the cuticle area
- Blend the glitter toward the tip, creating a smooth gradient effect
- Seal with a top coat and cure for long lasting brilliance
Styling Options:
- Add heart or floral accents for a complete Valentine’s Day theme
- Layer different shades of red glitter for extra depth
- Create an ombre effect by blending from dense to sparse glitter coverage
Pink Holographic Sparkle Design
Pink holographic sparkle nails offer a futuristic twist on traditional Valentine’s Day looks with their multidimensional rainbow effect under light. We apply holographic powder over pink gel bases to create nails that shift and shimmer with every movement.
Color Combinations:
- Soft blush pink base with silver holographic powder
- Hot pink gel with rainbow holographic finish
- Rose gold base with pink holographic accents
Professional Tips:
- Apply holographic powder while the gel is still tacky for best adhesion
- Use different application techniques like brushing or patting for varied effects
- Seal with a glossy top coat to enhance the holographic rainbow effect
Mixed Glitter Heart Confetti Look
Mixed glitter heart confetti nails combine fine and chunky glitter in pink, red, and white tones with tiny gel heart decals for a playful and whimsical style. We create this celebratory design by mixing different glitter sizes and colors to add texture and visual interest that mimics scattered confetti.
Design Elements:
- Fine glitter for base sparkle coverage
- Chunky glitter pieces for dramatic accent points
- Tiny heart decals placed strategically throughout the design
- Color palette featuring pink, red, and white tones
- Apply base color and cure completely
- Scatter fine glitter across the nail surface
- Add chunky glitter pieces for texture variation
- Place heart decals while gel is slightly tacky
- Seal everything with multiple thin top coat layers for durability
Cute and Playful Valentine’s Day Patterns

We’ll explore whimsical gel nail designs that capture the fun and romantic spirit of Valentine’s Day through charming motifs and creative typography.
Love Letter and Envelope Designs
Envelope shaped outlines transform your nails into miniature love letters with vintage appeal. We create these romantic designs by painting envelope silhouettes across the nail surface using delicate brush strokes in soft pinks and whites. Postage stamp details add authentic charm when placed in the upper corner of each envelope design, complete with tiny perforated edges and heart symbols.
Heart shaped seals complete the love letter aesthetic by mimicking traditional wax seals on vintage correspondence. We apply these decorative elements using bright red or deep pink gel polish, creating small circular shapes with raised heart centers. Handwritten style text brings personalization to the design through script lettering that reads “To: My Valentine” or romantic phrases painted in metallic gold or silver.
Bright color combinations enhance the vintage romance theme when we pair soft cream bases with vibrant red accents and gold details. These envelope designs work beautifully on square or coffin shaped nails where the rectangular surface mimics actual letter proportions.
Cupid Arrow Nail Art
Arrow details piercing hearts create ever-changing movement across your Valentine’s Day manicure using white, gold, or pink gel polish. We paint these cupid inspired elements by drawing clean arrow shafts that appear to pass through decorative heart shapes, creating the illusion of Cupid’s magical intervention. Combination patterns with XOXO symbols amplify the romantic message when arrows intersect with typography elements across accent nails.
Heart and dot embellishments provide beautiful contrast against the linear arrow designs through strategic placement of small decorative elements. We position these accents around the arrow shaft or at the point where arrows meet hearts, using complementary colors like rose gold dots on pink arrows or silver hearts with white arrow designs.
Spanning arrow compositions work particularly well when we paint single arrows across multiple nails, creating cohesive designs that flow from finger to finger. This technique allows the arrow to begin on one nail and complete its trajectory on an adjacent nail, maximizing visual impact across the entire hand.
XOXO Typography Patterns
Kiss and hug symbols bring playful romance to your nails through bold or script fonts painted on accent nails. We create these XOXO designs using various lettering styles, from elegant cursive scripts to modern block letters, typically featuring them on one or two nails per hand for balanced visual appeal. Script font applications deliver sophisticated charm when we use flowing letterforms in metallic gold or silver against nude or pale pink bases.
Minimalist typography on nude bases offers understated elegance perfect for subtle Valentine’s Day style. We apply simple XOXO motifs using thin brush techniques, creating clean letter forms that don’t overwhelm the natural nail color. Glitter and metallic accent additions transform basic typography into dazzling focal points through strategic sparkle placement around letter edges or as background elements.
Bold font variations make dramatic statements when we use chunky, modern letterforms in contrasting colors like black XOXO on bright red bases or white letters on deep pink backgrounds. These typography patterns work exceptionally well on shorter nail lengths where the letter proportions remain readable and impactful.
Elegant Minimalist Gel Designs for Subtle Romance

For those who prefer understated sophistication over bold declarations, we’ve curated the most refined gel nail designs that whisper romance rather than shout it.
Single Heart Accent Nail
This design delivers maximum impact through strategic simplicity by featuring a clean neutral or nude base across all nails with one carefully chosen accent nail. We recommend applying a small, precisely painted heart on your ring finger using classic red, soft pink, or even adding a tiny pearl embellishment for elevated elegance. The beauty lies in its versatility – this look transitions seamlessly from casual coffee dates to formal Valentine’s dinner reservations. Professional nail artists favor this technique because it conveys romantic sentiment without overwhelming the overall aesthetic, making it suitable for conservative work environments or those who appreciate refined subtlety.
Thin Red Line French Manicure
Modern minimalists are embracing this contemporary twist on the classic French manicure by replacing traditional white tips with delicate red lines. We apply these thin red accents at varying intensities and widths to create personalized looks that maintain sophisticated appeal. This design particularly shines on both short and long nail lengths, offering incredible versatility for different hand shapes and personal preferences. The technique works exceptionally well with gel polish applications, providing the durability and glossy finish that makes red lines appear crisp and professionally executed. Fashion forward clients choose this style because it feels current and chic while honoring timeless French manicure elegance.
Nude Base with Small Pink Hearts
Natural nude or light pink gel bases create the perfect canvas for delicate pink heart accents that maintain minimalist aesthetics without sacrificing romantic charm. We strategically place small, simple hearts on select nails rather than every finger, ensuring the design remains tastefully sparse and refined. The key to mastering this look involves using precise brush techniques to create clean heart shapes that appear intentionally delicate rather than accidentally imperfect. This approach appeals to clients who want Valentine’s Day appropriate nail art that doesn’t feel overly themed or temporary. Beauty enthusiasts gravitate toward this design because it strikes the ideal balance between playful romance and everyday wearability.
Bold and Statement-Making Valentine’s Designs

When you’re ready to make a dramatic impression this Valentine’s Day, these striking gel nail designs combine unexpected color pairings and eye-catching patterns. We’ve curated the most show-stopping looks that transform traditional romantic themes into modern masterpieces.
Black and Red Contrasting Patterns
Black serves as the perfect dramatic foundation for Valentine’s Day nail art, creating sophisticated contrast against classic red accents. We recommend starting with a glossy black base coat on your pointer and ring fingers, then applying vibrant red heart patterns using nail art brushes or stencils. This color combination channels edgy romance while maintaining the holiday’s traditional palette.
Pattern variations include geometric hearts, scattered mini hearts, or bold stripe designs that alternate between black and red sections. You can also reverse the concept by using red as your primary color and adding black outline details around heart shapes. The high contrast between these colors ensures your manicure will photograph beautifully and stand out in any crowd.
Bright Fuchsia with Silver Details
Bright fuchsia delivers maximum impact when paired with metallic silver accents for a luxurious Valentine’s Day look. We suggest applying two coats of vibrant fuchsia gel polish, then adding silver rhinestones in heart formations or delicate silver foil details along the cuticle line. This combination creates depth while maintaining a romantic yet modern aesthetic.
Silver chrome powder can also be dusted over wet gel topcoat to create mirror-like accents on accent nails. Consider adding tiny silver heart charms or creating silver French tips over the fuchsia base for additional sophistication. The metallic elements catch light beautifully, making your nails sparkle with every gesture.
Leopard Print with Red Accents
Leopard print brings wild romance to Valentine’s Day nail art when enhanced with strategic red highlights. We start with a nude or light pink base, then create leopard spots using black and brown gel polish with a detail brush. Red accents are added as highlight spots within the pattern or as solid red hearts placed strategically over the animal print.
This design works exceptionally well when you alternate between leopard print nails and solid red accent nails throughout your manicure. You can also incorporate red rhinestones within the leopard spots or add red outline details to make certain spots pop. The unexpected combination of animal print and romantic red creates a playful yet sophisticated look that’s perfect for those who want to break traditional Valentine’s Day rules.
Step-by-Step Application Tips for Long-Lasting Results

Achieving gorgeous Valentine’s Day gel nail designs requires more than just creativity—proper application technique ensures your romantic manicure stays flawless for weeks. We’ll guide you through professional methods that guarantee salon-quality results from the comfort of your home.
Proper Nail Preparation Techniques
Clean your nails thoroughly using a nail cleanser to remove all oils and residue that could prevent proper adhesion. Start by washing your hands with soap and water, then follow with an alcohol-based nail dehydrator to eliminate any remaining moisture or natural oils.
Shape each nail to your desired form using a high-quality nail file, working in one direction to prevent splitting. File from the outer edges toward the center, creating smooth curves that complement your chosen Valentine’s design aesthetic.
Buff the nail surface lightly using a 240-grit buffer to create microscopic grooves that help gel polish adhere better. Focus on removing shine rather than creating deep scratches, as excessive buffing can weaken your natural nails.
Push back cuticles gently with a cuticle pusher or orange stick, creating a clean canvas for your romantic gel designs. Trim only excess dead skin, avoiding live tissue that could lead to infection or irritation.
Wipe nails with rubbing alcohol one final time to ensure complete dehydration before applying your first coat of gel polish.
Gel Polish Application Best Practices
Apply thin coats consistently to prevent pooling and ensure even coverage throughout your Valentine’s manicure. Thick layers take longer to cure properly and often result in bubbling or premature chipping.
Use high-quality gel polish brands that offer superior durability and color payoff for your romantic designs. Professional-grade formulas typically contain better pigments and bonding agents that extend wear time significantly.
Cap the free edge of each nail by running the brush along the tip to seal the color and prevent chipping. This technique is especially important for Valentine’s designs that feature bold reds and pinks.
Avoid the cuticle area by leaving a small gap between the polish and your skin to prevent lifting and ensure clean lines around heart motifs or rose patterns.
Build color gradually with 2-3 thin coats rather than attempting full opacity in one application, allowing each layer to cure completely before adding the next.
Curing and Finishing Methods
Use UV or LED lights according to your exact gel polish manufacturer’s instructions, as curing times vary between different formulations. Most Valentine’s gel colors require 30-60 seconds under LED lights or 2 minutes under UV lamps.
Cure each layer completely to prevent lifting and ensure your romantic designs maintain their vibrant appearance throughout the wear period. Undercured polish often results in dull, tacky surfaces that attract dirt and debris.
Apply a quality top coat to seal your Valentine’s design and add protective shine that enhances the overall appearance. Choose formulas specifically designed for gel systems to ensure compatibility and maximum durability.
Wipe away excess gel from around the cuticles using a lint-free cloth dampened with rubbing alcohol immediately after curing. This step prevents gel buildup that can cause lifting or create an unprofessional appearance.
Finish with cuticle oil applied around the nail bed to hydrate the skin and create a polished, salon-quality look that complements your beautiful Valentine’s gel designs.
Conclusion
We’ve explored a stunning array of gel nail designs that’ll make your Valentine’s Day celebration extra special. From classic red elegance to playful heart patterns and bold statement looks there’s truly something for every style preference and skill level.
Remember that the key to achieving professional-looking results lies in proper preparation and taking your time with each step. Whether you’re drawn to minimalist elegance or eye-catching sparkle effects these designs will help you express your romantic side beautifully.
Now it’s time to gather your supplies choose your favorite design and create the perfect Valentine’s Day manicure. With these techniques and tips at your fingertips you’ll be ready to showcase gorgeous gel nails that capture the magic of love.
Frequently Asked Questions
What are the main advantages of gel nails over regular polish for Valentine’s Day?
Gel nails offer superior durability and long-lasting color compared to regular polish, making them ideal for Valentine’s Day celebrations. They resist chipping and maintain their vibrant appearance for weeks, ensuring your romantic nail art stays perfect throughout the holiday season and beyond.
What are the most popular Valentine’s Day gel nail colors?
Classic red remains the ultimate Valentine’s Day color, followed by various shades of pink including blush, dusty rose, and bright fuchsia. Rose gold, nude, and even bold black combined with red accents are also trending choices for romantic nail designs.
How do I create a smooth glitter gradient effect on gel nails?
Start with a base color and apply glitter polish in thin layers, concentrating more product at the nail tips and blending downward. Use a makeup sponge to dab and blend the glitter for seamless transitions. Seal with top coat for a smooth finish.
What are some easy Valentine’s nail art ideas for beginners?
Simple heart decals on nude bases, single accent nails with hearts, thin red French tips, and small pink hearts on neutral backgrounds are perfect for beginners. These designs require minimal skill but create elegant romantic looks.
How can I make my gel nail designs last longer?
Proper nail preparation is crucial – clean, shape, and buff nails before application. Apply thin gel coats, cap the free edge, cure properly under LED/UV light, and finish with quality top coat and cuticle oil for maximum longevity.
What tools do I need for Valentine’s Day nail art at home?
Essential tools include gel base coat, colored gel polishes, top coat, nail art brushes, dotting tools, heart-shaped decals or stencils, glitter, LED/UV lamp for curing, and cuticle pusher for proper nail preparation.
Can I mix different Valentine’s themes in one manicure?
Absolutely! Combining themes like hearts with glitter, minimalist designs with bold accents, or mixing pink and red shades creates unique, personalized looks. The key is maintaining color harmony and balanced placement across all nails.
How do I apply 3D heart embellishments securely?
Apply 3D hearts while the top coat is still wet but not fully cured. Press gently into place, then cure under the lamp. For extra security, apply a thin layer of top coat around (not over) the embellishment and cure again.