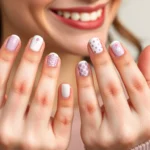
Halloween’s just around the corner and we’re all scrambling to perfect our spooky looks. While you might have your costume sorted out your nails probably need some attention too. Don’t worry – creating stunning Halloween nail art doesn’t require professional skills or expensive salon visits.
We’ve gathered the most beginner-friendly Halloween nail designs that’ll transform your fingertips into miniature masterpieces. From classic orange pumpkins to eerie spider webs these step-by-step tutorials use basic tools you already have at home. Each design takes less than 30 minutes and delivers maximum impact for your Halloween ensemble.
Whether you’re heading to a costume party or just want to embrace the spooky season we’ll show you exactly how to achieve salon-worthy results. Get ready to impress everyone with nails that are equal parts creepy and cute – no artistic experience required.
Classic Orange and Black Halloween Nails
We’ll start with the most iconic Halloween color combination that never goes out of style. These timeless shades create the perfect spooky foundation for any Halloween nail design.
Gather Your Basic Halloween Colors
Orange nail polish serves as your primary Halloween base color, so choose a vibrant pumpkin shade or burnt orange tone. We recommend selecting a high-quality formula that applies evenly in two coats without streaking.
Black nail polish becomes your accent color for creating dramatic contrasts and spooky details. Pick a true black shade rather than a dark gray to ensure your Halloween designs pop against the orange base.
Base coat and top coat protect your natural nails and extend the life of your Halloween manicure. We suggest using a quick-dry formula to speed up your nail art process.
Nail art brushes help you create precise lines and detailed patterns with ease. Gather a thin liner brush, a flat brush, and a dotting tool for maximum design versatility.
Create Simple Striped Patterns
Apply your base coat first and let it dry completely before moving to the color application step. We always recommend waiting at least two minutes between each layer.
Paint alternating orange and black stripes using a thin nail art brush or striping tape for clean lines. Start with your orange base color on the thumb, index, and ring fingers, then apply black to the middle and pinky fingers.
Create diagonal stripes by painting thin black lines across orange nails at a 45-degree angle. We find that spacing the stripes about 3mm apart creates the most visually appealing pattern.
Make chevron patterns by painting V-shaped stripes that meet at the center of each nail. This technique works best when you start from the cuticle area and work toward the nail tip.
Add Glitter Accents for Extra Sparkle
Orange glitter polish transforms basic Halloween nails into eye-catching statement pieces. We recommend applying glitter over your base color while it’s still slightly tacky for better adhesion.
Black glitter creates subtle sparkle that adds depth without overwhelming your Halloween design. Focus the glitter application on the nail tips or use it to outline your striped patterns.
Gold glitter accents complement both orange and black beautifully, giving your Halloween nails a festive party-ready finish. We suggest using a makeup sponge to dab glitter onto exact areas for controlled application.
Seal everything with two coats of clear top coat to prevent glitter from chipping or catching on clothing. This final step ensures your Halloween nail art lasts through all your spooky celebrations.
Spooky Spider Web Nail Art
 1")
We’ll create an eerie spider web design that’s perfect for Halloween night. This design builds on classic black and orange combinations while adding intricate web details.
Start with a Dark Base Coat
Apply black or dark-colored nail polish to all nails as your foundation. We recommend using a true black polish for the most dramatic effect, following the classic Halloween color scheme. Allow the polish to dry completely before proceeding to ensure the best results and prevent smudging during the web creation process.
Draw Intersecting Lines for the Web
Use a thin brush or toothpick dipped in white nail polish once your base is completely dry. Start from one corner of the nail and paint three straight lines that fan out diagonally across the surface. Connect these lines by adding curved lines between each section to form the authentic web pattern. Touch up any imperfect lines with black polish where needed to maintain clean, precise web details.
Add a Tiny Spider Detail
Create a small dot using a dotting tool or toothpick with black polish for the spider’s body. Add a second, smaller dot for the head, or use a thin brush to draw a tiny spider with delicate legs positioned near your web design. We suggest placing the spider off-center for a more natural, realistic appearance. Let all spider details dry thoroughly before applying your protective top coat to seal this spooky Halloween nail art masterpiece.
Cute Ghost Halloween Nails
 2")
Ghost nails offer a charming and friendly alternative to more frightening Halloween designs. We’ll show you how to create these adorable spooky spirits using simple white polish and basic nail art tools.
Apply White Polish as Your Base
Start by preparing your nails with a clean shape and applying a base coat to protect the nail surface. We recommend using a thick, even layer of white nail polish as your foundation for the ghost design. Allow the white polish to dry completely before moving to the next step, as this base layer determines how vibrant your ghost shapes will appear. The white base creates the perfect canvas for your ghost bodies and ensures maximum opacity for the final design.
Create Ghost Shapes with Dotting Tools
Use a dotting tool or the rounded end of a toothpick dipped in white polish to form your ghost shapes. We suggest placing one ghost per nail for a balanced look that won’t overcrowd the design. Begin by dabbing a medium sized circle near the top of the nail to create the ghost’s head, then drag the tool downward to widen the shape for the body. Create a flowing, wavy bottom edge to give your ghost that classic floating appearance. Bobby pins or pencil erasers work as excellent alternatives if you don’t have professional dotting tools available.
Paint on Simple Black Eyes and Mouth
Add personality to your ghosts using a thin brush or toothpick dipped in black polish to create facial features. We recommend painting small black dots for the eyes and a curved line or small “O” shape for the mouth to achieve a friendly ghost expression. Nail art pens provide more precise lines and details if you prefer greater control over the facial features. Clean up any smudges with a small brush dipped in nail polish remover before the design sets. Seal your completed ghost nails with a clear top coat for shine and durability that’ll last through all your Halloween festivities.
Pumpkin Patch Nail Design
 3")
We’ll create a charming pumpkin design that captures the essence of autumn festivities. This festive nail art combines vibrant orange tones with natural green accents for an authentic pumpkin patch look.
Begin with Orange Base Color
Apply a vibrant orange nail polish as your foundation layer across each nail. We recommend using two thin coats rather than one thick application to achieve even coverage and prevent streaking. Allow the first coat to dry completely before adding the second layer. Wait approximately 3-5 minutes between coats to ensure proper adhesion. The orange base creates the perfect canvas for your pumpkin design and provides the rich color that makes this Halloween nail art instantly recognizable.
Add Green Stems and Leaves
Use a small nail art brush dipped in green polish to paint delicate stems at the top of each nail. Start by creating a small vertical line about 2-3mm in length for the stem. Create leaf shapes using a dotting tool by making small teardrop forms on either side of the stem. We suggest making 2-3 small leaves per nail for a natural appearance. Press the dotting tool into the green polish and gently drag it to form organic leaf shapes. Allow the green details to dry thoroughly before moving to the next step.
Create Texture with Vertical Lines
Draw thin vertical lines down the length of each nail using a fine brush and the same orange polish you used for the base. Space these ridges evenly across the nail surface to mimic the natural segments of a real pumpkin. We recommend creating 3-4 vertical lines per nail depending on your nail width. Start from just below the green stem and draw downward in smooth motions. These texture lines transform your simple orange base into a realistic pumpkin appearance. Finish by applying a clear top coat to seal your design and add protective shine that’ll last through all your Halloween activities.
Blood Drip Halloween Nails
 4")
Transform your nails into a chilling masterpiece with our blood drip design that creates an instantly dramatic Halloween look. This design combines gothic elegance with horror elements to make your manicure the perfect finishing touch for your spooky costume.
Choose Your Base Color Carefully
Dark foundations create the most striking contrast for your blood drip effects. We recommend starting with a high-quality base coat to protect your natural nails from staining. Black polish serves as our go-to choice because it makes the red drips appear more vivid and realistic against the dark background.
Deep burgundy or dark red also work beautifully as alternative base colors for this design. Apply two thin coats rather than one thick layer to ensure even coverage and prevent streaking. Allow each coat to dry completely before moving to the next step to avoid smudging your carefully applied base.
Create Realistic Dripping Effects
Dotting tools and small brushes become your best friends for achieving authentic blood drip patterns. Start by placing small droplets of red polish along the cuticle area and nail edges where blood would naturally pool. We suggest working on one nail at a time to maintain control over the dripping effect.
Position your droplets irregularly rather than in perfect lines to mimic natural blood flow patterns. Use a toothpick to gently drag some droplets downward while the polish is still wet, creating varied drip lengths. Some drops should be short while others extend further down the nail for realistic variation.
Layer Red Polish for Depth
Multiple thin layers of red polish create the rich, dimensional color that makes blood drips look convincing. Begin with a translucent red shade and build up the intensity gradually rather than applying one thick coat. We find that three to four thin layers produce the most realistic blood color depth.
Focus the darkest red concentration at the top of each drip where it would naturally be thickest. Allow each layer to dry for at least two minutes before adding the next to prevent the colors from becoming muddy. Finish with a glossy top coat to enhance the wet blood appearance and protect your design throughout your Halloween festivities.
Witch Hat Nail Art
 5")
We’ll create an enchanting witch hat design that’s perfect for adding mystical charm to your Halloween nail collection. This beginner-friendly design requires only basic tools and delivers impressive results in just a few simple steps.
Paint a Black Triangular Shape
We start by applying a base coat to protect our nails and ensure smooth polish application. Allow the base coat to dry completely before moving to the next step.
Using black nail polish and a fine brush or detailer tool, we paint a broad triangle shape at the tip or center of each nail. The triangle forms the main body of our witch hat, so we make the base wider for that classic pointed hat silhouette.
Apply the black polish in thin, even strokes to avoid streaking or bubbling. We can build up the color with a second coat if needed for full opacity. Let each layer dry thoroughly before proceeding to prevent smudging.
Add a Colorful Hatband Detail
We select a contrasting color like purple, orange, green, or gold to create the decorative hatband. Using a small nail art brush or dotting tool, we paint a horizontal band across the base of our black triangle.
Position the hatband about one-third from the bottom edge of the triangle for proper proportion. The band should be thin and clean, creating a clear division between the hat and its base.
Allow the hatband to dry briefly before adding any additional details. We can make the band slightly thicker or thinner depending on our personal preference and nail size.
Include Small Decorative Elements
We enhance our witch hat design by adding charming accent details using a dotting tool or small nail art brush. Popular decorative options include tiny dots, stars, miniature bows, or small pumpkins placed on the hatband or beside the hat.
White polish creates an excellent buckle detail on the hatband, adding authentic witch hat character to our design. We can also incorporate multiple colors for stars or dots to make each nail unique.
Small decorative elements should be proportional to the nail size and hat design. We place these accents strategically to maintain balance without overwhelming the main witch hat shape.
Once all decorative elements are dry, we seal our entire design with a clear top coat for longevity and shine. The top coat protects our witch hat nail art throughout Halloween festivities and prevents chipping or fading.
Candy Corn Inspired Nails
 6")
Transform your nails into sweet Halloween treats with this iconic tri-colored design that captures the essence of everyone’s favorite autumn candy. We’ll guide you through creating perfectly layered sections that mirror the classic candy corn appearance.
Section Nails into Three Parts
Divide your nail into three horizontal sections to create the foundation for this beloved Halloween design. Start by visualizing or lightly marking where each color band will sit on your nail surface. We recommend making the bottom section slightly larger than the middle and top sections to mirror authentic candy corn proportions. Use a thin nail art brush or toothpick to create gentle guide marks if needed. This preparation step ensures your color bands will appear uniform and professional across all ten nails.
Apply Yellow, Orange, and White Layers
Start with the bottom section and apply yellow nail polish in thin, even strokes for the base of your candy corn design. Allow the yellow layer to dry completely before moving to the next step. Next, paint the middle section with vibrant orange nail polish, creating a smooth transition zone between colors. We suggest using a small nail art brush for better control when painting these defined sections. Finally, use crisp white nail polish for the top section, completing the classic candy corn color sequence. Each layer should be applied in two thin coats rather than one thick application for optimal coverage and color vibrancy.
Clean Up Lines for Sharp Definition
Use a nail art brush dipped in acetone or nail polish remover to refine the edges between each color section for professional-looking results. Clean up any bleeding or uneven lines by gently removing excess polish from the border areas. We recommend using a small angled brush for precise correction work along the color boundaries. Steady your hand by resting your wrist on a flat surface while making these detailed adjustments. Apply a clear top coat once all corrections are complete to seal your candy corn design and ensure the colors remain vibrant throughout your Halloween festivities.
Bat Silhouette Halloween Design
 7")
Transform your nails into a spooky night scene with this striking bat silhouette design that creates an eerie atmosphere perfect for Halloween festivities.
Create a Gradient Night Sky Background
We’ll start by building a dramatic foundation that mimics the twilight sky. Apply a clear base coat first to protect your natural nails from staining and ensure smooth polish application. Choose nail polish shades in deep blue and rich purple to create our gradient effect, working from the lightest tone at your nail tips toward the darkest shade near your cuticles.
Blend the colors seamlessly using a makeup sponge or small cosmetic brush, dabbing gently to merge the transition between shades. Allow each layer to dry completely before moving to the next step, ensuring our night sky background stays crisp and even. This gradient technique creates depth and makes your bat silhouettes appear to float against a realistic evening sky.
Draw Simple Bat Shapes
We’ll create our bat silhouettes using basic geometric shapes that anyone can master. Dip a fine nail art brush into black nail polish and start by drawing an oval shape for the bat’s body, positioning it strategically on your gradient background. Create the wings by drawing two triangular shapes extending outward from either side of the oval body, making them slightly curved to appear more natural.
Keep your bat shapes small and simple for the most effective silhouette look, focusing on clean lines rather than intricate details. Practice the basic bat outline on paper first if you’re nervous about drawing directly on your nails. The contrast between the black silhouettes and colorful gradient background creates a stunning visual impact that captures the essence of Halloween night.
Add Multiple Bats for Impact
We’ll enhance the design by creating a colony of bats in various sizes across your nails. Draw additional bat shapes in different dimensions, placing some larger bats in the foreground and smaller ones in the background to create visual depth. Position your bats at different angles and heights to simulate natural flight patterns, avoiding perfectly symmetrical placement that might look artificial.
Vary the number of bats on each nail, using three to five silhouettes per nail for optimal visual balance without overcrowding. Apply a glossy top coat to seal your design and add professional shine, ensuring your spooky bat silhouettes remain intact through all your Halloween celebrations. This layered approach transforms simple nail art into a captivating miniature scene that perfectly complements any Halloween costume.
Frankenstein Monster Nails
 8")
We’ll transform your nails into the iconic green monster with this beginner-friendly design that captures Frankenstein’s classic features.
Use Green as Your Main Color
Start by applying a clear base coat to protect your nails from staining and create a smooth foundation. Select a vibrant green polish like Sinful Colors Exotic Green for authentic monster coloring that stands out against the Halloween night. Apply two thin coats rather than one thick layer to achieve even coverage and prevent streaking. Allow each coat to dry completely before moving to the next step to avoid smudging your base color.
Paint Black Hair and Stitches
Use Milani Black Nail Art Polish to create the monster’s signature disheveled hair across the top portion of each nail. Paint jagged, uneven strokes to mimic wild hair texture that gives Frankenstein his menacing appearance. Draw stitches using a dotting tool or bobby pin dipped in black polish for precise lines across the face area. Create small perpendicular marks along longer stitch lines to replicate the surgical thread effect that defines this classic monster look.
Add Bolts and Facial Features
Apply metallic or silver polish to paint bolts on either side of the monster’s head using small circular motions. Position these bolts at the temple area of your nail design to maintain anatomical accuracy. Paint simple black dots for eyes and a straight line for the mouth using your nail art brush for clean facial features. Add white highlights to the eyes or red accents to the mouth for extra dimension that brings your Frankenstein monster to life. Finish with Seche Vite Topcoat to seal and protect your spooky creation for lasting Halloween wear.
Halloween French Tip Variations
 9")
Transform your classic French manicure into a spooky Halloween masterpiece with these creative twists that’ll make your nails the star of any costume party.
Replace White Tips with Orange
Switch out traditional white tips for vibrant orange polish to instantly create a Halloween-themed French manicure. Apply your base coat first to protect your natural nails from staining. Paint the majority of each nail with a contrasting dark color like black or deep purple for maximum impact. Use orange nail polish to create the tip section either by painting freehand or using nail guides for cleaner lines.
Clean up any mistakes with a small brush dipped in nail polish remover for professional-looking results. Seal your design with a high-quality top coat to prevent chipping during Halloween festivities. This simple color swap creates an eye-catching foundation that pairs perfectly with any Halloween costume.
Add Small Halloween Motifs
Enhance your orange-tipped French manicure with tiny Halloween decorations that bring personality to each nail. Create small bats using a dotting tool dipped in black polish by making an oval shape and adding wing details with quick strokes. Draw miniature spiders by painting a small black dot for the body and using a thin brush to add eight delicate legs around it.
Paint adorable ghosts using white polish in a teardrop shape with two black dots for eyes and a small curved line for the mouth. Add pumpkins by creating small orange circles and finishing with green stems using a fine nail art brush. These motifs work best when placed asymmetrically across your nails rather than centering them on each tip.
Experiment with Different Tip Shapes
Move beyond traditional rounded French tips by exploring angular and geometric shapes that complement Halloween’s edgy aesthetic. Create pointed tips using nail guides to achieve sharp vampire-like nail ends that look both elegant and menacing. Try chevron-shaped tips by painting V-shaped angles across your nail tips for a modern twist on the classic design.
Experiment with scalloped edges by painting curved wave patterns along your nail tips for a more whimsical Halloween look. Use coffin-shaped tips to create a gothic appearance that perfectly matches darker Halloween themes. Apply different colored polishes within each shaped section to create multi-dimensional designs that catch light beautifully under party lighting.
Conclusion
We’ve shown you that creating stunning Halloween nail art doesn’t require professional skills or expensive salon visits. With these step-by-step tutorials you can transform your nails into spooky masterpieces using basic tools and techniques that anyone can master.
Whether you’re drawn to classic orange and black designs or prefer more intricate patterns like spider webs and blood drips these tutorials offer something for every skill level and Halloween style preference. Each design can be completed in under 30 minutes making them perfect for last-minute costume preparations.
Remember to invest in quality base and top coats to ensure your Halloween nail art stays vibrant throughout all your spooky celebrations. With practice these techniques will become second nature and you’ll be creating impressive nail designs that perfectly complement your Halloween look year after year.
Frequently Asked Questions
How long does it take to create Halloween nail art designs?
Most Halloween nail art designs can be completed in under 30 minutes, making them perfect for last-minute costume preparations. Simple designs like orange and black stripes or ghost nails take around 15-20 minutes, while more detailed designs like spider webs or Frankenstein monsters may take 25-30 minutes including drying time.
What basic tools do I need for Halloween nail art?
You’ll need basic nail polish in Halloween colors (orange, black, white), a base coat, top coat, nail art brushes or thin brushes, dotting tools, and toothpicks. A makeup sponge is helpful for gradient effects. These affordable tools can create professional-looking designs without expensive salon visits.
Can beginners create these Halloween nail designs?
Absolutely! All designs featured are beginner-friendly and don’t require professional skills. The tutorials use simple techniques like dots, lines, and basic shapes. Start with easier designs like ghosts or pumpkins, then progress to more detailed patterns like spider webs as you gain confidence.
How can I make my Halloween nail art last longer?
Always use a base coat before applying polish and seal your design with a clear top coat. Allow each layer to dry completely before adding the next. Apply thin, even coats rather than thick layers, and avoid activities that might chip your nails during Halloween festivities.
What are the most popular Halloween nail art designs?
Classic orange and black combinations, spider webs, cute ghosts, pumpkin patches, and blood drips are fan favorites. Witch hats, candy corn designs, bat silhouettes, and Frankenstein monsters are also popular choices. Halloween French tips offer a sophisticated spooky alternative to traditional designs.
Do I need expensive nail polish for Halloween nail art?
No, you don’t need expensive polish. Focus on having good coverage with your base colors and invest in a quality base coat and top coat for longevity. Drugstore polishes work perfectly fine for Halloween nail art, especially since these designs are typically temporary seasonal looks.