We’ve all admired those stunning gel nail designs on social media and wondered if we could recreate them at home. The good news? You absolutely can! Gel nail art doesn’t have to be intimidating or require professional training to achieve gorgeous results.
Whether you’re completely new to nail art or you’ve struggled with regular polish in the past, gel nails offer the perfect solution. They’re forgiving to work with, stay put longer, and give you plenty of time to perfect your design before curing under the light. Plus, the glossy finish looks professionally done every single time.
We’re here to prove that creating beautiful gel nail art is more accessible than you think. With just a few basic tools and some simple techniques, you’ll be designing eye-catching manicures that last for weeks. Let’s jump into the industry of beginner-friendly gel nail art and transform your nails into tiny canvases of creativity.
Start With the Right Tools and Supplies for Gel Nail Art
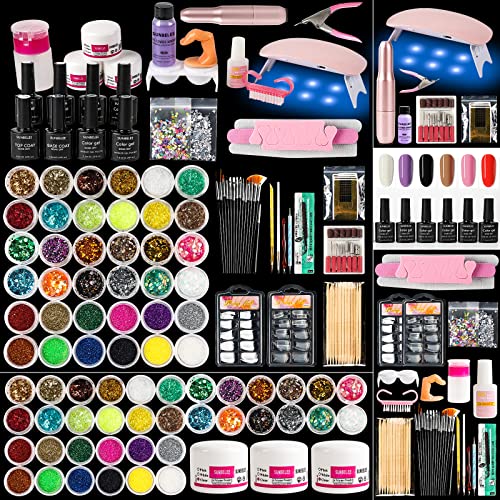
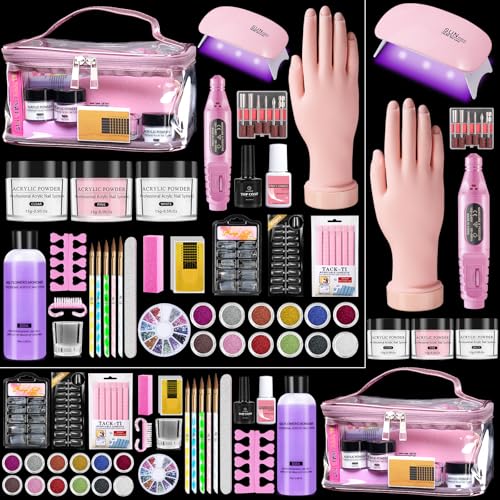
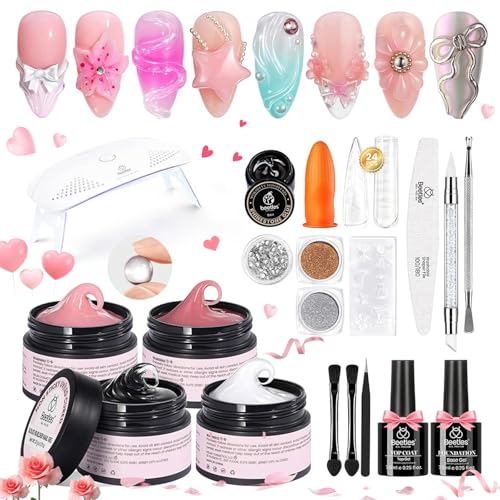
Getting your hands on the right equipment makes all the difference when creating beautiful gel nail art at home. We’ll walk you through the essential supplies that’ll set you up for success without very costly.
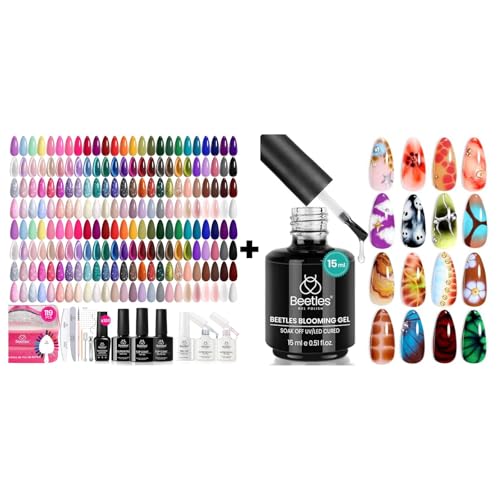
Essential Gel Polish Colors for Beginners
Building your gel polish collection should start with versatile colors that work for multiple nail art techniques. We recommend beginning with a classic nude, crisp white, and deep black as your foundation colors. These three shades allow you to create countless designs from simple French tips to elegant marbling effects.
Core Color Palette:
| Color Type | Recommended Shades | Uses |
|---|---|---|
| Neutrals | Nude, beige, soft pink | Base colors, French manicures |
| Classics | Black, white, red | Accent details, dots, stripes |
| Metallics | Gold, silver | Highlighting, glamour effects |
Adding a few bright colors like coral, navy blue, or emerald green gives you options for seasonal designs. Metallic shades in gold and silver create stunning accent details that elevate any basic design. We suggest purchasing gel polishes from reputable brands that offer good coverage and smooth application for beginners.
Basic Nail Art Tools You’ll Need
Your nail art toolkit doesn’t need to be extensive when you’re starting out. We’ve found that a few key tools will handle most beginner designs effectively.
Must-Have Tools:
- Dotting tools in various sizes for creating perfect circles and flower petals
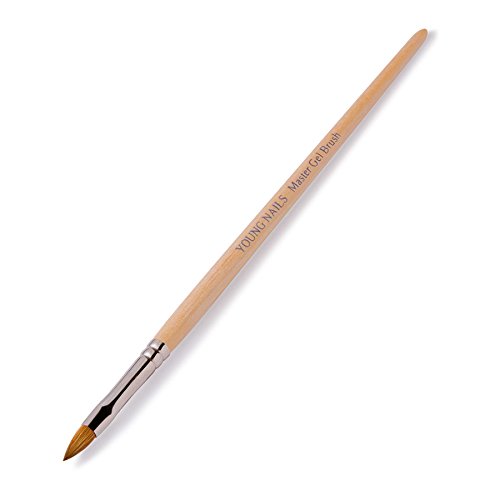
- Striping brushes with fine tips for drawing clean lines and geometric patterns
- Nail art brushes including flat and angled brushes for detailed work
- Toothpicks for marbling techniques and quick dot creation
- Nail files in different grits for shaping and surface preparation
- Cuticle pushers to prep your nail beds properly
Helpful Additions:
- Nail tape for crisp geometric designs
- Small makeup sponges for gradient effects
- Rhinestones and studs for dimensional accents
Most of these tools are available in affordable starter kits. We recommend investing in quality brushes since they’ll last longer and give you better control over your designs.
UV or LED Lamp Requirements
Choosing the right curing lamp is crucial for achieving long-lasting gel nail art. We strongly recommend LED lamps over UV lamps for several practical reasons.
LED Lamp Benefits:
- Cure gel polish in 30-60 seconds compared to 2-3 minutes with UV
- Last up to 10 times longer than UV bulbs
- Generate less heat during the curing process
- Work with most gel polish brands on the market
Wattage Recommendations:
| Lamp Wattage | Curing Time | Best For |
|---|---|---|
| 24W | 60-90 seconds | Basic home use |
| 36W | 30-60 seconds | Regular nail art |
| 48W+ | 30 seconds | Professional results |
We suggest looking for lamps with at least 36 watts of power to ensure your gel polish cures completely. Many affordable options include timers and automatic sensors that make the process foolproof. Proper curing prevents chipping and ensures your nail art designs stay vibrant for weeks.


Master Simple Dotting Techniques for Stunning Designs

Dotting tools form the foundation for many beginner-friendly gel nail art patterns. We’ll explore three versatile techniques that create professional-looking designs without requiring advanced skills.
Creating Perfect Polka Dots
Load your dotting tool with gel polish and gently press it onto the nail surface to form evenly spaced dots. We recommend starting with lighter colors and building up to darker shades for better control. Allow the gel to self-level before curing each layer for 10-30 seconds.
Space your dots consistently by using the width of your dotting tool as a measuring guide. Maintain uniform pressure for each dot to ensure they’re all the same size. This classic pattern works beautifully as an accent nail or covers the entire manicure for a playful look.
Cure each layer thoroughly before adding additional dots or colors. We’ve found that proper curing prevents smudging and maintains the crisp edges that make polka dots so appealing.
Making Flower Petals With Dots
Arrange five or six gel polish dots in a circular pattern to create instant flower petals. We suggest using a contrasting color for the center dot to mimic a flower’s natural stigma. Position each petal dot so they slightly overlap at the base for a cohesive floral appearance.
Practice the circular arrangement on a practice board before working on your nails. Start with the top petal and work clockwise around the circle. This technique requires minimal practice but produces elegant results that look far more complex than they actually are.
Layer different sized dots for dimensional flowers by using various dotting tool sizes. Create larger base petals first, then add smaller accent dots on top. Cure each layer for the recommended time to prevent bleeding between colors.
Gradient Dot Patterns
Transition colors from light to dark across the nail using a staggered dot pattern. We recommend using two or three complementary colors for the most striking gradient effect. Apply the lightest shade first, then gradually add medium and dark tones.
Blend the colors gently with a clean dotting tool or small brush while the gel is still workable. Work quickly but carefully to achieve that soft gradient transition. This method adds visual depth without requiring advanced blending skills.
Stagger your dot placement to avoid creating obvious lines between color transitions. We’ve found that overlapping some dots creates a more natural gradient flow. Cure each color layer before moving to the next to maintain color integrity throughout the design.


Try Easy Striping and Line Art Methods

Striping and line art create the most striking visual impact with minimal effort in gel nail art. We’ll show you three foolproof techniques that transform basic manicures into professional-looking designs.
Using Striping Tape for Clean Lines
Striping tape delivers perfect lines every time without needing steady brush skills. We recommend applying this thin adhesive tape onto fully cured gel nails in your desired pattern before painting over it with gel polish. Remove the tape carefully before curing the top layer to reveal sharp professional-looking lines.
Geometric shapes become effortless when you master this tape technique. We’ve found that creating triangles squares and chevrons requires simply positioning the tape at different angles. Horizontal vertical and diagonal arrangements work beautifully for minimalist looks that catch attention.
Practice makes perfect with tape removal timing. We suggest peeling away the striping tape immediately after applying your gel color but before the final cure. This prevents the polish from hardening around the tape edges and ensures clean separation.
Creating Geometric Patterns
Combining multiple gel polish colors with striping tape opens endless geometric possibilities. We love mixing contrasting shades to form bold patterns like color-blocked triangles or alternating chevron stripes. Metallic accents added to geometric bases create sophisticated designs that look professionally done.
Repetition creates visual rhythm in geometric nail art. We recommend starting with simple repeating patterns before attempting asymmetrical arrangements. Three-color combinations work best for beginners since they provide enough contrast without overwhelming the design.
Dotting tools enhance geometric patterns with perfect circles and small details. We use these tools to add accent dots at pattern intersections or create polka dot backgrounds beneath striped overlays. The combination technique produces layered designs with professional depth.
Simple French Tip Variations
French tips get exciting makeovers with colored alternatives to classic white. We suggest trying coral pink or metallic gold tips for fresh seasonal looks. Glitter tips add sparkle without requiring complex application techniques since you’re only covering the nail’s edge.
Thin brushes create the cleanest French tip lines for beginners. We recommend using striping brushes loaded with gel polish to paint steady curves across each nail tip. Alternatively striping tape positioned horizontally helps achieve perfectly straight lines for modern square French tips.
Creative tip shapes expand your French manicure options beyond traditional curves. We love swirl tips that follow natural nail contours and half-moon designs positioned at the cuticle area. Shimmer or metallic topcoats layered over colored tips provide subtle glamour that enhances simple designs without additional complexity.


Experiment With Basic Marble and Swirl Effects

Building on your newfound confidence with dotting and line art, we’ll explore marble and swirl effects that create stunning organic patterns with minimal skill required.
Water Marble Technique Simplified
Materials: Gel polish, cup of water, and dropper for precise control.
Creating water marble effects becomes manageable when we break it down into simple steps:
- Drop a small amount of gel polish into a cup of room temperature water
- Create patterns using the dropper or a thin tool to manipulate the polish surface
- Dip your prepared nail into the water, allowing the polish design to wrap around your nail
- Remove excess polish from your skin using a cleanup brush or cotton swab
Timing proves crucial for this technique since gel polish behaves differently than regular polish in water. We recommend working quickly and curing immediately after application to prevent smudging.
Dry Marble Method for Beginners
Materials: Gel polish, nail art mat or palette, and marbling tool for pattern creation.
Dry marbling offers more control than water techniques and produces consistent results:
- Apply small dots of different colored gel polishes onto your nail art mat
- Drag a thin tool through the polish drops to create marble veins and patterns
- Press your nail gently into the marbled polish design
- Cure for 30 seconds under your LED lamp to set the pattern
Benefits of this method include better color saturation and the ability to preview your design before application. We find this technique particularly forgiving for beginners since you can restart easily if the pattern doesn’t turn out as expected.
Two-Color Swirl Designs
Materials: Two contrasting gel polishes and a thin brush or dotting tool for blending.
Two-color swirls create dramatic effects while remaining simple enough for newcomers:
- Paint two small dots of contrasting gel polish directly onto your nail
- Swirl the colors together using a thin brush in figure-eight or circular motions
- Blend gently to maintain distinct color zones while creating smooth transitions
- Cure for 30 seconds to lock in your swirl pattern
Color combinations that work exceptionally well include black and white for classic elegance, or complementary colors like blue and orange for bold statements. We suggest practicing the swirling motion on your nail art mat first to develop muscle memory before working directly on your nails.


Practice Simple Stamping and Stencil Techniques

Stamping and stencils offer perfect entry points for beginners wanting to achieve intricate gel nail art designs without advanced brush skills. These techniques provide consistency and precision that make professional-looking results accessible to everyone.
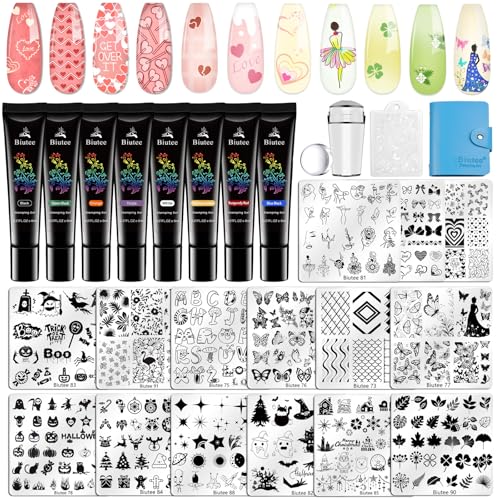
Choosing Beginner-Friendly Stamping Plates
Look for plates featuring simple designs such as stripes, dots, or small geometric patterns when starting your stamping journey. These basic motifs require less polish control and offer more forgiving application compared to intricate detailed designs.
Consider purchasing a starter kit that includes a variety of fundamental patterns to help you experiment with different techniques. Most beginner-friendly kits contain essential designs like flowers, hearts, and swirls that work beautifully with gel polish applications.
Select plates with deeper etching to ensure better polish pickup and transfer. Deeper grooves hold more product and create cleaner impressions on your nails, reducing the learning curve significantly.
Using Nail Stencils Effectively
Apply a thin base layer of gel polish to the area where you’ll place the stencil before positioning it on your nail. This creates better adhesion and prevents the stencil from shifting during application.
Position stencils carefully and press them firmly onto the nail surface to prevent polish from seeping underneath the edges. We recommend using a cuticle pusher or orange stick to smooth down all edges completely.
Use gentle pressure when applying polish over the stencil to avoid smudging or creating thick buildup. Light dabbing motions work better than brushing strokes for achieving clean, crisp lines.
Remove stencils immediately after applying the topcoat but before curing to ensure sharp design edges. Waiting too long can cause the stencil to stick or leave residue on your finished design.
Creating Repeating Patterns
Start with simple repetitive designs like stripes or dots to create cohesive looks across all your nails. These patterns help establish rhythm and consistency while building your confidence with gel nail art techniques.
Practice spacing consistency by using guides or measuring tools to maintain even distances between pattern elements. We suggest practicing on nail wheels first to perfect your technique before applying designs to your actual nails.
Build patterns gradually by completing one element at a time across all nails before moving to the next design component. This approach ensures uniformity and prevents rushed applications that can compromise your final results.
Experiment with color combinations within your repeating patterns to add visual interest without increasing complexity. Simple two-color alternating patterns can create sophisticated looks while remaining beginner-friendly.


Create Easy Gradient and Ombre Looks

Gradient and ombre effects create stunning visual transitions that transform ordinary gel manicures into eye-catching masterpieces. These techniques blend multiple colors seamlessly, producing professional-looking results that rival salon work.
Sponge Gradient Technique
Sponging creates the smoothest color transitions with minimal effort and maximum impact. We apply multiple gel polish colors directly onto a clean makeup sponge, positioning them side by side where we want the blend to occur. Dabbing the sponge onto the nail transfers the colors while naturally blending them at their meeting points.
Preparation ensures flawless results by starting with a properly cured base coat and thin layer of the lightest gradient color. We place the colors on the sponge in the same order they’ll appear on the nail, from cuticle to tip or side to side. Light dabbing motions work better than heavy pressure, allowing the colors to merge gradually without creating muddy tones.
Curing each sponged layer under a UV/LED lamp locks in the gradient before applying additional coats. We typically need 2-3 sponging sessions to achieve full opacity and smooth color transitions. Finishing with a quality top coat enhances the gradient’s vibrancy while providing lasting protection against chips and wear.
Brush Blending Method
Brush blending offers precise control over gradient placement and intensity, making it perfect for detailed ombre effects. We apply different gel polish colors side by side directly on the nail while they remain wet and workable. Using a small, clean nail art brush, we gently stroke where the colors meet to create seamless transitions.
Technique requires working quickly since gel polish begins to thicken as it sits uncured. We start with the lightest color as our base, then add darker shades in strategic spots. Small circular motions with the brush create natural-looking blends, while back-and-forth strokes produce more dramatic transitions between contrasting colors.
Control comes from brush selection and pressure application during the blending process. Flat brushes work best for horizontal gradients, while round brushes excel at creating radial ombre effects. We clean our brush frequently with rubbing alcohol to prevent color contamination and maintain sharp, clean blends throughout the process.
Sunset and Ocean-Inspired Gradients
Sunset gradients capture nature’s most breathtaking color combinations using warm oranges, pinks, purples, and reds. We start with a coral or peach base, then blend in deeper orange tones near the cuticle and soft pink highlights toward the nail tip. Adding touches of purple or magenta creates depth that mimics those magical golden hour skies.
Ocean gradients evoke serene coastal vibes through blues, greens, and sandy neutrals that flow like ocean waves. We begin with a soft blue base, then incorporate deeper navy or teal shades for depth. Blending in seafoam green and finishing with subtle white or champagne highlights creates that perfect beachy gradient that transports us to tropical shores.
Color combinations work best when we choose 2-3 shades within the same temperature family for cohesive results. Warm sunset palettes should avoid cool blues, while ocean themes benefit from avoiding warm oranges or reds. Both inspiration themes are beginner-friendly because they mirror natural color progressions we observe in real sunsets and seascapes.


Add Simple Accents and Embellishments

Transform your gel manicures into eye-catching designs by incorporating simple accents that require minimal skill but deliver maximum impact. We’ll explore three essential embellishment techniques that work perfectly with the gradient and stamping methods you’ve already mastered.
Using Rhinestones and Studs
Rhinestones create instant glamour when placed strategically on wet gel polish before curing. Position your chosen rhinestones or studs directly onto the uncured gel layer and press gently to secure them in place. Cure the nails for a few seconds to lock the embellishments permanently into your design.
Apply a small dot of fresh gel polish as adhesive if you’re working with dried gel layers. This technique works especially well as accent details on ring fingers or to highlight gradient transition points. Choose rhinestones that complement your base colors rather than compete with them for the most professional appearance.
Adding Glitter Accents
Glitter polish transforms basic gel manicures into celebration-ready designs with just a few strategic applications. Brush a thin layer of glitter polish over select areas of your cured base coat to create stunning focal points. Use precise, thin nail art brushes to paint glitter lines that follow your nail’s natural curve or create geometric patterns.
Layer different glitter sizes and colors for dimensional effects that catch light beautifully. Apply glitter to nail tips only for subtle sparkle that mimics traditional French manicures with modern flair. Remember to cure each glitter layer completely before adding additional embellishments or top coat.
Creating Negative Space Designs
Negative space techniques showcase your natural nail while creating sophisticated modern art effects. Paint geometric shapes or patterns on exact sections of each nail while leaving other areas completely bare. Use striping tape to mask off clean lines and create precise triangular or chevron patterns that frame your natural nail bed.
Remove the tape immediately after applying your gel polish but before curing to ensure sharp, professional edges. This approach works particularly well when combined with the gradient techniques you’ve learned, creating striking contrasts between colored and natural nail areas. Practice on nail wheels first to perfect your tape removal timing for consistently clean results.


Master Proper Application and Finishing Techniques

Proper application and finishing techniques form the foundation of successful gel nail art that lasts. We’ll guide you through the essential steps to ensure your beautiful designs stay vibrant and chip-free for weeks.
Base Coat and Curing Tips
Quality base coats prevent staining and promote superior adhesion to your natural nail surface. We recommend applying a thin, even layer of clear base coat after shaping and buffing your nails to create a smooth foundation. Curing requires precise timing to achieve optimal results, so we always cure our base coat for exactly 30 seconds under a UV or LED lamp.
Consistent curing prevents both under-curing and over-curing issues that can compromise your manicure’s durability. We ensure each gel polish layer receives the full recommended curing time, typically 30 seconds per coat. Temperature affects curing efficiency, so we keep our lamps clean and replace bulbs regularly to maintain consistent heat output.
Avoiding Common Beginner Mistakes
Over-curing creates brittleness that leads to cracking and chipping within days of application. We prevent this by never exceeding the recommended 30-second curing time for each layer. Under-curing results in soft, sticky finishes that smudge easily and collect dust and debris.
Thick gel application causes uneven coverage and increases the likelihood of lifting at the cuticle area. We apply multiple thin coats rather than one thick layer, allowing each coat to self-level before curing. Rushing between steps compromises adhesion, so we take time to properly prep each nail surface and allow adequate curing between applications.
Skipping nail preparation leads to premature chipping and reduced wear time. We always clean our nails thoroughly, push back cuticles, and lightly buff the nail surface before applying any gel products.
Sealing Your Design for Longevity
Top coat application determines your manicure’s final appearance and durability. We apply a thin layer of clear top coat over our completed nail art design, ensuring complete coverage from cuticle to tip. Proper sealing requires attention to nail edges where chips typically begin, so we wrap the top coat slightly under the nail tip.
Final curing locks in your design and creates the glossy finish that makes gel manicures so appealing. We cure our top coat for the full 30 seconds to ensure maximum hardness and shine. Cleanup removes excess gel that can cause lifting, so we use a lint-free wipe to gently remove any gel that has touched the skin around our cuticles before final curing.
Immediate aftercare protects your fresh manicure from damage during the first few hours. We avoid hot water and harsh chemicals for at least 4-6 hours after completing our gel nail art to allow the finish to fully set.


Conclusion
We’ve shown you that creating stunning gel nail art doesn’t require years of experience or expensive salon visits. With these beginner-friendly techniques and basic tools you can transform your nails into beautiful works of art that last for weeks.
The key to success lies in starting simple and building your skills gradually. Practice these foundational techniques until they become second nature then let your creativity flow. Remember that every expert was once a beginner and each design you create is a step toward mastering this rewarding create.
Now it’s time to gather your supplies and start experimenting. Your nail art journey begins with that first dot polka dot or simple stripe. We can’t wait to see what amazing designs you’ll create!
Frequently Asked Questions
Can beginners really create professional-looking gel nail art at home?
Yes, absolutely! Gel nail art is beginner-friendly because gel polish is forgiving and allows for corrections before curing. With basic tools like dotting tools, striping brushes, and quality gel polishes, anyone can create stunning designs. Start with simple techniques like polka dots or French tips, then gradually progress to more complex patterns as your confidence grows.
What essential tools do I need to start gel nail art?
You’ll need gel polish in versatile colors (nude, white, black, plus a few bright shades), dotting tools, striping brushes, nail files, and an LED curing lamp. Quality brushes are crucial for better control and longevity. These basic tools are sufficient for most beginner designs and will help you create professional-looking results.
Why is an LED curing lamp important for gel nail art?
LED curing lamps are essential because they cure gel polish quickly and thoroughly, ensuring your nail art doesn’t chip and maintains vibrant colors. Proper curing is crucial for durability – without it, your beautiful designs won’t last. LED lamps are more efficient than UV lamps and provide consistent results for long-lasting manicures.
What are the easiest gel nail art techniques for beginners?
Start with simple dotting techniques for polka dots and flower petals, then try striping tape for clean geometric lines. French tip variations and gradient effects using makeup sponges are also beginner-friendly. These techniques require minimal skill but produce impressive results, making them perfect for building confidence and developing your artistic abilities.
How long does gel nail art typically last?
With proper application and quality products, gel nail art can last 2-3 weeks without chipping or fading. The key is using a good base coat, proper curing times, and sealing with a quality top coat. Avoid thick application and over-curing, which are common beginner mistakes that can reduce durability.
Can I create marble effects without advanced skills?
Yes! The dry marble method is particularly beginner-friendly, offering more control than traditional water marbling. Simply apply different gel polish colors on the nail and use a toothpick to create swirl patterns before curing. This technique produces stunning organic patterns with minimal skill required and consistent results every time.
What’s the best way to apply rhinestones and embellishments?
Place rhinestones on wet gel polish before curing for secure adhesion. Use tweezers for precise placement and apply gentle pressure. For glitter accents, use them strategically as focal points rather than covering entire nails. Always seal embellishments with a top coat to ensure they stay put and maintain the smooth finish.
How do I avoid common beginner mistakes in gel nail art?
Avoid thick application by using thin, even coats and proper curing times between layers. Don’t over-cure, which can cause brittleness. Always use a quality base coat and seal designs with top coat. Practice on nail wheels before applying to your actual nails, and remove striping tape while the polish is still wet for clean lines.