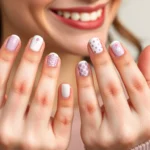
We’ve all been there – admiring gorgeous nail art on Pinterest only to realize those intricate designs seem impossible on our shorter nails. The good news? Short nails are actually the perfect canvas for stunning nail art that’s both practical and absolutely adorable.
Many people believe you need long nails to create eye-catching designs but we’re here to prove that theory completely wrong. Short nails offer unique advantages like easier maintenance and endless versatility that longer nails simply can’t match. From delicate florals to bold geometric patterns there’s no limit to what you can achieve on a petite nail bed.
Whether you’re a nail art beginner or someone who’s struggled to find designs that work with your natural nail length we’ve curated the most gorgeous and achievable looks that’ll have everyone asking where you got your nails done. Let’s jump into these game-changing designs that prove great things really do come in small packages.
Minimalist Geometric Patterns That Make Short Nails Look Chic
Geometric designs prove that short nails can be just as sophisticated as their longer counterparts. These clean patterns create visual interest without overwhelming your compact nail canvas.
Simple Lines and Dots
Vertical stripes elongate short nails instantly by drawing the eye upward. Paint thin lines using a striping brush or nail tape for perfectly straight edges. We recommend alternating between nude base colors and metallic accents like gold or silver for an elegant finish.
Horizontal bands create a modern blocking effect that celebrates your nail’s natural shape. Place single lines at the cuticle or nail tip for subtle definition. Multiple bands in complementary colors like blush pink and cream white add contemporary flair.
Dotted accents bring playful sophistication to any base color. Use a dotting tool to create uniform circles along the nail bed or arrange them in diagonal patterns. Metallic dots over matte backgrounds create striking contrast that catches light beautifully.
Curved lines soften geometric designs while maintaining their minimalist appeal. Paint gentle arcs from one side to the other using a thin brush for fluid movement. These work exceptionally well with pastel colors like lavender and mint green.
Triangle and Square Accents
Corner triangles maximize impact on short nail surfaces by utilizing natural nail edges. Paint small triangles at the cuticle or tip using contrasting colors for bold definition. Black triangles on white bases create classic graphic appeal.
Floating squares add geometric interest without overwhelming compact nails. Position small squares near the cuticle or offset toward one side for asymmetrical balance. We love using holographic polishes for these accents to create rainbow reflections.
Half moon triangles replace traditional curved lunulas with sharp geometric shapes. Paint inverted triangles at the nail base using nude or metallic shades. This design works beautifully with darker base colors like navy or burgundy.
Diamond patterns combine multiple triangles for sophisticated detail. Create diamond shapes by connecting triangle points at nail center. Use tape to achieve crisp edges and remove while polish is slightly tacky.
Negative Space Designs
Cutout circles showcase natural nail color within geometric frames. Paint your base color and use reinforcement stickers to create perfect circular windows. Remove stickers before polish fully dries for clean edges.
Linear windows create modern art effects by leaving strategic strips unpainted. Use striping tape to section off areas and paint around them. Clear top coat over exposed natural nail prevents chipping and adds shine.
Geometric frames outline your nail shape with painted borders while keeping centers clear. Paint thin rectangular or oval frames using steady brush strokes. These designs make short nails appear longer through visual illusion.
Corner cutouts remove polish from nail corners to create unique negative space patterns. Use small pieces of tape to mask triangular sections before painting. Metallic frames around clear corners add luxury appeal to everyday manicures.
Delicate Floral Motifs Perfect for Petite Nails
 1")
Floral designs bring natural beauty to short nails without overwhelming their compact surface. We’ve curated these delicate motifs that transform petite nails into charming works of art.
Tiny Rose Buds
Miniature rose buds create the perfect romantic accent for short nails. These small scale flowers fit beautifully on limited nail surfaces while maintaining elegant proportions. Painting them in soft pinks delivers subtle femininity that complements any outfit. Red variations add classic sophistication without appearing overpowering on compact nails. We recommend placing 1-2 rose buds per nail to maintain the delicate aesthetic that makes this design so appealing.
Cherry Blossom Branches
Cherry blossom branches offer springtime elegance with their graceful linear elements. Fine branch lines serve as artistic foundations while scattered tiny blossoms provide gentle color pops. This seasonal design captures natural beauty through minimalist execution that suits short nails perfectly. We suggest using nude or pale pink bases to enhance the branches’ delicate appearance. Strategic placement of 3-4 small blossoms along thin branches creates visual movement without cluttering the nail space.
Pressed Flower Effects
Pressed flower effects deliver artisanal charm through realistic botanical textures. These designs mimic dried flowers embedded into polish or gel for authentic natural appeal. We love how this technique provides intricate detail without requiring large floral patterns that might overwhelm short nails. Layering translucent colors creates depth that makes flowers appear genuinely pressed into the nail surface. Various flower types like daisies or baby’s breath work beautifully in this style while maintaining the whimsical aesthetic perfect for petite nails.
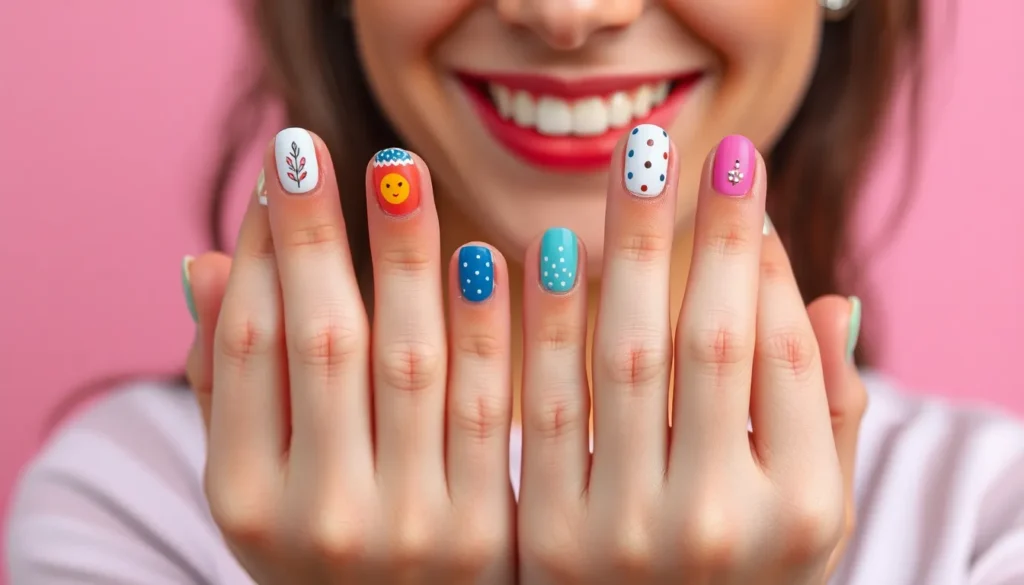
Playful Polka Dot Variations for Maximum Cuteness
 2")
Polka dots bring instant charm and playfulness to short nails while maximizing their cute factor. We’ve compiled the most effective dot variations that work beautifully on compact nail surfaces.
Classic Two-Tone Dots
Two-tone polka dots create a timeless and sweet aesthetic that’s perfect for short nails. We recommend starting with a base color like pastel pink or nude, then adding contrasting dots in white or black for a clean, eye-catching look. The simplicity of using only two colors enhances the neatness that short nails naturally provide.
Spacing your dots evenly across the nail surface creates the most polished appearance. We suggest using a dotting tool or bobby pin to achieve consistent dot sizes that won’t overwhelm your nail’s compact canvas. This minimalist approach works exceptionally well for daily wear while maintaining that adorable factor we’re all after.
Gradient Polka Patterns
Gradient polka dots add a modern twist to traditional dot designs while visually elongating short nails. We love creating color intensity gradients that start darker at the cuticle and fade toward the tip, giving your nails depth and dimension. Size gradients work equally well, with larger dots near the base gradually shrinking as they move toward the tip.
This technique creates visual interest without overcrowding your nail’s limited space. We find that gradient patterns make short nails appear longer while adding a ever-changing element that catches the light beautifully. The depth this creates transforms simple dots into a sophisticated design element.
Mixed Size Dot Combinations
Combining dots of various sizes creates whimsical texture and playful interest on short nails. We suggest mixing tiny, medium, and large dots in coordinating colors for a fresh, fun effect that feels both random and intentional. This technique works best when layered over pastel or neutral bases that are currently trending for short nails.
Random placement of different sized dots creates the most organic, cheerful appearance. We recommend using no more than three dot sizes to maintain visual balance on your compact nail surface. This approach allows for creative freedom while ensuring your design remains cohesive and cute rather than chaotic.
Stunning Ombre and Gradient Effects on Short Nails
 3")
Ombre and gradient effects create beautiful visual depth that makes short nails appear longer while adding sophisticated flair. These seamless color transitions blend two or more shades from base to tip, transforming compact nail surfaces into stunning canvases.
Sunset Color Blends
Sunset ombre designs capture the magic of golden hour with warm hues that flow beautifully together. We love combining soft pink, coral, orange, and golden yellow for that perfect twilight effect on short nails. The gradual color transition draws attention to the gorgeous blend rather than nail length, creating an elongating illusion.
Achieving this look requires careful blending using a makeup sponge or wedge to dab colors seamlessly. Start with the lightest shade at the base and gradually build up the warmer tones toward the tips. The smooth gradient effect mimics natural sunset colors while improving the visual appeal of shorter nail beds.
Pastel Fade Techniques
Pastel fades offer a delicate, feminine approach perfect for everyday wear and seasonal transitions. Light colors like lavender, baby blue, mint green, and blush pink create gentle gradients that complement spring and summer looks beautifully. These soft shades fade subtly into each other, producing an ethereal effect that brightens short nail surfaces.
Creating pastel gradients works best when you focus the fade from cuticle to tip or blend colors horizontally across the nail. The gentle color transitions suit professional settings while adding a cute, polished finish. We recommend using colors from the same family for the smoothest blend on compact nail areas.
Glitter Gradient Tips
Glitter gradients add sparkle and festive energy without overwhelming short nail surfaces. Concentrating fine glitter at the tips and fading it toward the base creates an elegant ombre effect that catches light beautifully. This technique works especially well when you mix glitter with clear or matching base polish for subtle enhancement.
The key to perfect glitter gradients lies in building layers gradually, starting with heavy concentration at tips and decreasing intensity toward the cuticle. Using fine glitter particles ensures smooth application on shorter nails while creating that coveted sparkling fade. Seal your design with glossy topcoat to enhance shine and ensure the glitter stays put throughout wear.
Adorable Animal-Inspired Nail Art Ideas
 4")
Animal motifs bring an irresistible charm to short nails, transforming them into playful canvases that celebrate our love for cute creatures. We’ll explore three beloved animal designs that perfectly complement shorter nail lengths.
Tiny Paw Prints
Paw prints create the most adorable accent designs for short nails without overwhelming their compact surface. We recommend using a small dotting tool to create the main pad, then adding four tiny dots above it for the toes. Neutral colors like soft browns, grays, and blacks work beautifully against pastel pink or nude base colors.
Start with a light base coat in beige or pale pink to make the paw prints pop. Apply the main pad using gentle pressure with your dotting tool, then carefully place the smaller toe dots. We suggest painting paw prints on just one or two accent nails to maintain balance, or create a scattered pattern across all nails for a playful puppy theme.
Cute Cat Faces
Cat faces bring whimsical personality to short nails through minimalist features that capture feline charm. We focus on creating stylized eyes using tiny black dots or short lines, paired with delicate whiskers drawn with a fine brush. Simple triangular ears can be added using a small brush or toothpick for precision.
Choose soft base colors like cream, pale pink, or light gray to showcase the cat features effectively. Draw two small curved lines for sleepy eyes or tiny dots for alert expressions. Add three short whisker lines on each side using black polish or a nail art pen. We recommend limiting cat faces to one or two nails to avoid overcrowding the design.
Simple Butterfly Wings
Butterfly wings create elegant, delicate designs that perfectly suit the proportions of short nails. We suggest using outline techniques or filled panels to mimic butterfly wing patterns without requiring extensive detail work. Soft gradients in pastels enhance the ethereal butterfly effect.
Begin with a light base in white or pale blue to make wing colors vibrant. Create wing shapes using curved lines that follow your nail’s natural contour, then fill with soft colors like lavender, coral, or mint green. Add tiny dots or simple line patterns within the wings for texture. We recommend painting butterfly wings on accent nails only, as the symmetrical design creates beautiful focal points that complement your other nail art choices.
Elegant French Tip Reimagined for Short Nails
 5")
The timeless French manicure gets a fresh makeover that’s perfectly suited for shorter nail lengths. We’re showcasing three stunning variations that maintain sophistication while adding contemporary flair to your compact nail canvas.
Colored French Tips
Vibrant and pastel colors replace the traditional white tip to create a modern twist on this classic design. We love how bright pink, soft lavender, or chic navy tips instantly brighten your nails and make your fingers pop while keeping the overall look minimal and wearable. Color blocking creates definition and contrast that visually elongates your nails, making them appear longer than they actually are. This approach brings playful and fresh energy to short nails while allowing for complete personalization based on your mood or outfit.
Double French Lines
Two parallel thin lines near your nail tip add creative and contemporary flair instead of the single traditional line. We find this design works exceptionally well on short nails by providing more visual detail without overcrowding the limited space available. Contrasting colors or metallic shades like gold and silver create subtle glam and dimension that elevates the traditional French design with a graphic edge. The double lines maintain elegance while introducing a modern architectural element that makes your manicure stand out from conventional styles.
Reverse French Manicure
The accent color or line moves to your nail base near the cuticle area instead of sitting at the tip for this trendy variation. We think this reverse approach creates visually interesting nails that appear distinctive and stylish on shorter lengths. You can execute this design with either a soft curve or sharp line using versatile color combinations ranging from nude bases with bold accent lines to playful pastels with glittery touches. This technique visually elongates your nails by drawing attention to a less common area while creating an unexpected and fashionable twist on the classic French manicure.
Festive Holiday Designs That Shine on Short Nails
 6")
We’ve discovered that short nails provide the perfect canvas for celebrating holidays throughout the year. These festive designs prove that you don’t need length to capture the magic of seasonal celebrations.
Christmas Tree Accents
Christmas tree designs transform your short nails into miniature winter wonderlands. We recommend starting with a deep green base and adding tiny triangular trees using a dotting tool or fine brush. Sparkling backgrounds in silver or gold create the perfect backdrop for these festive accents.
Gold glitter polish enhances the holiday sparkle without overwhelming your nail surface. Apply the Christmas tree design to one or two accent nails while keeping the remaining nails in coordinating solid colors like red, green, or metallic gold. This approach maintains balance while celebrating the season.
Glossy gel polish extends the wear time of your Christmas tree art and provides that professional salon finish. We suggest adding tiny white dots along the tree branches to mimic snow or ornaments, creating depth and visual interest on your compact nail surface.
Valentine’s Day Hearts
Heart designs capture romance perfectly on short nails through delicate placement and thoughtful color choices. We prefer painting small heart shapes on one or two nails using classic red, soft pink, or elegant rose gold shades. These romantic symbols create focal points without overwhelming your nail area.
Pastel hearts work beautifully against neutral base colors like nude or soft pink, creating a subtle yet festive look. Bold red hearts make stunning statement pieces when placed strategically on ring fingers or thumbs. We recommend keeping the hearts small and proportional to maintain the elegant aesthetic.
Tiny bow accents complement heart designs perfectly, adding an extra touch of sweetness to your Valentine’s Day manicure. Sparkle details around the hearts create dimension and catch light beautifully. These romantic elements prove that short nails can be both cute and sophisticated for love-themed celebrations.
Halloween Mini Motifs
Halloween nail art on short nails focuses on recognizable mini motifs that pack maximum spooky impact. We suggest using small pumpkins, tiny bats, adorable ghosts, and delicate spider webs as your primary design elements. Dark base colors like black or deep purple provide the perfect backdrop for these Halloween symbols.
Bright orange details make pumpkin designs pop against dark backgrounds, while white accents bring ghost motifs to life. We recommend keeping each motif small yet detailed enough to be instantly recognizable. This approach ensures your Halloween spirit shines through without crowding your nail surface.
Spider web patterns work exceptionally well in nail corners, creating subtle Halloween vibes that don’t overpower other design elements. Tiny bat silhouettes scattered across one or two accent nails add playful spookiness to your manicure. These mini Halloween motifs prove that short nails can be just as festive and fun as longer ones during the spooky season.
Quick and Easy Accent Nail Techniques
 7")
We’ll show you three simple accent nail techniques that create maximum impact on short nails without requiring complex skills or extensive time. These strategic approaches let you add personality and flair to your manicure while keeping the overall look manageable and polished.
Single Statement Nail
Creating a focal point with one accent nail on each hand transforms your entire manicure instantly. We recommend selecting your ring finger or middle finger as the statement nail since these positions naturally draw attention without overwhelming your hands.
Bold contrasts work exceptionally well on short nails when you pair neutral base colors with vibrant accent shades. For example, pair nude or soft pink base colors with electric blue, emerald green, or coral statement nails to create visual interest that doesn’t compete with your nail length.
Pattern placement on your statement nail can include anything from geometric shapes to small florals, but we suggest keeping designs proportional to your nail size. Simple designs like a single large dot, diagonal stripe, or small heart work better than intricate patterns that might look cramped on shorter surfaces.
Glitter Accent Placement
Strategic glitter application maximizes sparkle while maintaining sophistication on short nails. We’ve found that applying glitter as tips creates the illusion of length while adding glamour to your manicure.
Gradient techniques starting from the cuticle and fading toward the tip work beautifully on short nails because they create visual depth. Start with a light application near the cuticle using a makeup sponge, then build intensity as you move toward the tip for a seamless sparkly effect.
Full nail coverage with fine glitter particles gives short nails a luxurious appearance without overwhelming their compact surface. We recommend using one or two accent nails with full glitter coverage while keeping the remaining nails in complementary solid colors to maintain balance.
Rhinestone Focal Points
Minimal rhinestone placement delivers maximum elegance on short nails when you use just a few well chosen stones. We suggest placing 1-3 rhinestones per accent nail to avoid overcrowding the limited surface area while still creating that glamorous focal point.
Cuticle area positioning works particularly well because it draws the eye upward and creates the illusion of longer nail beds. Place small rhinestones in a gentle curve near the cuticle, or create a simple line of stones parallel to your cuticle for an elegant accent.
Pattern combinations using rhinestones with other nail art elements create sophisticated designs that suit short nails perfectly. Try pairing rhinestones with simple geometric shapes, placing them at the intersection of lines, or using them as centers for small floral designs to add dimension and sparkle to your manicure.
Essential Tools and Tips for Short Nail Art Success
 8")
Having the right tools transforms your short nail art from good to gorgeous. We’ll guide you through the must-have supplies that make creating stunning designs on shorter nails effortless and professional-looking.
Best Brushes for Detailed Work
Detail brushes are our top recommendation for creating precise lines and intricate designs on short nails. These fine-tipped tools allow you to control every stroke, making them perfect for drawing tiny hearts, delicate flowers, and geometric patterns that won’t overwhelm your nail space.
Angled brushes excel at cleaning up edges and creating sharp, clean lines that enhance the polished look of your nail art. We use these versatile tools for French manicure tips, triangle accents, and any design requiring crisp boundaries.
Liner brushes offer exceptional control for drawing thin lines, dots, and small details that suit short nails perfectly. Their ultra-fine tips make creating minimalist patterns like simple stripes or delicate vine motifs incredibly manageable.
Nail Art Pen Recommendations
Nail art pens eliminate the need for separate brushes while providing excellent precision for drawing small details directly onto your nails. These convenient tools feature built-in fine tips that make creating polka dots, tiny stars, and intricate patterns surprisingly simple.
Dual-ended nail pens maximize your tool efficiency by offering two different tip sizes in one convenient tool. We recommend keeping several colors on hand to create multicolored designs without constantly switching between different pens.
Water-based nail pens provide easier cleanup and smoother application than traditional nail polish, making them ideal for beginners attempting detailed work on short nails. These pens also dry faster, reducing the risk of smudging your carefully crafted designs.
Prep and Finish Techniques
Cleansing the nail area removes oils and debris that can prevent your nail art from adhering properly to the surface. We always start by removing any old polish completely and gently pushing back cuticles to create a clean canvas.
Applying a base coat protects your natural nails while helping your nail art designs adhere better and last longer. This essential step prevents staining and creates a smooth foundation that makes applying subsequent layers much easier.
Sealing with a top coat prevents chipping and adds professional shine to your finished design. We recommend applying thin, even coats to avoid bubbling and ensure your cute nail art maintains its fresh appearance for days longer.
Conclusion
Short nails truly offer endless possibilities for stunning nail art that’s both practical and beautiful. We’ve shown you that size doesn’t limit creativity – from delicate florals to playful patterns these designs prove that shorter nails can be just as eye-catching as their longer counterparts.
With the right tools and techniques you’re now equipped to transform your short nails into tiny canvases of artistic expression. Whether you prefer minimalist elegance or bold statement pieces there’s a perfect design waiting for you to try.
Don’t let nail length hold you back from experimenting with these gorgeous designs. Your short nails are ready to shine with any of these creative ideas that celebrate style functionality and personal flair.
Frequently Asked Questions
Can short nails really showcase beautiful nail art?
Absolutely! Short nails are actually an ideal canvas for creative designs. They offer easier maintenance, versatility, and stunning results regardless of length. The misconception that only long nails can display beautiful art is completely false – short nails provide excellent opportunities for gorgeous, achievable designs.
What are the best nail art designs for beginners with short nails?
Minimalist geometric patterns are perfect for beginners. Simple lines, dots, triangle accents, and square designs enhance the chicness of short nails. Polka dot variations and single accent nails are also excellent starting points that require minimal skill but deliver maximum impact.
How do I create negative space designs on short nails?
Negative space designs involve leaving sections of your natural nail unpainted or creating cutouts. Use tape or nail guides to create clean lines, then paint around the protected areas. This technique highlights your natural nail color while creating sophisticated, modern looks.
What tools do I need for short nail art?
Essential tools include detail brushes for precise lines, angled brushes for clean edges, and liner brushes for thin details. Nail art pens offer convenience and precision, while dual-ended options provide efficiency. Having the right brushes makes intricate designs much easier to achieve.
How can I make my short nail art last longer?
Proper prep and finish techniques are crucial. Start by cleansing the nail area, apply a base coat for better adhesion, then create your design. Always seal with a quality top coat to prevent chipping and maintain shine. This process significantly extends your nail art’s lifespan.
Are gradient and ombre effects possible on short nails?
Yes! Short nails are perfect for gradient effects. Try sunset blends, pastel fades, or glitter gradients using a makeup sponge to blend colors. The smaller canvas actually makes it easier to achieve smooth transitions and creates sophisticated visual depth.
What’s the best way to do accent nails on short nails?
Focus on creating one statement nail per hand using bold contrasts or eye-catching designs. Place glitter accents on tips or create subtle gradients. Minimal rhinestone focal points work beautifully too, adding elegance without overcrowding the limited space.
Can I do holiday-themed nail art on short nails?
Definitely! Short nails are perfect for festive designs. Try tiny Christmas tree accents, simple Valentine’s Day hearts, or minimal Halloween motifs. The key is scaling designs appropriately – smaller, simpler versions of holiday themes work beautifully on shorter nails.