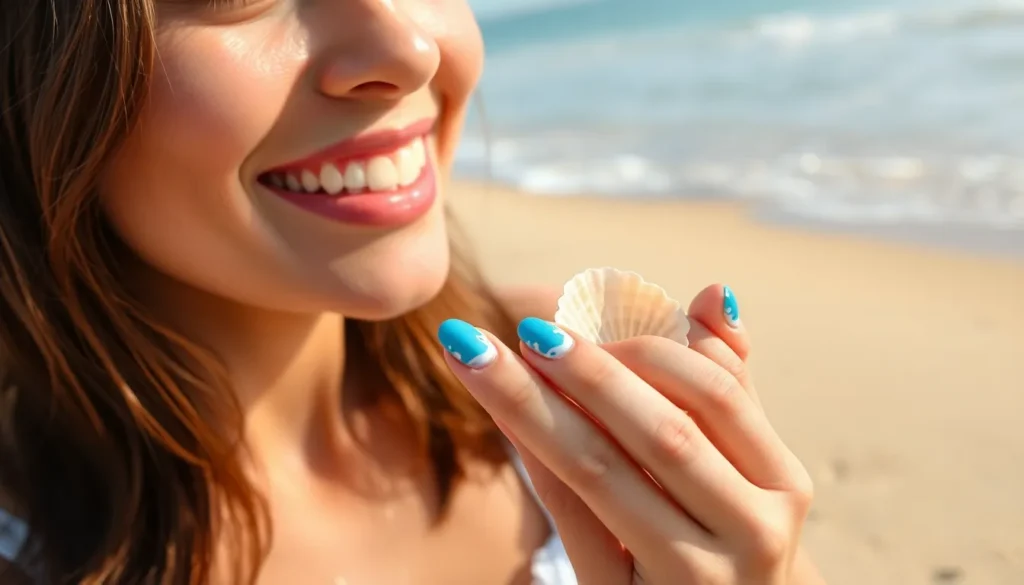
Summer’s calling and we’re ready to answer with nails that capture the ocean’s magic. Short nails don’t limit your beachy style options – they actually enhance them by creating the perfect canvas for coastal-inspired designs that won’t interfere with your daily adventures.
We’ve discovered that shorter nails showcase beachy nail art beautifully while remaining practical for swimming, beach volleyball, and all those sandy activities you love. From subtle wave patterns to bold tropical sunsets, these designs prove that length doesn’t determine impact.
Whether you’re planning a tropical getaway or simply want to bring vacation vibes to your everyday look, we’ll show you how to transform your short nails into stunning beach-inspired masterpieces. Get ready to jump into designs that’ll have everyone asking where you got your nails done – even if you created them at home.
Classic Ocean Blue Ombre
Ocean blue ombre captures the mesmerizing depths of sea waters on your short nails. This timeless technique creates a stunning gradient that mirrors the natural transition from shallow to deep ocean waters.
Light to Dark Blue Gradient Technique
Start with a light baby blue shade at your nail base and gradually blend darker blues toward the tips. We recommend using a makeup sponge to dab the colors while they’re still wet, creating seamless transitions between each shade. Apply your base coat first, then paint vertical stripes of light blue, medium blue, and navy blue on the sponge before pressing it onto each nail.
Blend the colors by gently patting the sponge in a rolling motion from cuticle to tip. Work quickly since nail polish dries fast, and don’t be afraid to build up the gradient with multiple thin layers. Clean your sponge between applications to maintain crisp color separation, and finish with a glossy top coat to enhance the ocean depth effect.
Adding White Wave Details
Paint delicate white wave crests over your dried ombre base using a thin nail art brush. Create organic wave shapes by drawing curved lines that follow your nail’s natural contour, starting from one side and flowing across to the other. We suggest practicing the wave motion on paper first to develop your technique.
Add small dots of white polish above your wave lines to represent sea foam and bubbles. Use a dotting tool or the tip of a bobby pin to create varying sizes of foam details, concentrating them near the wave crests for realistic ocean movement. Layer these white accents sparingly to avoid overwhelming your beautiful blue gradient underneath.
Coral Reef Inspired Colors
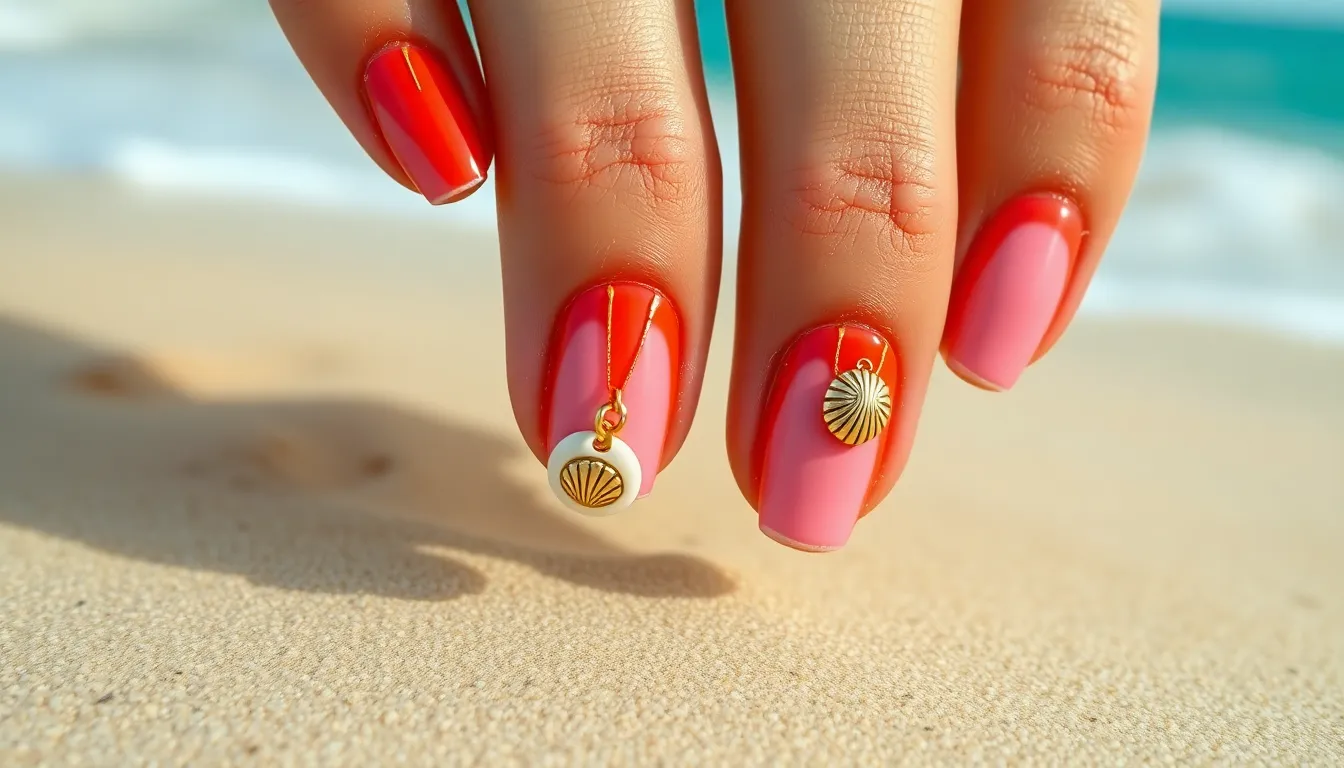
Coral reef colors bring the vibrant underwater industry to your short nails with stunning tropical hues. These nature-inspired shades create eye-catching designs that perfectly complement your summer beach activities.
Bright Coral and Pink Combinations
Vibrant coral serves as the perfect base color for creating bold beachy nail designs on short nails. Apply coral polish across all nails for a striking foundation that mimics the warm tones found in tropical coral formations. The rich salmon and coral shades instantly evoke the breathtaking colors of underwater reefs.
Pink accents add playful dimension to your coral base with strategic placement techniques. Create thin pink stripes using nail art brushes or dotting tools for geometric patterns. Add scattered pink dots in varying sizes to simulate the organic textures found in natural coral structures. These pink elements provide visual interest without overwhelming your short nail space.
Combine multiple coral tones by layering different shades for depth and complexity. Start with a lighter coral base and add darker coral tips for an ombre effect. Blend salmon pink with bright coral using a makeup sponge for smooth color transitions that mirror the natural variations in coral reef formations.
Incorporating Gold Accent Lines
Gold polish creates elegant accent lines that mimic sunlight dancing on ocean waves and seashell surfaces. Use thin nail art brushes to draw delicate gold stripes across your coral and pink base colors. These metallic accents catch light beautifully and add sophisticated shine to your beachy nail design.
Gold beads and seashell charms provide three-dimensional texture that enhances your coral reef theme. Place small gold beads at cuticle lines or nail tips for subtle sparkle. Attach tiny seashell charms to accent nails using nail glue for authentic beachy flair that complements your short nail length.
Strategic gold placement maximizes impact on shorter nail surfaces without overwhelming the design. Draw gold lines along nail edges to create elegant borders. Add gold dots at the intersection of pink and coral sections for cohesive color coordination. These metallic touches transform simple color combinations into sophisticated beach-inspired artwork.
Seashell and Pearl Accents
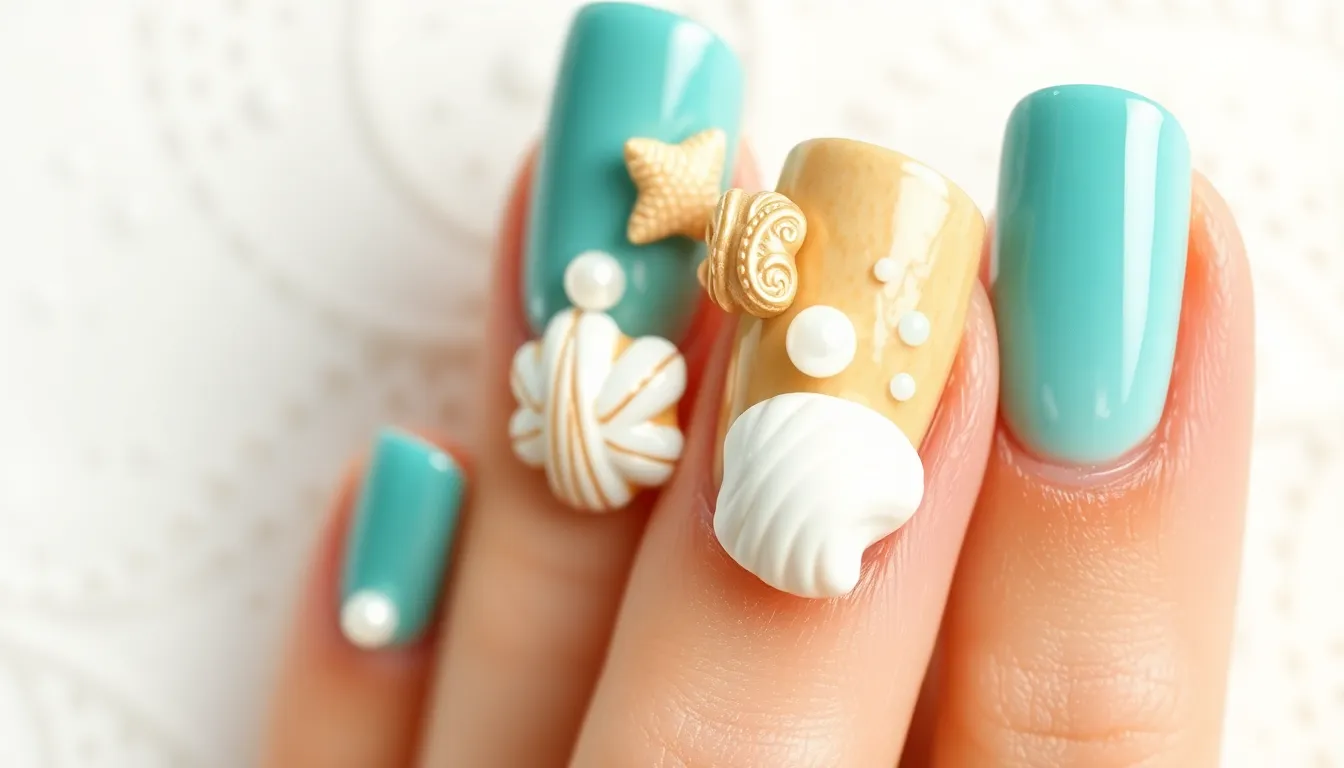
Transform your short nails into ocean treasures with dimensional seashell elements and lustrous pearl details. These elegant accents capture the essence of beachside discoveries while maintaining sophistication on compact nail surfaces.
Creating 3D Shell Effects on Short Nails
Building dimensional shell effects requires strategic layering techniques that maximize impact without overwhelming short nail surfaces. We recommend starting with a base color resembling sand or seafoam to establish your ocean foundation.
Gel polish application creates the most durable 3D shell shapes on compact nails. Apply a thin layer of your chosen gel polish, then use a dotting tool to create small shell formations before curing. This technique allows precise control over shell placement and prevents overcrowding on limited nail space.
Acrylic molding offers greater dimensional possibilities for shell creation. Mix your acrylic medium with ocean inspired colors like pale pink or cream white. Shape small shell forms directly on the nail surface using a fine brush, allowing each layer to dry completely before adding texture details.
Texture enhancement brings shells to life through careful detailing. Use a thin nail art brush to add ridge lines and natural shell patterns. Apply these details while your base layer remains slightly tacky for better adhesion and seamless integration.
Small seashell charms provide instant 3D effects without extensive buildup. Secure these decorative elements with clear nail glue, positioning them strategically on accent nails to avoid daily wear interference.
Pearl Dot Placement Strategies
Strategic pearl placement creates sophisticated ocean inspired patterns that complement short nail proportions perfectly. We’ve developed proven positioning techniques that maximize visual impact while maintaining elegant restraint.
Accent nail focus concentrates pearl elements on your ring finger for minimalist sophistication. Place a single pearl dot at the nail’s center or create a small cluster near the cuticle area. This approach draws attention without overwhelming your overall design.
Random scatter placement mimics natural sea foam patterns across multiple nails. Apply pearl dots using a dotting tool or toothpick, varying sizes slightly to create organic ocean bubble effects. Distribute these elements unevenly for the most natural appearance.
Symmetric arrangement creates balanced designs perfect for formal occasions. Position pearl dots in matching patterns on corresponding fingers, such as placing two dots on each pinky nail or creating identical crescents on your thumbs.
Base integration allows pearls to enhance existing nail art elements. Apply pearl dots over dried ocean wave patterns or coral reef designs to add depth and luxury. This layering technique creates sophisticated dimension without requiring additional nail length.
Size variation prevents monotonous pearl applications on short surfaces. Mix small and medium pearl sizes within your chosen placement pattern, using larger pearls as focal points and smaller ones for supporting detail work.
Tropical Sunset Gradients
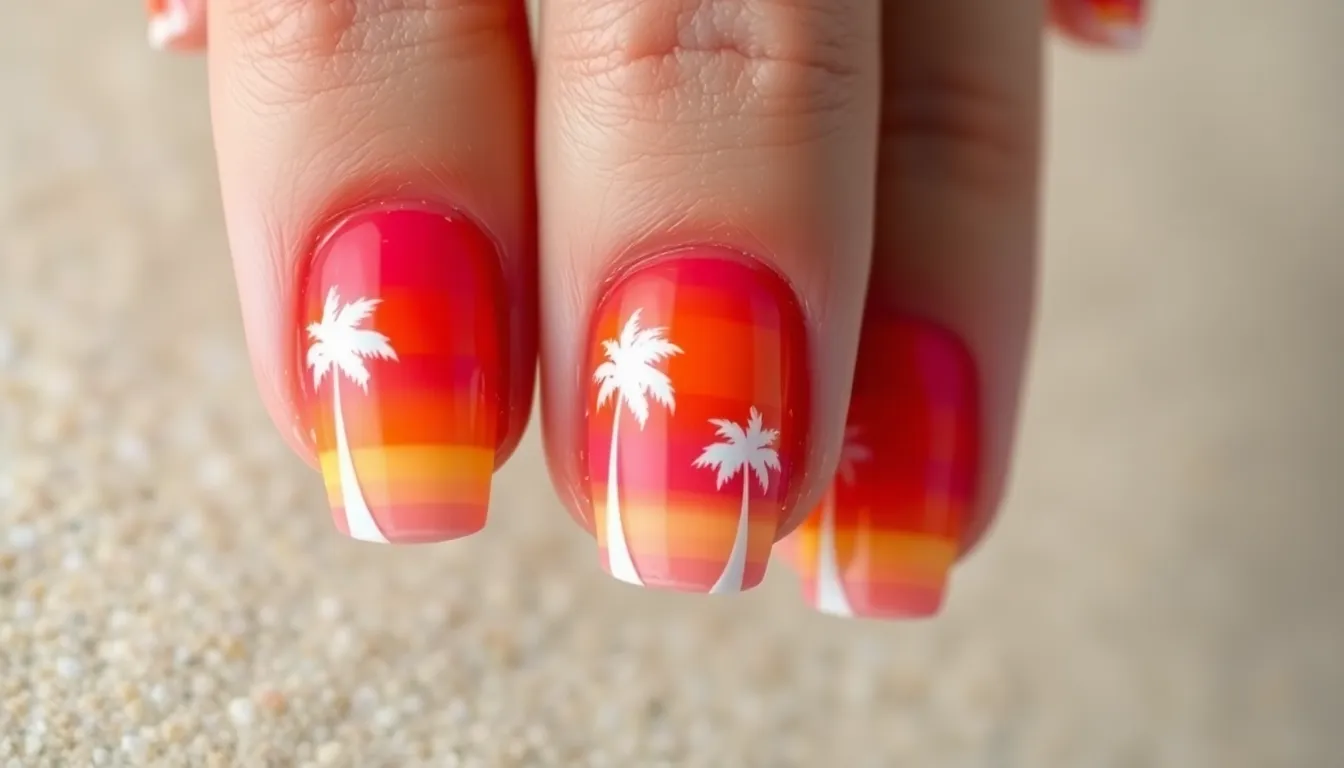
We can capture the breathtaking beauty of a tropical sunset right on our short nails using vibrant ombré techniques. These gradient designs blend warm sunset colors to create stunning visual effects that perfectly complement compact nail surfaces.
Orange and Pink Blending Methods
Sponge blending creates the most seamless sunset transitions on short nails. We start by applying a light base coat, then use a makeup sponge to dab orange polish at the cuticle area while gradually transitioning to pink at the nail tip. The key lies in building up color intensity through multiple thin layers rather than one thick application.
Brush blending offers more precise control for detailed gradient work. We apply orange polish to the lower half of each nail, then immediately use a clean nail art brush to pull the color upward while it’s still wet. Pink polish gets applied to the tip and blended downward to meet the orange, creating natural color fusion.
Color building techniques help us achieve deeper sunset tones on shorter surfaces. We begin with the lightest shade as our base, then gradually layer deeper oranges and pinks to mimic how sunset colors intensify in nature. This method prevents color muddiness while maximizing visual impact on compact nails.
Finishing touches enhance the overall sunset effect through strategic topcoat application. We can apply a clear topcoat for glossy finishes or add fine glitter over wet polish to simulate the sparkle of sunlight on water. These final details transform simple gradients into sophisticated beachy masterpieces.
Palm Silhouette Accent Nails
Strategic placement maximizes the visual impact of palm silhouettes on short nails. We recommend choosing one or two accent nails per hand rather than overwhelming the entire set, allowing the tropical design to serve as a focal point against our sunset gradient base.
Brush technique ensures clean palm tree shapes on compact surfaces. We use a thin nail art brush loaded with white or light colored polish to create the trunk first, starting from the base and drawing upward with steady pressure. The palm fronds get added using gentle curved strokes that fan out naturally from the trunk top.
Dotting tool details add realistic palm leaf textures without overcrowding short nails. We dip a small dotting tool in our chosen polish color to create individual leaf segments along each frond, building texture through strategic dot placement. This technique adds dimension while maintaining clean lines on smaller nail surfaces.
Color contrast helps palm silhouettes stand out against sunset backgrounds. We typically use white polish for dramatic contrast against orange and pink gradients, though black can create striking effects for evening looks. The key involves ensuring sufficient color difference between our silhouette and background for clear definition.
Nautical Stripes and Anchors
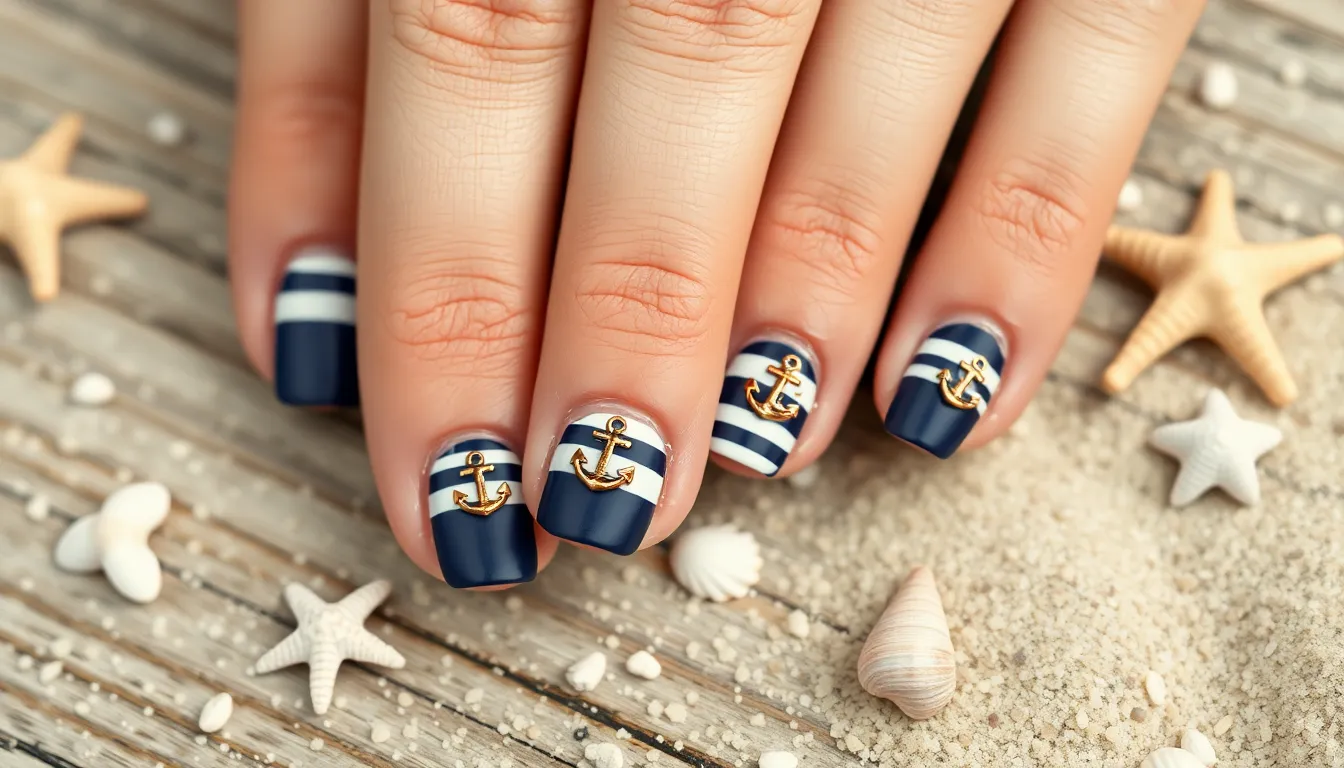
Now we’re diving into classic maritime designs that bring coastal charm to your short nails. These timeless patterns offer sophisticated elegance while perfectly complementing the compact canvas of shorter nails.
Navy and White Stripe Patterns
Navy and white stripes create the quintessential beachy look that echoes sailor uniforms and seaside aesthetics. We recommend using thin, evenly spaced stripes on short nails to avoid overwhelming the limited nail space. Striping tape delivers the cleanest lines when applied over a white or navy base coat, while a thin nail art brush offers more creative control for freehand designs.
Horizontal stripes work best for achieving that authentic nautical appearance. Start with your chosen base color and allow it to dry completely before applying tape or painting additional stripes. We’ve found that keeping stripe width consistent across all nails creates a polished, professional finish that enhances the overall maritime theme.
Color balance plays a crucial role in nail stripe success. Alternating between navy and white creates classic contrast, while adding thin metallic silver lines between the main stripes elevates the design with subtle sophistication.
Mini Anchor Detail Techniques
Adding anchors to short nails requires proportional sizing to maintain visual balance and elegance. We suggest using fine detail brushes, nail stamps, or decals to create these miniature maritime symbols. Mini anchors positioned near the cuticle or nail center provide the best visual impact without crowding the design.
Base color selection influences anchor visibility and overall aesthetic appeal. Solid navy, white, or soft beige backgrounds showcase anchor details most effectively. Metallic gold or silver anchors add chic touches that catch light beautifully, while navy anchors maintain traditional maritime authenticity.
Dotting tools offer excellent alternatives for creating anchor shapes when freehand painting proves challenging. Start with the anchor’s main body using gentle downward strokes, then add the curved arms and crossbar with precise movements. We always finish with a high quality topcoat to ensure durability and enhance the overall shine of these intricate details.
Strategic placement prevents overcrowding on short nail surfaces. Consider featuring anchors on one or two accent nails while keeping remaining nails simple with coordinating stripe patterns or solid colors.
Sand and Sea Glass Effects
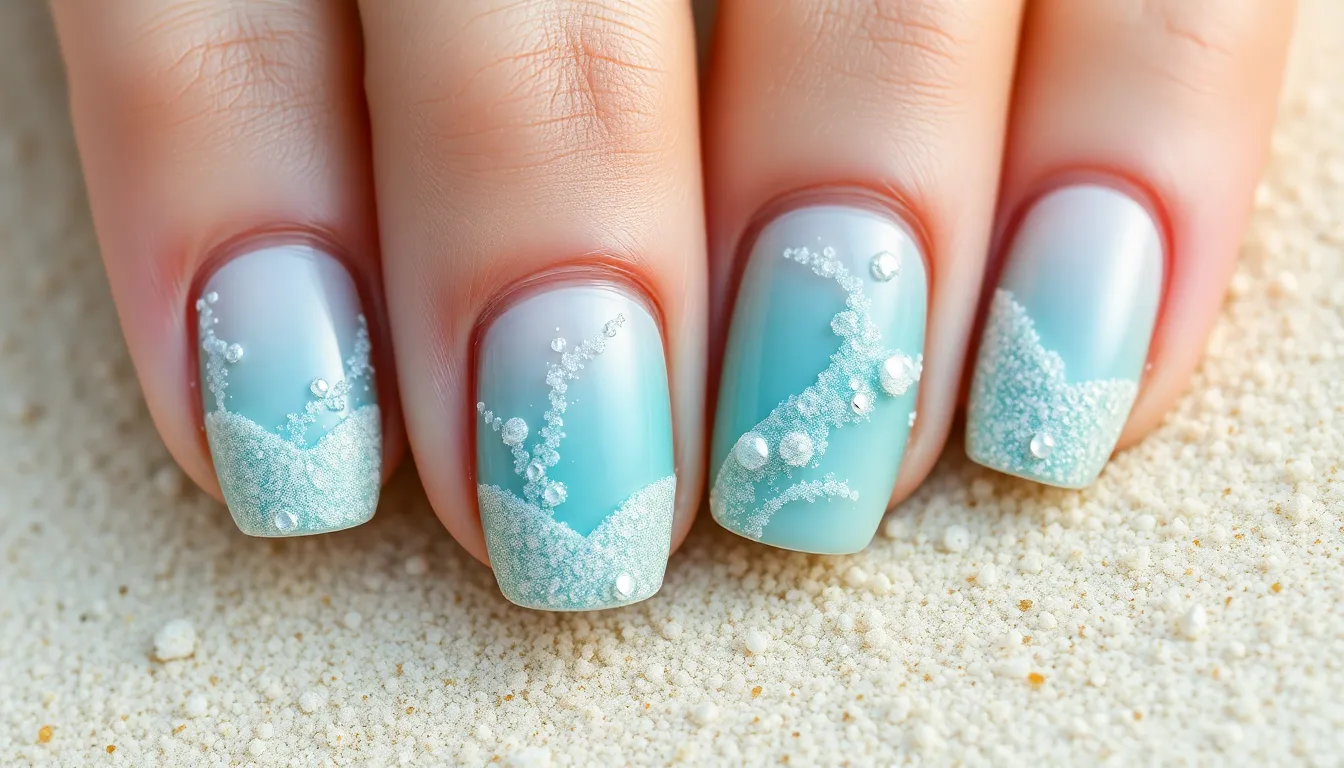
We can capture the serene beauty of shoreline treasures through designs that mimic sandy shores and translucent sea glass. These effects create a natural, weathered appearance that perfectly complements short nail lengths.
Textured Sand Finish Applications
Layering techniques transform short nails into realistic sandy surfaces. We recommend starting with a polished beige or light tan base coat, then applying sand powder or textured polish over the surface. Fine white specks or subtle glitter can suggest seafoam when scattered across the beige foundation.
Ombre application creates depth without overwhelming compact nail space. Using a wedge sponge, we can blend the sandy texture from light to dark, mimicking natural sand patterns. This gradient style works exceptionally well on shorter nails since it adds visual interest through texture rather than requiring complex designs.
Building texture requires strategic product application. We apply the base coat first, then layer the sandy finish while the polish remains slightly tacky. Some nail artists use actual nail art sand powder mixed with clear topcoat for authentic texture that catches light naturally.
Frosted Sea Glass Color Combinations
Semi-transparent pastels recreate weathered sea glass perfectly. We achieve these effects using frosted pastel blues, greens, mint, seafoam, soft teal, and pale aqua applied in thin, semi-opaque layers. Each color mimics the translucent quality of ocean-tumbled glass.
Matte topcoats enhance the frosted glass appearance. After applying the base sea glass colors, we finish with a matte topcoat to eliminate shine and create that characteristic frosted texture. This technique works particularly well on short nails where the subtle effect remains visible.
Strategic accent placement completes the oceanic theme. We combine these frosted shades with white or iridescent glitter to mimic sunlit water sparkle. Tiny pearls, gold charms, or painted starfish can be added sparingly to maintain the sophisticated, weathered glass aesthetic while maximizing impact on shorter nail surfaces.
Color layering creates authentic depth. We build these sea glass effects by applying multiple thin coats rather than one thick application, allowing each layer to dry completely before adding the next. This technique prevents muddiness while achieving the characteristic translucent quality of genuine sea glass.
Minimalist Wave Designs
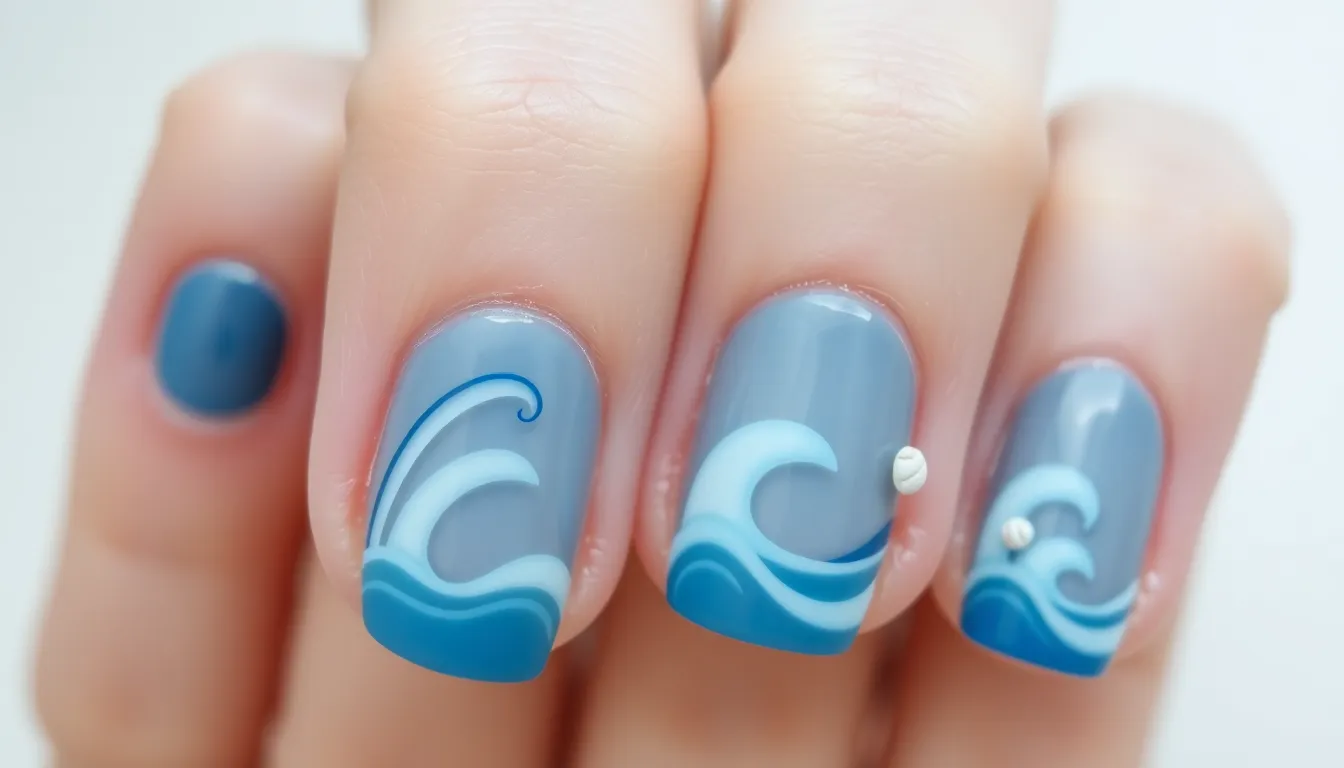
We love how minimalist wave patterns offer an elegant approach to beachy nail art on short nails. These understated designs capture ocean vibes without overwhelming your compact nail space.
Simple Blue Wave Lines
Create effortless wave patterns using just a few brush strokes and strategic color placement. We recommend starting with a clean white or nude base coat to make your blue waves pop against the neutral background.
Use a thin nail art brush to draw gentle curved lines across each nail surface. Start from one side and create flowing S-shaped curves that mimic natural wave movements. The key is keeping your hand steady while allowing the lines to flow organically rather than forcing perfect symmetry.
Apply soft blue polish in varying shades to add depth to your wave design. We suggest using two or three different blue tones like powder blue, sky blue, and navy to create natural wave variations. Layer the colors by painting some waves in lighter shades and others in deeper blues.
Focus on spacing between your wave lines to prevent the design from looking cluttered on short nails. Leave enough negative space between each wave to let the pattern breathe and maintain that minimalist aesthetic we’re aiming for.
Negative Space Ocean Techniques
Embrace the power of negative space to create sophisticated beachy designs that don’t overwhelm short nail surfaces. We find that leaving portions of the nail bare actually enhances the overall impact of your ocean-inspired art.
Try wave-shaped cutouts using nail tape or stencils to create clean geometric wave patterns. Place the tape in wave formations across your nail, paint over it with blue polish, then remove the tape to reveal crisp negative space waves underneath.
Incorporate small seashell accents strategically placed in the negative space areas. We recommend using tiny shell stickers or hand-painted shells in just one or two spots per nail to maintain that minimalist approach while adding beachy charm.
Experiment with partial coverage techniques where you paint waves on only half of each nail. This creates a modern, artistic look that’s perfect for short nails because it doesn’t compete for space with other design elements.
Use clear topcoat strategically over both the painted and unpainted areas to create subtle texture differences. The negative space areas will have a natural matte finish while the painted waves remain glossy, adding visual interest through texture contrast rather than color overload.
Starfish and Sea Creature Motifs
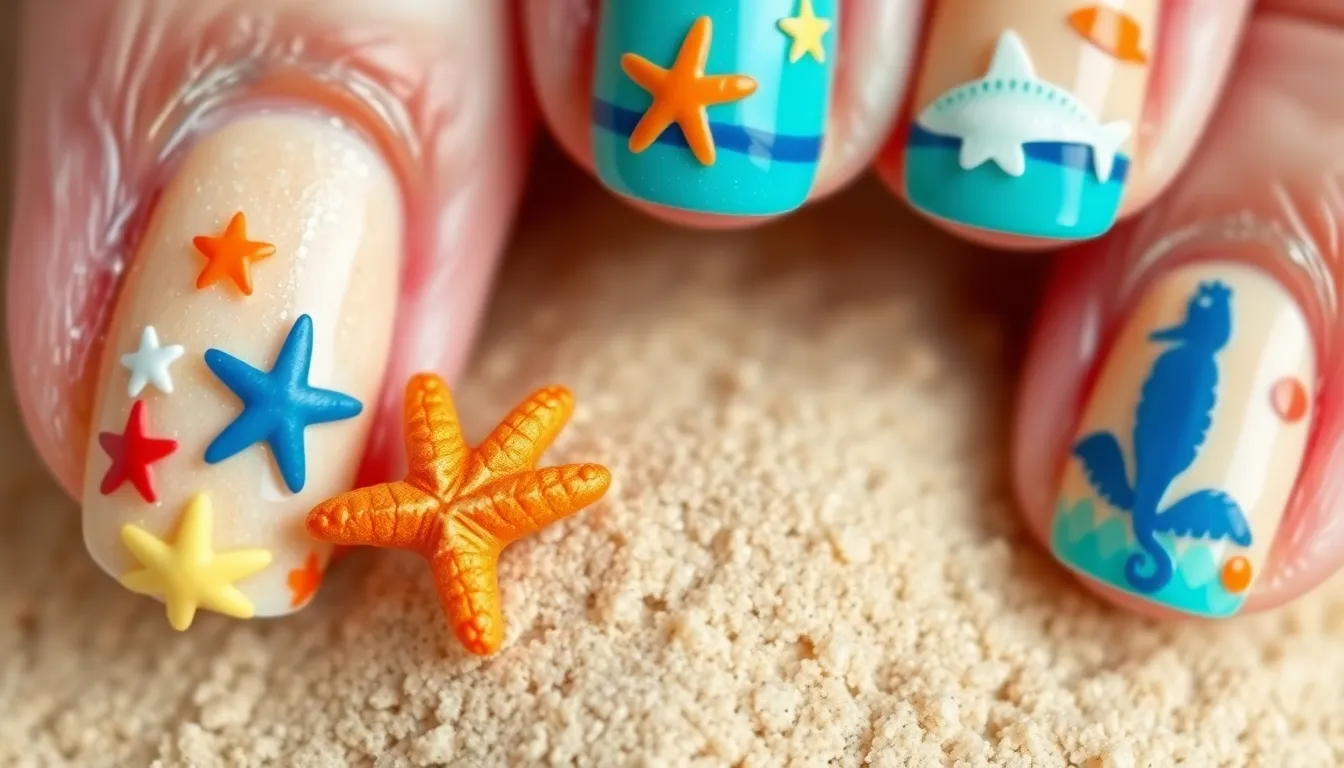
Starfish and sea creature motifs bring charming ocean life to short nails without overwhelming the compact nail surface. These designs perfectly complement the beachy aesthetic we’ve been building while offering delicate details that work beautifully on shorter lengths.
Easy Starfish Painting Methods
Creating starfish designs starts with a sandy beige base coat that mimics natural beach sand. We recommend using a dotting tool or bobby pin to form the basic five-pointed star shape, which provides better control than traditional brushes on short nails.
Begin by placing a central dot, then extend five small lines radiating outward to create the starfish arms. Choose white or orange polish for the starfish color, as these shades pop beautifully against the sandy background while maintaining that authentic beach feel.
Enhance your starfish design by sponging gradient ocean colors around the edges. Light and medium blues create a realistic sea effect that frames the starfish without crowding the nail space. This technique works particularly well on short nails because it adds depth without requiring intricate details.
Add subtle sparkle with a touch of glitter polish to represent sunlight dancing on water. Apply the glitter sparingly around the starfish or blend it into the blue gradient for a natural shimmer effect that catches light beautifully.
Perfect your starfish by outlining the shape with a fine brush for extra definition. This final step ensures your sea creature stands out clearly against the oceanic background, creating a polished look that’s both professional and playful.
Seahorse and Fish Silhouettes
Seahorse silhouettes work exceptionally well on short nails when painted in simple, recognizable shapes. We suggest using black or deep ocean blue outlines against pastel backgrounds like seafoam green or pale blue to create striking contrast without overwhelming the nail surface.
Paint seahorse curves using a thin nail art brush, starting from the head and flowing down to the curved tail. Keep the design centrally placed on the nail to maintain clarity and elegance. The key is creating smooth, organic lines that capture the seahorse’s distinctive S-shaped profile.
Fish silhouettes offer versatility through various species shapes, from simple oval bodies to more detailed tropical fish outlines. Choose one fish per nail to avoid cluttering, and vary the sizes slightly across different nails for a natural underwater scene effect.
Achieve precision with nail stamping tools or decals if hand-painting feels challenging. These tools ensure consistent shapes across all nails while maintaining the professional quality that makes your beach design truly shine.
Create depth by layering different colored silhouettes on select accent nails. Use darker shades for background creatures and lighter colors for foreground elements, building a subtle underwater scene that tells a story across your manicure.
Finish sea creature silhouettes with strategic placement of small golden charms shaped like shells or pearls. These accents add glamorous touches to some nails while keeping others simple with painted motifs, creating perfect balance for short nail proportions.
Beachy French Manicure Variations
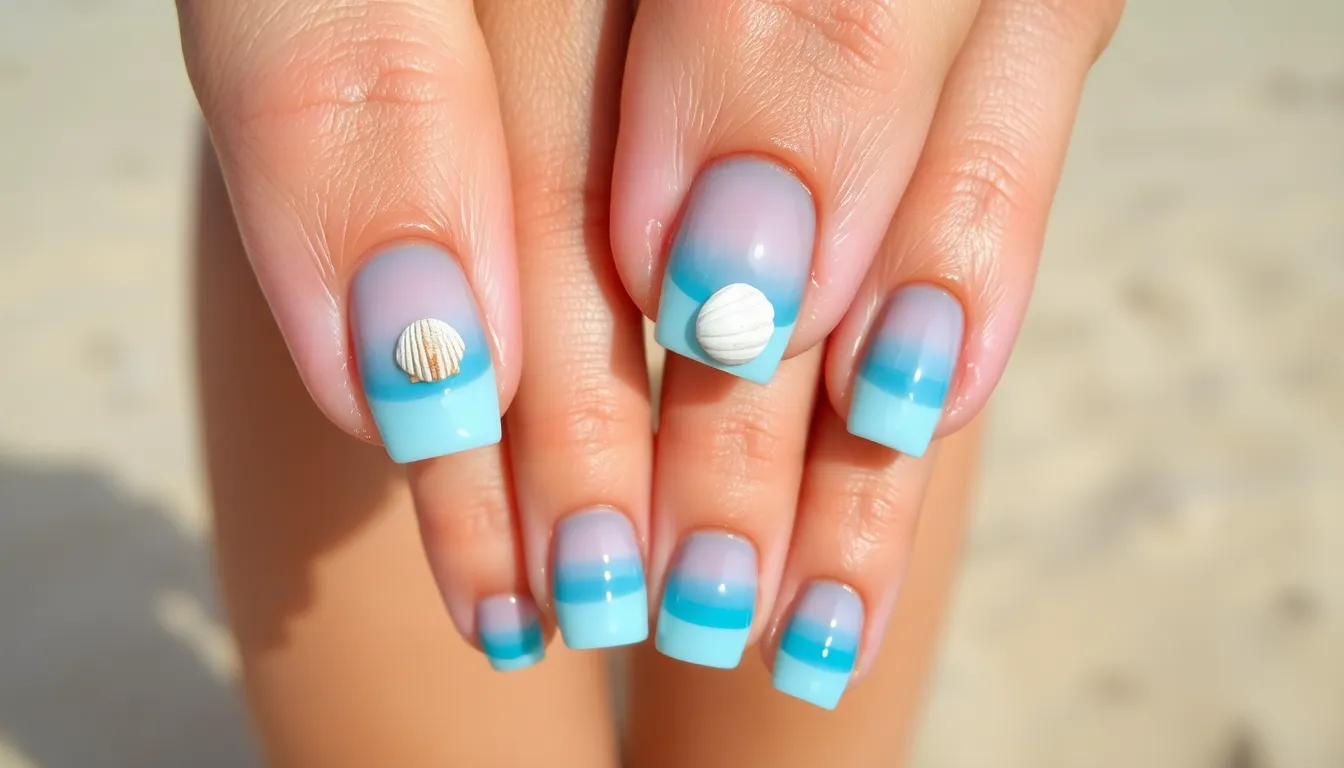
French manicures get a stunning coastal upgrade when we incorporate ocean inspired elements and sandy textures. These beachy variations transform the classic look into something perfectly suited for summer adventures.
Ocean-Tinted French Tips
Blue tinted tips capture the mesmerizing beauty of ocean waves right at your fingertips. We recommend starting with a light blue shade for the tip area and gradually blending into a deeper ocean blue for added depth. Gradient effects work exceptionally well on short nails because they create the illusion of movement without overwhelming the limited nail space.
Seashell accents elevate your French tips from simple to spectacular. Small seashell charms or hand painted shell designs along the tip line add whimsical touches that scream beachy vibes. We suggest placing these decorative elements strategically on one or two accent nails to maintain balance across your manicure.
Oceanic blue variations offer endless possibilities for customization. Teal undertones work beautifully for those who prefer warmer ocean hues, while navy tips create more dramatic contrast against natural nail beds. Consider alternating between different blue shades across your nails for a playful wave pattern effect.
Sandy Nude Base Alternatives
Matte nude bases perfectly mimic the soft texture of sun warmed sand. This versatile foundation works as an ideal canvas for various beach themed nail art designs, from tiny palm trees to scattered pearls. We love how matte finishes add sophistication while maintaining that relaxed coastal atmosphere.
Pastel citrus combinations bring tropical energy to traditional French manicures. Soft peach, coral, and pale yellow bases paired with white or cream tips create that perfect sunset on the beach feeling. These lighter shades complement tanned skin beautifully and photograph wonderfully against beach backgrounds.
Textured sand effects add dimensional interest to your base color. Mixing fine sand particles or textured nail polish into your base coat creates an authentic sandy shore appearance. We recommend keeping this technique subtle on short nails to avoid overwhelming the design while still achieving that beachy texture we’re after.
Conclusion
Short nails are perfect for beachy nail art that’s both stunning and practical. We’ve shown you that compact nail surfaces can display everything from ocean ombres to tropical sunsets with remarkable beauty and sophistication.
These coastal designs prove that creativity isn’t limited by nail length. Whether you’re drawn to minimalist waves or vibrant coral reefs your short nails can capture the essence of summer perfectly.
Ready to jump into your next beach-inspired manicure? Pick your favorite technique from our collection and transform your nails into the perfect summer accessory that’ll withstand all your coastal adventures.
Frequently Asked Questions
Can short nails really showcase beach-themed nail art effectively?
Absolutely! Short nails are perfect for beach-inspired designs and actually offer practical advantages for summer activities like swimming and beach volleyball. They provide an ideal canvas for coastal designs ranging from subtle wave patterns to bold tropical sunsets, proving that creativity isn’t limited by nail length.
What is the ocean blue ombre technique for short nails?
The ocean blue ombre technique creates a mesmerizing sea-depth effect by blending light to dark blue shades. Use a makeup sponge to create seamless color transitions, then add delicate white wave details over the ombre base using organic wave shapes and sea foam accents for a stunning ocean-inspired look.
How do I create coral reef-inspired nail designs?
Start with a bright coral base color, then add playful pink accents through geometric patterns and scattered dots to mimic natural coral textures. Layer different coral shades for depth and complexity, then enhance with gold accent lines that mimic sunlight on ocean waves for an elegant finish.
What are the best techniques for seashell and pearl accents?
Create dimensional shell effects using gel polish and acrylic molding with strategic layering. Add small seashell charms for instant 3D effects. For pearls, use accent nail focus, random scatter placement, or symmetric arrangements to complement short nail proportions while adding elegance and depth.
How do I create tropical sunset gradients on short nails?
Blend orange and pink colors using sponge and brush techniques for seamless transitions. Build colors gradually to achieve deeper sunset tones while preventing muddiness. Finish with a clear topcoat or fine glitter to enhance the overall sunset effect on your compact nail surface.
What are some minimalist beach nail art options?
Simple blue wave lines capture ocean vibes elegantly without overwhelming short nails. Use a thin nail art brush with varying blue shades, incorporate negative space for a clean aesthetic, and add wave-shaped cutouts or small seashell accents for sophisticated beachy designs.
How can I create nautical-themed designs on short nails?
Use navy and white stripe patterns with striping tape for clean lines, maintaining proper color balance. Add mini anchor details using fine brushes or dotting tools, ensuring proportional sizing and strategic placement to maintain visual balance on shorter nail surfaces.
What are sand and sea glass nail effects?
For sand effects, start with a beige base and apply sand powder or textured polish using ombre applications. For sea glass, use semi-transparent pastels with a matte topcoat for a frosted appearance. Strategic accent placement and color layering create authentic depth without overwhelming short nails.
How do I add sea creature motifs to short nails?
Paint starfish using a sandy beige base and dotting tool for precision. Create seahorse and fish silhouettes with simple shapes and strategic placement. Layer colored silhouettes and add golden charms for accents, ensuring balanced and elegant beach-themed designs on compact nail surfaces.
Can I do beachy French manicure variations on short nails?
Yes! Transform traditional French tips with blue-tinted gradients, seashell accents, sandy nude bases, or pastel citrus combinations. Add textured sand effects for dimensional interest. These variations showcase the versatility of short nails in achieving sophisticated yet relaxed summer-ready designs.

