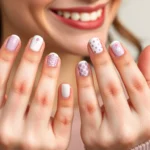
We’ve all been there – scrolling through stunning nail art tutorials only to realize they’re designed for long nails that seem to go on forever. If you’re blessed with shorter nails but still crave that perfect manicure look, you’re definitely not alone in this struggle.
Short nails don’t mean boring nails. In fact, we’d argue that shorter nails offer the perfect canvas for chic and sophisticated designs that won’t interfere with your daily activities. From delicate geometric patterns to minimalist accent nails, there’s an entire industry of simple nail art that’s specifically customized for your nail length.
We’re about to share our favorite easy nail art techniques that’ll transform your short nails into stunning masterpieces. These designs require minimal tools, take less than 30 minutes to complete, and look absolutely professional. Ready to discover how simple it can be to create gorgeous nail art that actually works with your lifestyle?
Quick Geometric Patterns for Effortless Style
Geometric patterns transform short nails into modern masterpieces without requiring advanced artistic skills. These sharp lines and angles create visual interest that perfectly complements the compact canvas of shorter nails.
Triangle Accents Using Tape
Triangle accents deliver maximum impact with minimal effort on short nail surfaces. We recommend using nail tape or regular scotch tape to create crisp geometric shapes that look professionally done.
Start by applying your base color and letting it dry completely for 10-15 minutes. Place thin strips of tape diagonally across each nail to form triangle shapes near the cuticle or nail tip. Paint over the taped area with a contrasting color like gold metallic over nude or black over white. Remove the tape immediately while the polish is still wet to avoid peeling. Finish with a top coat to seal the design and add shine.
Try creating multiple small triangles on your ring finger as an accent nail while keeping other nails solid. Experiment with different triangle sizes by cutting tape strips to various widths. Use metallic shades like rose gold or silver for elegant evening looks that catch light beautifully.
Simple Stripes with a Thin Brush
Simple stripes offer endless possibilities for short nail art enthusiasts who want clean geometric looks. We find that thin nail art brushes or striping brushes work best for creating precise lines on compact nail beds.
Apply your base color first and allow it to cure completely before adding stripes. Dip your thin brush into contrasting polish and drag it across the nail in straight lines. Create vertical stripes for a lengthening effect or horizontal stripes for width. Space your stripes evenly by using the brush width as a guide between each line.
Mix thick and thin stripes on the same nail for ever-changing visual texture. Combine two colors with your base for a three tone striped effect. Add stripes to just one or two accent nails to avoid overwhelming the overall look. Practice on a nail wheel first if you’re concerned about keeping lines straight and even.
Dotted Lines for Minimalist Appeal
Dotted lines create sophisticated patterns that work beautifully on short nails without overwhelming the small surface area. We love how these subtle designs add interest while maintaining an elegant minimalist aesthetic.
Use a dotting tool nail art pen or even a bobby pin to create uniform dots along your nail. Start with a light base color and add darker dots for contrast. Create single dotted lines down the center of each nail or along the edges for border effects. Space dots evenly by counting “one Mississippi” between each placement.
Form curved dotted lines that follow your nail’s natural shape for organic appeal. Vary dot sizes by using different tools like toothpicks for tiny dots or pencil erasers for larger ones. Combine dotted lines with solid areas to create negative space designs. Keep the pattern consistent across all nails or focus dots on accent nails only for subtle sophistication.
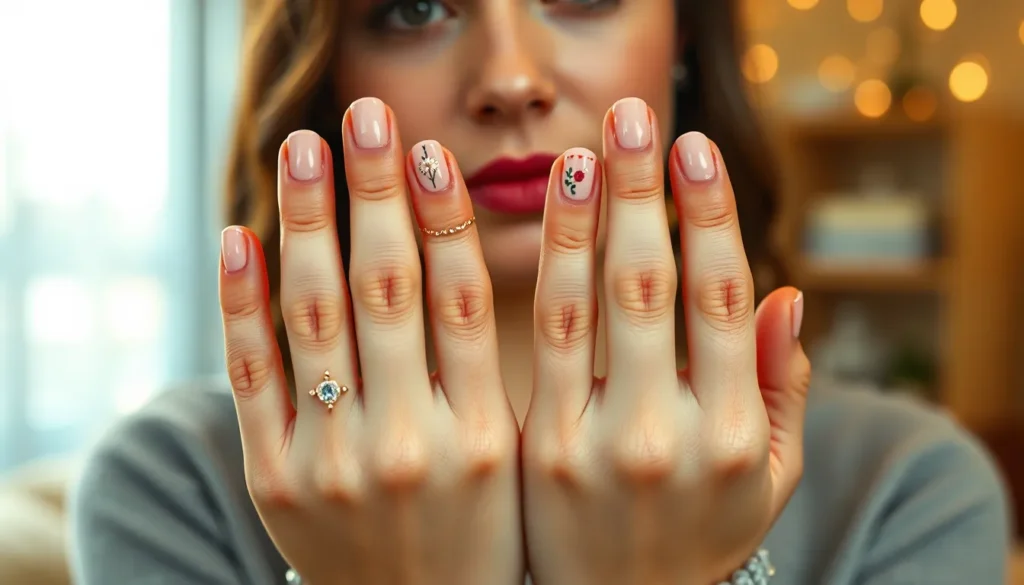
Easy Floral Designs That Work on Short Nails

Floral patterns bring a feminine touch to short nails without overwhelming the limited surface area. We’ve selected three beginner-friendly designs that create stunning results with minimal effort.
Single Flower Accent on Ring Finger
Creating a single flower accent transforms your ring finger into a beautiful focal point while keeping the overall look balanced. Paint your base coat in a neutral or pastel shade across all nails, then focus on designing one delicate flower on your ring finger only. This technique works exceptionally well because it doesn’t overcrowd your nail surface and provides just the right amount of visual interest.
Start with a small dot for the flower center using a contrasting color, then add 5-6 small petals around it using a thin brush or toothpick. We recommend using white or pink petals with a yellow center for a classic daisy look, or try purple petals with a white center for something more unique. The result is a sophisticated manicure that looks professionally done but takes less than 15 minutes to complete.
Tiny Daisy Clusters Using a Dotting Tool
Dotting tools make creating multiple tiny daisies surprisingly simple and perfect for short nail surfaces. Begin by applying your chosen base color and allowing it to dry completely before starting your floral design. Use the larger end of your dotting tool to create small yellow dots randomly across 2-3 nails for the flower centers.
Next, dip the smaller end of your dotting tool in white polish and create 4-5 small dots around each yellow center to form petals. These miniature daisies look charming when clustered together and create a garden-like effect that’s both playful and elegant. The beauty of this technique lies in its imperfection – slightly uneven petals actually make the design look more natural and handcrafted.
Simple Leaf Patterns for Natural Beauty
Leaf patterns add an organic element that complements floral designs beautifully and requires only basic brush control. Draw simple leaf shapes using a fine brush dipped in green polish, starting from a small stem and painting outward in a curved motion. We suggest creating 2-3 small leaves per nail, positioning them asymmetrically for a more natural appearance.
Vary your leaf sizes and shades of green to create depth and visual interest across your manicure. You can even add tiny brown stems using a nail art pen or the tip of a bobby pin for extra detail. These leaf accents work wonderfully as standalone designs or as supporting elements when paired with the flower techniques mentioned above.
Beginner-Friendly Ombre and Gradient Techniques

Moving beyond geometric patterns and florals, we’ll explore gradient techniques that create stunning depth on short nails. Ombre and gradient effects work exceptionally well for shorter lengths because they add visual dimension without requiring intricate detailing.
Two-Color Fade Using a Makeup Sponge
Start with a base coat and let it dry completely before beginning your gradient. Paint horizontal stripes of your chosen nail polish colors directly onto a makeup sponge, making sure they overlap slightly where they meet. Gently dab the sponge onto your nail to transfer the blended colors, creating that coveted fade effect. Repeat this dabbing motion until you achieve your desired opacity and smoothness.
We recommend choosing colors within the same family for your first attempt, as they blend more seamlessly together. Clean your sponge between applications if you’re doing multiple nails to maintain crisp color transitions. This technique actually makes short nails appear longer by creating the illusion of extended length through the gradient flow.
Glitter Gradient for Special Occasions
Begin by applying your base color and allowing it to dry thoroughly. Apply glitter polish starting at either the tip or base of your nail, depending on your preferred look. Use a clear polish brush to gently drag the glitter toward the center of your nail, creating a beautiful fading sparkle effect.
This method works perfectly for events and celebrations because it adds glamour without requiring complex nail art skills. The glitter gradient enhances short nails by adding dimension and catching light from different angles. Start with less glitter than you think you need, as you can always build up the intensity with additional layers.
Subtle Color Transitions with Polish
Use a detailed brush or your regular polish brush to apply one shade on the lower half of your nail. Apply your second color to the upper half, leaving a small meeting point in the middle. Blend the colors where they meet using a clean brush or small piece of makeup sponge while the polish is still slightly wet.
This technique suits short nails perfectly because it highlights their natural shape without overwhelming the limited surface area. Practice the blending motion on a practice nail or nail wheel first to get comfortable with the timing and pressure needed. Light or pastel shades work best for beginners as they’re more forgiving and create an elegant, lengthening effect on shorter nails.
Creative Uses of Nail Stickers and Decals

Building on our gradient techniques, we’re now exploring how nail stickers and decals can transform your short nails into stunning works of art with minimal effort.
Positioning Stickers on Short Nail Beds
Placement becomes crucial when working with limited nail surface area on short nails. We recommend trimming stickers to fit properly without overlapping your cuticles or skin, ensuring a clean professional appearance.
Strategic positioning creates visual impact:
- Center placement draws attention to the nail’s focal point
- Tip positioning creates the illusion of longer, more elegant nails
- Side placement offers asymmetrical interest without overwhelming the nail bed
Clear or nude base coats help stickers stand out beautifully without making your nails appear crowded or busy. We’ve found that positioning stickers closer to the nail’s center or tip enhances the overall aesthetic while maintaining proportion.
Layering Decals for Custom Designs
Combining multiple decals adds dimension and creates unique designs that look professionally crafted. We suggest using transparent or semi-transparent decals for layering since they won’t obscure your base color completely.
Effective layering techniques include:
- Floral motifs paired with geometric shapes on different nail sections
- Small overlapping decals that mimic complex lace or mosaic patterns
- Varied sizes creating depth without overwhelming short nail beds
Strategic overlapping allows you to achieve intricate looks while respecting the size constraints of shorter nails. We recommend starting with larger decals as your base layer, then adding smaller accent pieces for detailed finishing touches.
Mixing Stickers with Hand-Painted Elements
Combining stickers with simple hand-painted details enhances creativity and allows for personalized touches. We use stickers as focal points while adding complementary dots, lines, or minimalist brush strokes around them.
Successful mixing strategies:
- Stickers serve as main design elements with painted accent details
- Hand-painted edges help blend decals seamlessly with the nail surface
- Simple brush strokes connect multiple stickers for cohesive designs
This approach works perfectly with minimal polish colors and basic tools, making it accessible for beginners. We’ve discovered that hand-painted accents create smooth transitions between stickers and your nail’s natural surface.
Pro tip: Always apply a top coat over your finished sticker and hand-painted combination to seal the design and increase durability for long-lasting results.
Minimalist Negative Space Art Ideas

Moving away from stickers and decals, we’ll explore how leaving parts of your natural nail exposed creates sophisticated designs that are perfect for short nails. Negative space nail art enhances your nail’s natural shape while adding visual interest through strategic placement of color and bare nail sections.
Half-Moon Designs Using Reinforcement Stickers
Paper reinforcement stickers become your secret weapon for creating polished half-moon designs on short nails. Start by applying a base coat to clean nails, then press reinforcement stickers at the base of each nail to create the iconic curved shape. Paint over the exposed nail area with your chosen color, leaving the sticker covered section bare for a classic contrast.
Remove the stickers while the polish is still slightly wet to achieve clean, crisp lines that won’t chip. Choose nude and pastel combinations for subtle elegance, or experiment with bold contrasting colors like black and white for dramatic impact. This technique works exceptionally well on short nails because it doesn’t overwhelm the limited nail surface while creating a timeless, sophisticated look.
Geometric Cutouts for Modern Appeal
Striping tape and nail vinyls transform short nails into contemporary masterpieces through strategic geometric cutouts. Create triangular sections by placing tape diagonally across the nail, leaving one corner exposed while painting the rest in your chosen shade. Remove the tape to reveal sharp, clean lines that add visual dimension without cluttering your nail bed.
| Geometric Shape | Application Method | Best Colors |
|---|---|---|
| Triangles | Diagonal tape placement | Bold contrasts |
| Squares | Grid pattern with tape | Neutral tones |
| Diagonal lines | Angled striping tape | Monochromatic schemes |
Experiment with multiple cutouts on different nails for an asymmetrical design that feels modern and intentional. Keep the natural nail sections prominent to maintain the minimalist aesthetic that works so well on shorter lengths.
Simple Line Work Leaving Natural Nail Exposed
Thin brush strokes create elegant line designs that complement short nails without overwhelming them. Draw single vertical lines down the center of each nail, leaving generous natural nail space on both sides for a balanced, airy appearance. Use a nail art pen or thin brush dipped in contrasting polish to achieve consistent line thickness across all nails.
Multiple parallel lines work beautifully when spaced evenly across the nail surface, creating a subtle striped effect that elongates the appearance of short nails. Horizontal lines at the nail tips add width and visual interest while maintaining the minimalist approach. Choose colors that contrast nicely with your natural nail tone to ensure the lines stand out clearly against the exposed nail bed.
Keep line work simple and intentional, as overcrowding defeats the purpose of negative space art and can make short nails appear even smaller.
French Manicure Variations for Short Nails

French manicures remain a timeless choice for short nails, offering elegant sophistication that works perfectly with compact nail beds. We’ll show you three modern variations that update this classic style with contemporary flair.
Colored Tips Instead of Traditional White
Swapping white tips for vibrant colors transforms your French manicure into a personalized statement piece. Pastel shades like soft pink, lavender, or mint green create a romantic springtime vibe that’s perfect for everyday wear. Neon colors such as electric blue, hot pink, or lime green add a bold pop of personality that stands out in any crowd.
Metallic finishes bring luxury to your fingertips with options like rose gold, silver, or copper that catch light beautifully. We recommend starting with a nude or clear base coat to make colored tips pop against your natural nail. Using nail guides or striping tape helps achieve crisp, clean lines without advanced artistic skills.
Thin Line French for Delicate Look
Creating ultra thin lines at your nail tips delivers maximum elegance with minimal effort on short nails. This delicate variation prevents overwhelming your compact nail surface while adding refined sophistication to any look. We suggest using a fine detail brush or striping brush to paint narrow bands that measure just 1-2 millimeters in width.
Striping tape becomes your best friend for achieving perfectly straight thin lines every time. Simply apply your base color, place the tape where you want the line, paint over it with your chosen tip color, then remove the tape while the polish is still wet. This technique works especially well with contrasting colors like black on nude or white on deep burgundy.
Reverse French Manicure Techniques
Reverse French manicures flip the traditional design by placing colored lines at your cuticle area instead of nail tips. This trendy variation creates the illusion of longer nails by drawing attention to the base of your nail bed. We love how this technique works with glitter polish applied in a curved line near your cuticles for special occasions.
Contrasting colors make reverse French manicures pop against short nails with combinations like black base lines on white nails or gold accents on deep navy polish. Using reinforcement stickers as guides helps create perfect curved lines that follow your natural cuticle shape. The technique requires only two colors and steady hands, making it accessible for beginners who want to try something different from traditional French styles.
Quick Polka Dot and Circle Patterns

Polka dots and circular shapes offer the perfect introduction to nail art for short nails, delivering maximum impact with minimal effort. These classic patterns add charm without overwhelming your small nail surface.
Using Bobby Pins for Perfect Dots
Bobby pins serve as our secret weapon for creating professional-looking dots at home. The rounded tip of a bobby pin becomes your precise dotting tool when dipped into nail polish. Start by selecting your favorite nail polish color and dip the bobby pin’s rounded end directly into the bottle. Press gently onto your nail surface to create consistent, uniform dots every time.
This budget-friendly technique eliminates the need for expensive professional tools while delivering salon-quality results. Varying the pressure creates different dot sizes – light pressure produces smaller dots while firmer pressure creates larger ones.
Creating Bubble Effects with Different Sizes
Bubble effects transform simple dots into playful, dimensional designs that catch the light beautifully. Begin with your chosen solid base color and allow it to dry completely. Add larger dots using your first accent color, spacing them randomly across the nail surface. Layer smaller dots inside or around the larger ones using a contrasting shade.
This layering technique creates the illusion of floating bubbles on your nails. The key lies in using at least three different colors to achieve depth and visual interest. Light colors work exceptionally well for this effect, creating an airy, whimsical appearance.
Combining Dots with Solid Color Bases
Solid color bases provide the perfect canvas for showcasing your dot patterns effectively. Choose bold shades like deep navy or rich burgundy for dramatic contrast, or opt for soft pastels for a delicate appearance. Apply two thin coats of your base color and let dry completely before adding dots.
Random dot placement creates a modern, artistic look while structured patterns offer a more classic appearance. We recommend starting with three to five dots per nail to avoid overcrowding your short nail space. This balanced approach ensures your design remains elegant and wearable for any occasion.
Time-Saving Tools and Techniques for Easy Application

Creating beautiful nail art on short nails doesn’t have to take hours. We’ll explore the most efficient tools and techniques that’ll help you achieve professional-looking results in half the time.
Essential Brushes for Detail Work
Fine detail brushes make the difference between amateur and professional-looking nail art on short nails. These precision tools allow us to create delicate lines and intricate patterns that complement shorter nail beds perfectly. We recommend investing in at least one high-quality fine brush for creating small florals, geometric details, and accent lines.
Thin liner brushes excel at creating precise French tips and clean stripes on short nails. They’re particularly useful for achieving the thin line French technique we discussed earlier, giving you complete control over line thickness and placement. Most nail artists consider these brushes essential for creating professional-looking geometric patterns.
Flat brushes serve multiple purposes in your nail art toolkit, from applying smooth base coats to creating clean geometric shapes. We use them for painting larger areas efficiently and for creating crisp edges on triangular accents and other angular designs.
Household Items That Work as Nail Art Tools
Toothpicks transform into excellent dotting tools for creating polka dots and small design accents on short nails. We love using them because they’re readily available and create perfectly sized dots for shorter nail beds. Simply dip the tip in nail polish and gently press onto your nail for consistent results.
Tape pieces work wonderfully for masking areas and creating those crisp geometric lines we’ve been exploring throughout this guide. Cut small strips to fit your short nails, press them down firmly, and paint over them for clean, professional-looking patterns. Remove the tape while the polish is still slightly wet for the sharpest lines.
Cotton swabs and bobby pins serve as versatile tools for both creating designs and making corrections. Bobby pins work particularly well as budget-friendly dotting tools, while cotton swabs help clean up mistakes around the cuticle area without disturbing your main design.
Quick-Dry Products to Speed Up the Process
Quick-dry top coats seal your designs efficiently while dramatically reducing waiting time between layers. We apply these immediately after completing our nail art to prevent smudging and achieve a professional finish in minutes rather than waiting for traditional polish to air dry.
Spray or drops labeled as quick-dry help prevent those frustrating smudges that can ruin your carefully crafted short nail art. These products work by creating a protective barrier that allows the polish underneath to cure faster, making them perfect for busy schedules.
UV or LED lamps provide the fastest curing solution when working with gel polishes on short nails. Gel systems cure completely in 30-60 seconds under these lamps, allowing you to complete multiple layers and intricate designs without extended waiting periods between steps.
Color Combinations That Make Short Nails Pop

The right color combinations can transform short nails from ordinary to extraordinary. We’ll explore strategic color pairings that create visual impact and make your manicure stand out.
Complementary Colors for Bold Contrast
Complementary colors sit opposite each other on the color wheel and create striking visual contrast that makes short nails impossible to ignore. Blue and orange pairings work beautifully for summer designs, while red and green combinations offer festive holiday appeal. Purple and yellow create an unexpected pop that’s perfect for creative expression.
We recommend using these bold contrasts in alternating patterns or accent nail designs rather than full coverage. Paint your ring finger in coral while keeping the other nails in turquoise for a balanced look that draws attention. Geometric patterns using complementary colors also work exceptionally well on short nail beds, creating focal points that enhance your natural nail shape.
The key to success with complementary colors lies in proportion and placement. Choose one color as your dominant shade and use its complement as an accent to avoid overwhelming your short nails. This approach ensures your manicure looks intentional and sophisticated rather than chaotic.
Monochromatic Schemes for Subtle Elegance
Monochromatic color schemes create sophisticated depth using varying shades of a single color family. Light pink, medium rose, and deep burgundy work together to create elegant gradients that make short nails appear longer and more refined. Navy, sky blue, and powder blue offer another stunning monochromatic palette that’s perfect for professional settings.
We love using monochromatic schemes for subtle ombre effects that add visual interest without overwhelming short nail beds. Paint each nail in a slightly different shade of your chosen color family, starting with the lightest on your thumb and progressing to the darkest on your pinky. This creates a beautiful gradient effect that’s both modern and timeless.
Nude and beige tones in varying intensities offer the most versatile monochromatic option for short nails. These shades complement any outfit while adding subtle sophistication to your overall look. Layer different nude tones or add a slightly darker shade as an accent for extra dimension.
Seasonal Color Palettes to Try
Spring brings fresh opportunities to showcase bright, cheerful colors that celebrate renewal and growth. Coral, turquoise, and sunny yellow create vibrant combinations that make short nails feel energetic and optimistic. We suggest pairing these colors with simple dot patterns or thin stripe designs to enhance their impact without adding bulk.
Summer calls for bold, confident colors that reflect the season’s energy. Hot pink, electric blue, and lime green work beautifully together or as standalone statement shades. These vibrant colors pair perfectly with minimalist negative space designs that let the colors shine while maintaining elegance.
Autumn and winter invite warmer, richer tones that add depth and sophistication to short nails. Burgundy, navy, dark green, and metallic gold create luxurious combinations perfect for special occasions. We recommend using these deeper shades with subtle accent techniques like thin metallic lines or small geometric shapes to avoid overwhelming short nail beds.
| Season | Primary Colors | Accent Colors | Best Design Pairing |
|---|---|---|---|
| Spring | Coral, Turquoise, Yellow | Light Pink, Mint | Simple dots, thin stripes |
| Summer | Hot Pink, Electric Blue, Lime | White, Silver | Negative space, geometric |
| Autumn | Burgundy, Navy, Forest Green | Gold, Copper | Metallic accents, leaves |
| Winter | Deep Purple, Charcoal, Crimson | Silver, Pearl | Minimalist lines, snowflakes |
Maintenance Tips to Keep Simple Designs Looking Fresh

Creating beautiful nail art on short nails is just the beginning. Proper maintenance ensures your designs stay vibrant and chip-free for days longer than expected.
Top Coat Application for Longevity
Apply a high-quality top coat immediately after completing your nail art design to create a protective barrier that prevents chipping and fading. We recommend sealing every design with this crucial step, as it can double the lifespan of your manicure.
Reapply top coat every 2-3 days to maintain that fresh, glossy appearance and extend wear time significantly. This simple maintenance routine takes less than five minutes but makes a dramatic difference in how long your nail art looks professional.
Choose fast-drying formulas that cure completely within minutes, preventing smudges and dents that commonly occur with slower-drying products. Quality top coats also add depth to your designs, making colors appear more vibrant and geometric patterns more defined.
Touch-Up Techniques for Extended Wear
Address minor chips immediately with spot touch-ups using matching color polish to maintain a clean, polished look throughout the week. We’ve found that catching small imperfections early prevents them from spreading and ruining the entire design.
Use fine brushes or nail art tools for precise corrections that blend seamlessly with the original design without disturbing surrounding areas. Thin liner brushes work exceptionally well for fixing small geometric lines, while dotting tools can repair spotted patterns perfectly.
Keep your original polish colors accessible for quick fixes, storing them in a cool, dry place to prevent thickening. Small touch-up bottles are ideal for this purpose, as they’re easier to control for detailed repair work on short nail surfaces.
Removal Methods That Protect Short Nails
Choose acetone-free nail polish removers to prevent drying and weakening of your short nails during the removal process. These gentler formulas take slightly longer to work but preserve nail health and prevent brittleness that can make short nails appear even shorter.
Avoid aggressive scraping or peeling techniques that can damage the nail edges and create weak spots prone to breaking. Instead, soak nails briefly in remover and gently push off polish using wooden cuticle sticks or orange wood tools.
Wrap each nail in remover-soaked cotton for 30-60 seconds before gentle removal, allowing the product to break down the polish naturally. This method works especially well for glitter polishes and layered designs that typically require more effort to remove completely.
Conclusion
We’ve shown you that short nails aren’t a limitation – they’re the perfect canvas for stunning nail art. From geometric patterns to delicate florals and modern French variations you now have countless techniques to create professional-looking designs at home.
The beauty of these simple nail art ideas lies in their accessibility. Whether you’re using household items like bobby pins and tape or investing in a few essential brushes you can achieve gorgeous results without very costly or spending hours on application.
Remember that practice makes perfect and your short nails deserve just as much creativity and style as longer ones. With proper maintenance and the right color combinations you’ll discover that short nails can be both practical and absolutely beautiful. Start with one technique that speaks to you and build your skills from there.
Frequently Asked Questions
Can I really do nail art on short nails?
Absolutely! Short nails are an excellent canvas for nail art. They’re actually easier to work with for beginners and require less maintenance than long nails. The key is choosing designs that complement your nail shape and size. Simple geometric patterns, delicate florals, and minimalist designs work particularly well on shorter nails.
What tools do I need for basic nail art on short nails?
You don’t need expensive tools to get started. Essential items include fine detail brushes, a thin liner brush, dotting tools (or bobby pins), and striping tape. Many household items work great too – toothpicks for dotting, makeup sponges for gradients, and regular tape for geometric designs.
How long does it take to create nail art on short nails?
Most simple nail art designs for short nails can be completed in under 30 minutes. Quick techniques like polka dots, simple stripes, or single flower accents take just 10-15 minutes per hand. More complex designs like ombre or layered patterns might take 20-30 minutes total.
What nail art techniques work best for short nails?
Geometric patterns, minimalist designs, and negative space art are perfect for short nails. French manicure variations, simple florals, polka dots, and gradient effects also work beautifully. These techniques enhance your natural nail shape without overwhelming the smaller canvas.
How do I make my nail art last longer on short nails?
Apply a high-quality top coat immediately after completing your design and reapply every 2-3 days. Use acetone-free removers when changing designs to protect nail health. Proper preparation with a base coat and avoiding harsh chemicals will help your nail art stay fresh longer.
Can I use nail stickers and decals on short nails?
Yes! Nail stickers and decals are perfect for short nails. Trim them to fit your nail bed properly and use a clear or nude base coat to enhance their appearance. Layer different decals for custom designs, and always finish with a top coat for durability.
What colors work best for short nail designs?
Complementary colors like blue and orange create bold contrast, while monochromatic schemes offer subtle elegance. Seasonal palettes work well too – vibrant colors for spring/summer and richer tones for fall/winter. Choose colors that complement your skin tone and personal style.
Are ombre and gradient effects possible on short nails?
Definitely! Use a makeup sponge to create smooth color transitions. Glitter gradients work especially well for special occasions. The key is blending colors that are in the same family and working quickly before the polish dries. Short nails actually showcase gradients beautifully.