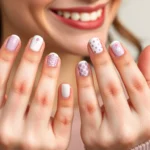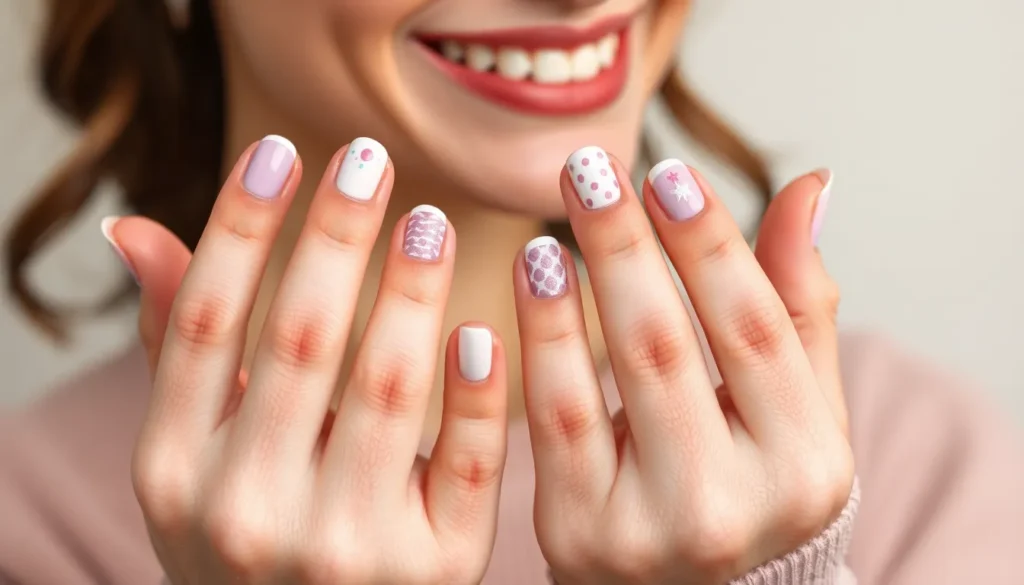
Short nails don’t mean you have to sacrifice style or creativity when it comes to nail art. We’ve all been there – admiring gorgeous manicures online only to think they’re impossible to recreate on our shorter nails. But we’re here to change that mindset completely.
The truth is, short nails offer their own unique advantages for nail art. They’re easier to maintain, more practical for daily activities, and can look incredibly chic with the right designs. Plus, you’ll spend less time on application and your manicure will last longer without chips or breaks.
We’ve compiled the most stunning yet achievable nail art ideas that work perfectly on shorter nails. From simple geometric patterns to elegant minimalist designs, these techniques will transform your nails into tiny canvases of art. You don’t need professional skills or expensive tools – just a few basic supplies and our step-by-step guidance to create salon-worthy results at home.
Polka Dot Perfection: Simple Dotting Techniques for Short Nails
Polka dots transform short nails into playful canvases that celebrate minimalist charm. We’ll explore two effective approaches to achieve perfect circular patterns that complement your shorter nail length.
Using a Dotting Tool for Clean Circles
Dotting tools create the most precise circles for professional-looking polka dot nail art. We recommend starting with a dual-ended dotting tool that offers both small and medium tip sizes. Apply your base color first and allow it to dry completely before beginning the dotting process.
Load your dotting tool with nail polish by dipping it directly into the bottle. The amount of polish on the tool determines the dot size, so practice on a nail wheel or paper first. Touch the tool perpendicular to your nail surface and lift straight up without dragging.
Space your dots evenly by using a consistent pattern across each nail. For short nails, we suggest limiting yourself to 3-5 dots per nail to avoid overcrowding. Alternate between colors like white dots on a navy base or gold dots on a burgundy background for striking contrast.
Clean your dotting tool between colors using nail polish remover on a cotton pad. This prevents color mixing and ensures crisp, clean dots throughout your design. Work quickly while the polish remains fluid for the smoothest application.
Creating Patterns with Household Items
Bobby pins serve as excellent alternatives to professional dotting tools for creating polka dots. The rounded end produces medium-sized dots that work perfectly on short nail surfaces. Dip the bobby pin end into your chosen polish color and press gently onto your nail.
Toothpicks offer versatility for both large and small dot variations on short nails. Use the pointed end for tiny accent dots or the side for larger circular shapes. Roll the toothpick slightly as you lift it to create perfectly round dots.
Cotton swabs create soft, diffused dots that add texture to your short nail designs. Cut the cotton swab in half and use the exposed tip for medium dots, or twist the cotton end for varied sizes. This technique works especially well for creating gradient polka dot effects.
Pencil erasers produce consistent medium-sized dots ideal for short nail proportions. New erasers work best as they maintain their circular shape and firm texture. Press the eraser into your polish and stamp onto your nail with even pressure for uniform results.
French Tip Variations: Classic Looks Made Easy
 1")
We’ll transform the timeless French manicure into stunning short nail designs that capture elegance without overwhelming your smaller canvas.
Traditional French Manicure Adaptations
Micro French tips create the perfect balance for short nails by featuring ultra-thin white lines that won’t dominate your nail space. We recommend keeping these tips delicate and precise to maintain the classic sophistication while working with limited surface area.
Reverse French manicures flip the traditional concept by placing color at your nail base instead of the tip. This chic variation draws attention to your cuticle area and creates an elongating effect that’s particularly flattering on shorter nails.
Softened color palettes replace stark white tips with gentle beiges, creams, or pale pinks that blend seamlessly with your natural nail tone. These subtle adaptations prevent the harsh contrast that can make short nails appear even smaller while preserving the refined French aesthetic.
Colorful French Tip Alternatives
Bright neon tips inject modern energy into the classic French style using vibrant yellows, electric blues, or hot pinks. We suggest applying these bold colors sparingly to avoid overwhelming your short nail canvas while still making a statement.
Pastel gradient tips offer a soft, dreamy alternative using gentle lavenders, mint greens, or peachy corals. These colors create visual interest without the intensity of traditional white tips, making them perfect for everyday wear.
Multi-colored French designs feature different tip colors on each nail, creating a playful rainbow effect. This technique works exceptionally well on short nails because each individual design remains simple while the overall look appears creative and fun.
Metallic French accents incorporate gold, silver, or rose gold tips that catch light beautifully on shorter nails. These sophisticated alternatives add glamour to your manicure without requiring complex application techniques.
Geometric Designs: Clean Lines for Compact Canvases
 2")
Short nails offer the perfect canvas for crisp geometric patterns that emphasize precision over complexity. We’ll show you how to create stunning angular designs that complement your nail’s natural proportions.
Triangle and Square Patterns
Contrasting colors work beautifully when we paint simple triangles or squares at different nail positions like tips, corners, or center points. Fine nail brushes give us hand-painted precision while striping tape ensures those razor-sharp edges we’re after.
Alternating triangle arrangements create modern abstract effects that fit perfectly on compact nail surfaces. Small square blocks grouped together offer another sophisticated approach that doesn’t overwhelm limited space.
Centered placement becomes crucial for short nails since we need to avoid overcrowding while maximizing visual impact. These shapes should remain small and purposeful rather than trying to fill every available space.
Striping Tape Techniques
Striping tape transforms geometric nail art by giving us perfectly straight lines without requiring advanced painting skills. This thin adhesive tape works as our guide for creating horizontal, vertical, diagonal, or crisscross patterns.
Application starts with a solid base coat before we position the tape in our desired pattern. Paint over with contrasting polish, then carefully remove the tape while the polish stays wet for clean results.
Layered geometric designs emerge when we combine triangles and squares with striping tape techniques. This approach scales perfectly for smaller nails while maintaining that professional, sharp-lined appearance we want.
Metallic accents paired with matte bases add dimension without creating visual clutter on our compact canvas. Clear top coats preserve the sharpness of geometric lines while preventing chips that could ruin our precise work.
Accent Nail Artistry: Focus on One Statement Finger
 3")
Creating a stunning accent nail transforms your short nail manicure into an eye-catching statement piece. We’ll focus on making one nail the star while keeping the others beautifully simple.
Glitter and Rhinestone Applications
Glitter transforms your accent nail into a sparkling masterpiece without overwhelming short nail surfaces. We recommend concentrating glitter polish or loose glitter on just your ring finger for maximum impact. This technique creates visual interest while maintaining an elegant, balanced look across all fingers.
Rhinestones add sophisticated texture when applied strategically to short nails. Small nail gems work best because they fit proportionally without overpowering your nail bed. We suggest placing 2-3 rhinestones in a triangular pattern on your accent nail or creating a simple line along the nail’s edge.
Combining glitter and rhinestones creates the ultimate textured accent nail. Start with a glitter base coat on your chosen finger, then add 1-2 small rhinestones as focal points. This layered approach gives you dimension and sparkle that complements the simpler polish on your remaining nails.
Application becomes effortless with the right tools and technique. Use nail glue to secure rhinestones and press them gently with a cuticle pusher for perfect placement. Quick-dry top coats seal your design and add extra shine, ensuring your embellishments stay secure throughout daily activities.
Textured Accent Options
Textured nail polish creates dimensional effects that make your accent nail pop. Matte top coats over glossy base colors provide instant contrast, while caviar beads or microbeads add tactile interest. We love how these textures break up the monotony of traditional smooth finishes.
Layering techniques produce stunning textured results with minimal effort. Try dabbing glitter over a matte base using a makeup sponge for a gradient effect. This method creates depth and visual appeal while remaining beginner-friendly and quick to execute.
Sponge application opens up endless textural possibilities for your accent nail. Dip a cosmetic sponge into contrasting colors and gently pat it onto your base coat. This technique works particularly well for creating ombré effects or adding subtle color variations that enhance your overall design.
Scaled-down patterns work best on short nails to avoid overcrowding. Keep your textured elements small and intentional rather than covering the entire nail surface. This approach ensures your accent nail remains the focal point without overwhelming your manicure’s overall aesthetic.
Gradient and Ombre Effects: Smooth Color Transitions
 4")
Building on our accent nail techniques, we’ll now explore how gradient and ombre effects create stunning visual depth on short nails. These seamless color transitions add dimension while making your nails appear longer and more elegant.
Sponge Blending Methods
Sponge blending offers the most beginner-friendly approach to creating smooth gradients on short nails. We recommend starting with a makeup sponge and your chosen polish colors for this technique. Apply stripes of different nail polish colors side by side directly onto the sponge surface.
Dabbing the sponge gently onto your nail creates the initial color transfer. Reapply polish to the sponge and repeat this dabbing motion until the colors blend smoothly together. Multiple layers build up opacity while maintaining the gradient effect.
Controlling the pressure and frequency of your dabbing determines the final gradient intensity. Light pressure creates subtle transitions, while firmer dabbing produces more vibrant color blending. We suggest practicing on a nail wheel first to perfect your technique.
Finishing with a clear top coat smooths out any texture from the sponge application. This final step adds shine and creates a professional-looking finish that rivals salon results.
Two-Tone Fade Techniques
Two-tone fade techniques create striking contrasts with softened boundaries between colors. Unlike full gradients, these designs maintain distinct color zones while blending their edges for a modern aesthetic. We achieve this by focusing the blending action only where the two colors meet.
Vertical fades work exceptionally well on short nails by creating an elongating effect. Apply one color to the top half and another to the bottom half, then blend the center line with a sponge or fine brush. This technique maximizes the visual impact without overwhelming the small nail surface.
Horizontal and diagonal fade placements offer alternative styling options for different occasions. Diagonal fades create ever-changing movement, while horizontal fades provide a classic, sophisticated look. Each placement technique suits different nail shapes and personal preferences.
Pairing two-tone fades with minimalistic accents enhances the overall design impact. Simple dots or thin lines complement the fade effect without competing for attention, making these designs perfect for both everyday wear and special occasions.
Stamping Solutions: Professional-Looking Patterns Made Simple
 5")
Nail stamping transforms the challenge of creating intricate designs on short nails into an effortless process. This technique allows us to achieve salon-quality patterns without requiring artistic skills or steady hands.
Nail Stamping Plate Basics
Stamping plates contain various etched designs in different shapes and sizes that perfectly suit short nail surfaces. We begin by applying nail polish directly onto our chosen design on the metal plate.
Scraping off excess polish comes next using the included scraper tool, ensuring the etched pattern remains filled with color. A silicone stamper picks up the pattern by rolling it across the design with gentle pressure.
Transferring the pattern onto our nail requires a quick rolling motion from one side to the other. Sealing the design with a clear top coat protects the pattern and creates a professional finish.
Limited space on short nails makes stamping particularly effective since we can highlight focal designs without overwhelming the nail bed. Small, precise motifs fit perfectly within the compact surface area of shorter nails.
Quick Stamp Design Ideas
Minimalist geometric shapes like dots, lines, and triangles create clean modern looks that complement short nails beautifully. These simple patterns avoid cluttering while adding sophisticated detail to our manicure.
Floral and lace motifs offer delicate feminine touches that enhance the elegance of shorter nails. We can position these patterns strategically to create focal points without overwhelming the nail surface.
Celestial patterns including stars, moons, and constellation designs bring trendy appeal to our nail art repertoire. These cosmic elements work especially well on dark base colors for dramatic contrast.
Abstract squiggles and wave patterns provide modern artistic flair that suits contemporary style preferences. We can customize these designs using different polish colors and finishes to match our personal aesthetic.
Combining multiple small patterns across different nails creates cohesive nail art sets while maintaining visual balance. This approach works particularly well when we alternate between solid colors and stamped designs.
Minimalist Line Art: Less Is More Approach
 6")
We embrace the philosophy that elegance comes from simplicity, especially when working with short nails where clean lines create maximum impact. Minimalist line art transforms your short nails into sophisticated canvases without overwhelming the limited space.
Single Line Designs
Single line nail art offers the perfect solution for creating chic designs with minimal effort and tools. We recommend starting with a diagonal line down the center of your nail using a thin nail art brush or striping brush for precision. Vertical lines along the nail’s edge create an elongating effect that flatters shorter lengths beautifully.
Curved lines following your nail’s natural shape add organic elegance to your manicure. We suggest practicing these designs on your non-dominant hand first to develop steady brush control. Simple border lines along the nail tip provide a modern twist on traditional French manicures while maintaining that clean, minimalist aesthetic.
These designs work exceptionally well on nude or pastel base colors, allowing the single line to become the focal point. We find that using contrasting colors like black lines on white bases or metallic lines on matte finishes creates striking visual impact without complexity.
Abstract Minimalist Patterns
Abstract minimalist patterns combine geometric shapes with asymmetric lines to create artistic nail designs that suit short nails perfectly. We recommend starting with broken lines or intersecting thin lines that create subtle abstract compositions across your nail surface. Small triangles, half-moons, or squares placed strategically on one or two accent nails provide focal points without overwhelming your entire manicure.
Asymmetric line combinations paired with tiny dots create sophisticated patterns that enhance your nail’s natural shape. We suggest keeping these elements sparse and centralized rather than covering the entire nail surface to maintain that minimalist appeal. Intersecting lines at different angles add dimension while preserving the clean aesthetic that makes short nails look polished.
These abstract patterns work beautifully when combined with matte or semi-gloss top coats that add texture without competing with the design elements. We find that limiting your color palette to two or three coordinating shades maintains the sophisticated minimalist look while allowing for creative expression within the design framework.
Floral Motifs: Delicate Blooms for Small Spaces
 7")
Short nails become the perfect canvas for delicate floral motifs that capture nature’s beauty without overwhelming your nail space. We’ve found that smaller blooms actually enhance the charm of compact nail surfaces, creating elegant designs that feel fresh and feminine.
Easy Daisy Designs
Creating charming daisies starts with simple white petals arranged around a tiny yellow center dot. We recommend using a dotting tool or toothpick tip to place five to six white dots in a perfect circle for the petals. Adding a bright yellow dot in the center completes this sweet flower design that never goes out of style.
Base colors make all the difference when showcasing your daisy art. Pastel shades like soft pink, mint green, or classic nude polish provide the ideal contrast that makes white petals pop. These gentle backgrounds allow your daisies to stand out beautifully without competing for attention.
Placement strategy matters significantly on short nail surfaces. We suggest positioning one to two small daisies per nail, keeping them centered or slightly offset to avoid overcrowding. This approach maintains the fresh, clean aesthetic that makes daisy designs so appealing on shorter nails.
Simple Rose Techniques
Stylized roses emerge beautifully through small curved strokes that represent delicate petals. Begin with a colored dot at the center of your chosen placement, then use a fine brush or nail art pen to create small curved lines spiraling outward. This technique builds a recognizable rose shape without requiring advanced artistic skills.
Color combinations open endless possibilities for your rose nail art. Classic red or pink roses shine against light base colors, while modern monochrome looks featuring white roses on nude bases create sophisticated elegance. We’ve discovered that soft coral roses on cream backgrounds offer a particularly stunning vintage appeal.
Brush selection determines the success of your rose designs. Fine detail brushes or quality nail art pens give you the control needed for precise petal strokes. Starting from the center and working outward helps maintain proportions that look natural and balanced on your short nail canvas.
Multiple roses can create cohesive designs across your manicure. We recommend varying the size slightly between nails while keeping the same color palette for unity. Placing larger roses on accent nails and smaller ones on remaining fingers creates visual hierarchy that enhances the overall floral theme.
Negative Space Nail Art: Strategic Bare Nail Areas
 8")
Negative space designs transform your natural nail into part of the artwork itself, creating sophisticated looks that perfectly complement short nails. We’ll show you how strategic bare areas can make your manicure appear more elongated and visually striking.
Cutout Designs
Cutout patterns incorporate geometric shapes where sections of polish are intentionally removed to reveal the natural nail underneath. We recommend starting with simple triangles near the base or circles at the tips to create modern, edgy designs that won’t overwhelm your nail surface.
Popular cutout shapes include crescents, diamonds, and irregular abstract forms that add artistic flair without requiring advanced skills. Position these cutouts strategically at different points on each nail to create visual interest while maintaining balance across your manicure.
Geometric cutout combinations work beautifully:
| Shape | Placement | Effect |
|---|---|---|
| Triangles | Base corners | Creates length illusion |
| Circles | Near cuticle | Frames the nail elegantly |
| Diagonal strips | Center sections | Adds ever-changing movement |
| Half moons | Nail base | Classic yet contemporary |
Begin with solid base colors like deep blues or rich burgundies to make the negative space pop dramatically. Abstract irregular shapes offer more creative freedom and work especially well when you want an edgy, artistic appearance that draws attention.
Tape-Assisted Negative Space
Tape creates precise, clean lines for professional looking negative space manicures without requiring steady hands or artistic experience. We suggest using nail striping tape or regular painter’s tape to achieve crisp edges that would be difficult to create freehand.
French tip variations become effortless with tape assistance, allowing you to experiment with diagonal tips, chevron patterns, or framed edges while leaving center areas bare. Apply your base coat, position the tape carefully, paint over it, then remove while the polish is still slightly wet for the cleanest results.
Essential tape techniques include:
- Horizontal stripes: Leave alternating bands of natural nail exposed
- Vertical sections: Frame the sides while keeping the center bare
- Chevron patterns: Create V shapes using two pieces of tape
- Grid designs: Intersecting tape creates checkered negative space
Practice with different tape widths to vary your line thickness and create more complex layered patterns. Metallic polishes work exceptionally well over tape assisted designs because they provide sharp contrast against the natural nail color.
Quick Color Blocking: Bold Geometric Sections
 9")
Color blocking transforms short nails into striking canvases by dividing them into distinct geometric sections with bold, contrasting colors. We’ll explore how to create these eye-catching designs using simple techniques that maximize your nail’s visual impact.
Two-Color Combinations
Choosing complementary or contrasting color pairs creates polished looks without overwhelming short nail spaces. Nude and red combinations offer timeless elegance, while soft pastels paired with bold navy create modern sophistication. We recommend using thin striping tape to create crisp division lines between your chosen colors.
Dividing your nail horizontally creates the illusion of length on shorter surfaces. Paint the upper half in one shade and the lower portion in your contrasting color. Vertical divisions work equally well, splitting each nail down the center for a contemporary geometric effect.
Diagonal lines add ever-changing movement to two-color blocking designs. Position the tape at a 45-degree angle across your nail, creating triangular sections that draw the eye upward. Glossy gel polishes enhance the contrast between your two chosen shades, making the geometric division more pronounced.
Multi-Color Block Patterns
Three or more colors create playful, ever-changing looks when arranged in cohesive geometric patterns. Choose colors from the same family, such as various pastels or bold primary shades, to maintain visual harmony across your short nails. We suggest limiting yourself to four colors maximum to prevent overcrowding.
Abstract shapes work better than complex patterns on shorter nail surfaces. Create small rectangles, triangles, or irregular blocks using different colors within your chosen palette. Position larger color blocks near the cuticle area and smaller accent blocks toward the nail tip for balanced proportions.
Alternating patterns across your nails creates cohesive sets without repetition. Use different color combinations on each nail while maintaining your overall palette theme. Matte finishes can soften bold multi-color designs, while glossy topcoats make colors appear more vibrant and dimensional.
Strategic color placement maximizes visual impact on compact nail canvases. Place your boldest color in the center block to create a focal point, then surround it with complementary or neutral shades. This technique prevents any single color from overwhelming your short nail’s surface area.
Conclusion
Short nails don’t limit your creative potential – they actually open up a industry of stylish possibilities that are both practical and stunning. We’ve shown you that beautiful nail art isn’t reserved for longer nails and that you can achieve professional-looking results with simple techniques and basic tools.
From polka dots to geometric patterns and minimalist line art we’ve covered designs that work perfectly with your nail length. These techniques prove that short nails can be just as eye-catching and fashionable as any elaborate manicure.
Remember that the key to great nail art on short nails is embracing simplicity and precision. With practice these easy techniques will become second nature and you’ll discover your own unique style preferences along the way.
Frequently Asked Questions
Can short nails really look stylish with nail art?
Absolutely! Short nails offer unique advantages like easier maintenance and practicality for daily activities. They provide the perfect canvas for elegant minimalist designs, precise geometric patterns, and delicate details that might be overwhelming on longer nails. With the right techniques, short nails can be just as stunning and creative as longer nails.
What are the easiest nail art techniques for beginners with short nails?
Polka dots are perfect for beginners – simply use a dotting tool, bobby pin, or toothpick to create clean circles. Geometric designs with striping tape, simple French tip variations, and single accent nails are also beginner-friendly. These techniques require minimal tools and skills while delivering professional-looking results.
How do I create polka dots on short nails without overcrowding them?
Limit the number of dots per nail to avoid overcrowding the small surface area. Use a dotting tool for clean, uniform circles, or substitute with household items like bobby pins or toothpicks. Focus on strategic placement rather than filling the entire nail, and consider using dots as accent elements rather than covering the whole nail.
What French manicure variations work best for short nails?
Micro French tips work perfectly for short nails, creating elegance without overwhelming the surface. Try reverse French manicures, colorful alternatives like neon or pastel tips, and multi-colored designs. Softer color palettes and metallic accents can add modern flair while maintaining the classic French manicure sophistication.
How can I create geometric designs on short nails?
Use contrasting colors, fine brushes, and striping tape to achieve clean, crisp lines. Center your designs to maximize visual impact without overcrowding. Striping tape helps create professional-looking patterns, and you can layer designs while maintaining a polished appearance. Pair metallic accents with matte bases for added dimension.
What’s the best way to create an accent nail on short nails?
Choose one nail (typically the ring finger) to highlight with glitter, rhinestones, or textured polish. Apply glitter strategically and place rhinestones with precision for balance. Use textured options like matte finishes or caviar beads, and try layering techniques like sponge application for ombré effects while keeping other nails simple.
How do I achieve gradient effects on short nails?
Use a makeup sponge for blending – apply colors to the sponge and dab onto the nail to transfer color and build opacity. Try two-tone fade techniques for striking contrasts with softened boundaries. Experiment with vertical, horizontal, or diagonal placements, and pair with minimalistic accents for enhanced appeal.
Is nail stamping suitable for short nails?
Yes! Nail stamping is perfect for short nails as it creates professional-looking patterns effortlessly. Use stamping plates with small, precise motifs that won’t overcrowd the surface. Try minimalist geometric shapes, delicate florals, celestial patterns, or abstract designs. The technique allows for quick, consistent results across all nails.
What minimalist designs work well on short nails?
Single line designs like diagonal or vertical lines create chic looks with minimal effort. Abstract patterns combining geometric shapes with asymmetric lines work beautifully. Keep designs sparse and centralized, use limited color palettes, and focus on clean, simple elements that enhance rather than overwhelm the nail surface.
Can I create floral designs on short nails?
Definitely! Short nails are perfect for delicate floral motifs like charming daisies and stylized roses. Use pastel shades for backgrounds, vary flower sizes across nails for cohesive themes, and focus on placement strategies. The key is keeping designs proportional to the nail size while maintaining a fresh, elegant aesthetic.
What is negative space nail art and how does it work on short nails?
Negative space nail art incorporates the natural nail as part of the design, creating sophisticated looks perfect for short nails. Try cutout designs where sections of polish are removed to reveal the natural nail, or use tape-assisted techniques for precise patterns. Popular shapes include triangles and circles for modern, edgy designs.
How do I create color blocking designs on short nails?
Divide nails into distinct geometric sections using bold, contrasting colors. Try two-color combinations like nude and red, or soft pastels with bold navy. Use tape for clean lines, focus on strategic color placement to maximize visual impact, and experiment with multi-color patterns while maintaining visual harmony across all nails.