Christmas season brings out our creative spirit and what better way to celebrate than with festive nails that capture the holiday magic? We’ve all admired those stunning Christmas nail designs on social media but felt intimidated by their complexity. The good news is you don’t need professional skills or expensive tools to create beautiful holiday nail art.
We believe everyone deserves to feel confident with gorgeous Christmas nails whether you’re attending family gatherings or holiday parties. That’s why we’ve curated the most beginner-friendly designs that’ll transform your nails from ordinary to extraordinary in just minutes.
From simple snowflakes to elegant candy canes these easy Christmas nail art ideas require only basic supplies you probably already own. We’ll walk you through each step so you can create salon-worthy results right at home. Ready to deck your nails with holiday cheer?
Classic Red and Green Christmas Nails
Classic red and green combinations form the foundation of traditional Christmas nail art. These timeless colors capture the essence of the holiday season while remaining beginner friendly.
Simple Alternating Color Pattern
Alternating red and green nails creates an eye catching Christmas design that requires minimal artistic skill. We recommend starting with a base coat on all nails to protect your natural nail bed and ensure better color adhesion.
Apply bright red polish to your thumb, middle finger, and pinky nail on each hand. Green polish goes on your index finger and ring finger to create a balanced pattern. This technique works best with cream formulas that provide full coverage in two thin coats.
Finish each nail with a glossy top coat to enhance the vibrancy of both colors. The alternating pattern draws attention to your hands while maintaining a sophisticated appearance that’s perfect for holiday gatherings.
Easy Gradient Technique
Gradient Christmas nails blend red and green colors seamlessly for a more advanced look that’s still achievable for beginners. We suggest using a makeup sponge to create smooth color transitions between the festive shades.
Start by painting your entire nail with the lighter color as your base. Dab red and green polish onto opposite ends of a clean makeup sponge in overlapping sections. Press the sponge gently onto your nail from cuticle to tip, rolling it slightly to blend the colors naturally.
Repeat the sponging process two to three times until you achieve your desired gradient intensity. Clean up any excess polish around your cuticles with a small brush dipped in nail polish remover. Seal your gradient design with a clear top coat to smooth any texture and add shine.
Festive Snowflake Nail Designs
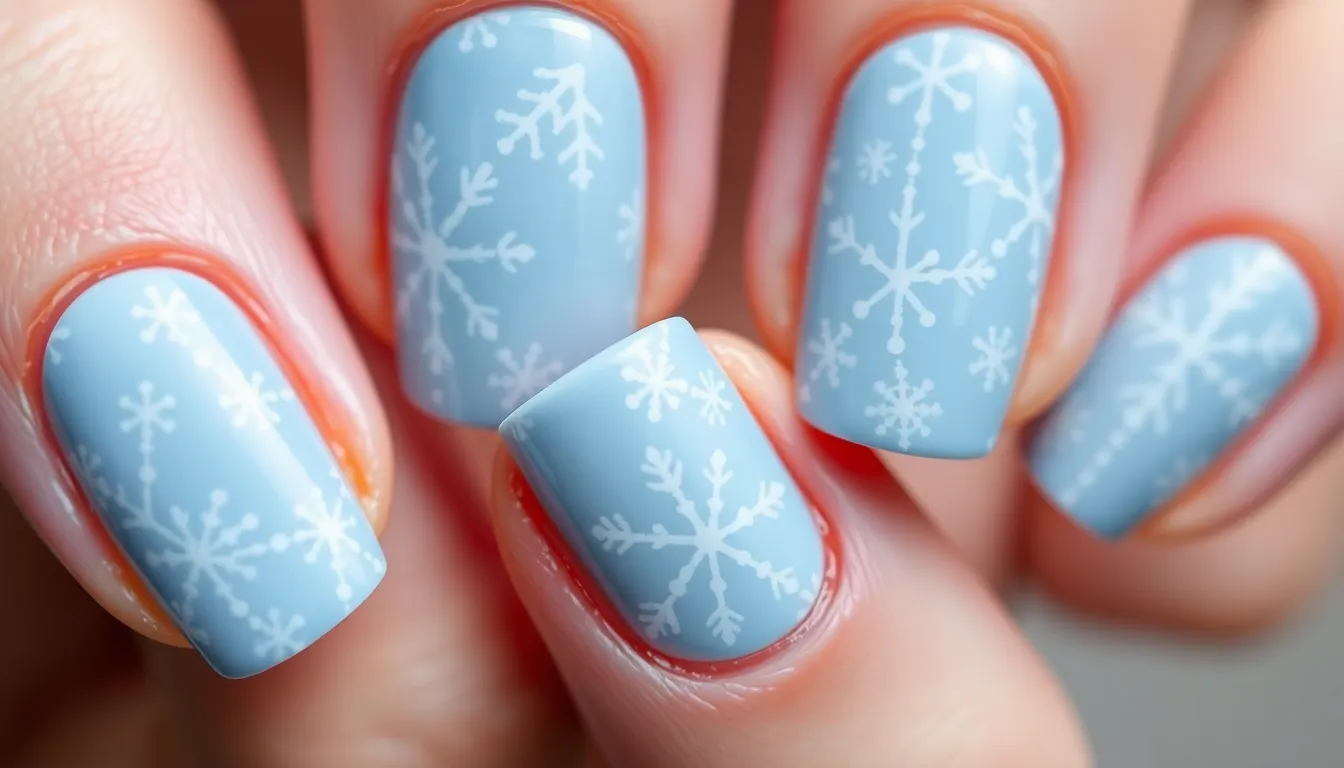
Snowflakes bring magical winter charm to your Christmas nail art collection. These delicate designs create stunning focal points that capture the essence of the holiday season.
Basic White Dot Snowflakes
We’ll start with the simplest snowflake technique that requires only basic tools. Paint your nails with a light base color like pale blue, silver, or clear polish for the perfect winter backdrop.
Create the snowflake structure by using a dotting tool to place six white dots in a circular pattern around the center of your nail. Make one dot in the center, then position the remaining dots evenly around it to form the snowflake’s main arms.
Add decorative elements by placing smaller white dots between the main arms to create intricate snowflake patterns. We recommend adding a few blue dots scattered around the design for a frosty effect that mimics real snowflakes.
Build dimension by varying the size of your dots throughout the design. Use larger dots for the main structure and smaller ones for delicate details that make each snowflake unique.
Using Nail Stickers for Perfect Shapes
Nail stickers eliminate the guesswork and ensure professional looking results every time. We’ve found that snowflake stickers work particularly well for beginners who want intricate designs without the complexity.
Choose quality stickers from reputable nail art brands that offer various snowflake patterns and sizes. Look for stickers with clear adhesive backing that won’t leave residue on your nails.
Apply the base by painting your nails with a clear base coat or light colored polish that complements your chosen stickers. Allow the base to dry completely before proceeding to prevent smudging.
Position the stickers carefully on each nail, pressing down gently to ensure they adhere properly. We suggest placing them slightly off center for a more natural, scattered snowfall appearance.
Seal the design with a high quality top coat to protect the stickers and create a smooth, glossy finish. This final step ensures your snowflake nail art lasts throughout the holiday season.
Simple Christmas Tree Nail Art
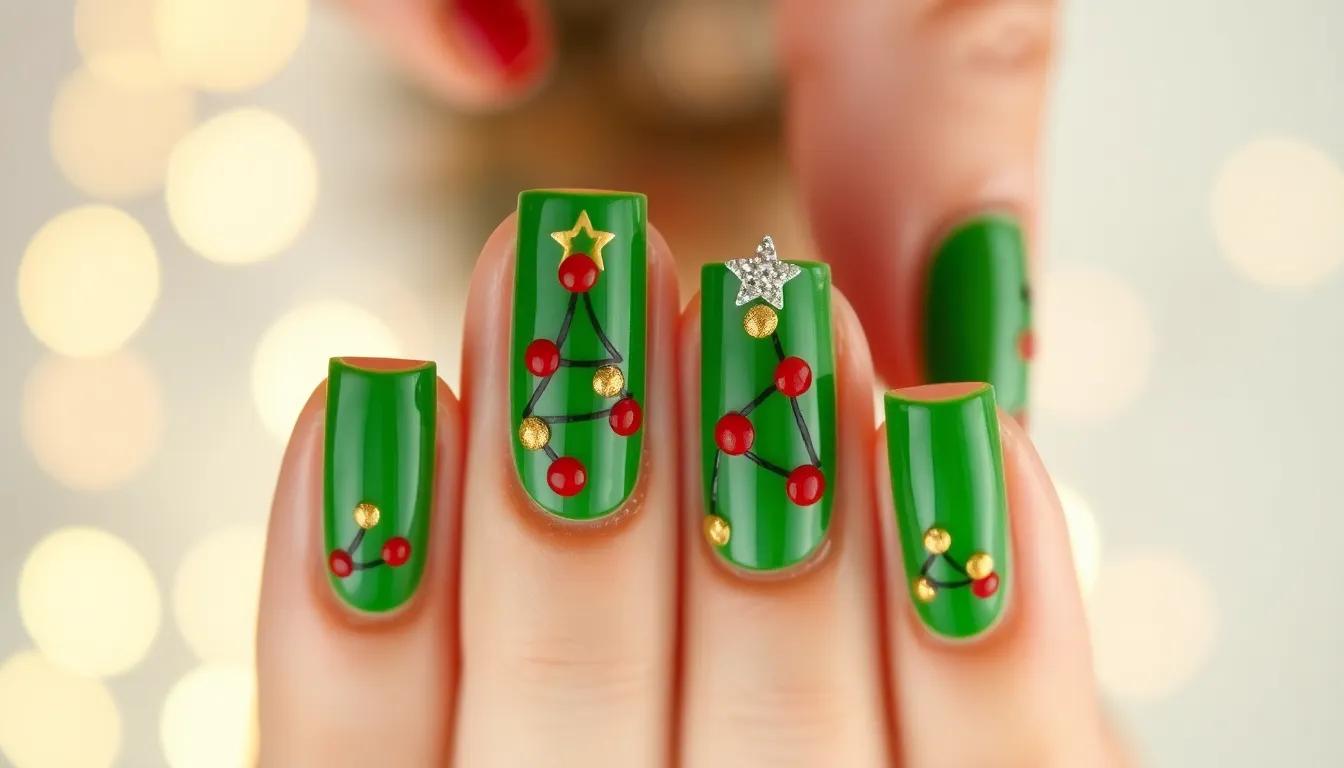
Creating Christmas tree nail art brings festive charm to your fingertips with surprisingly simple techniques. We’ll show you how to master this beginner-friendly design using basic tools you likely already have at home.
Triangle Tree with Dotting Tool
Start with a green base coat to create the perfect foundation for your Christmas tree design. Once the polish dries completely, grab your dotting tool and position it at the center of your nail near the top. Create a small dot at the apex to begin forming your tree’s triangular shape.
Work your way down by adding progressively larger dots in a triangle pattern. Place dots close together to form the tree’s outline, starting with one dot at the top, then two dots below it, followed by three dots, and continuing until you reach the nail’s base. Vary the green shades by using different polish colors or layering dots to create texture and depth.
Add ornament details by using your dotting tool with red or gold polish to place tiny decorative dots throughout the tree. Position these ornaments sparingly to avoid overwhelming the design while maintaining that festive Christmas spirit.
Adding Glitter Star Toppers
Apply a small amount of glitter polish directly at the top of your Christmas tree using a fine brush or toothpick. Dab the glitter gently to create a star shape, or simply add a concentrated sparkly dot for an elegant topper effect.
Use star-shaped decals as an alternative method that eliminates the guesswork of drawing perfect stars. Press the adhesive decoration firmly onto the nail’s surface at the tree’s peak, ensuring it adheres properly for long-lasting wear.
Seal your design with a clear top coat to lock in the glitter and protect your Christmas tree artwork. Allow each layer to dry completely before applying the final protective coating, ensuring your festive nails maintain their shine throughout the holiday season.
Easy Holly and Berry Designs
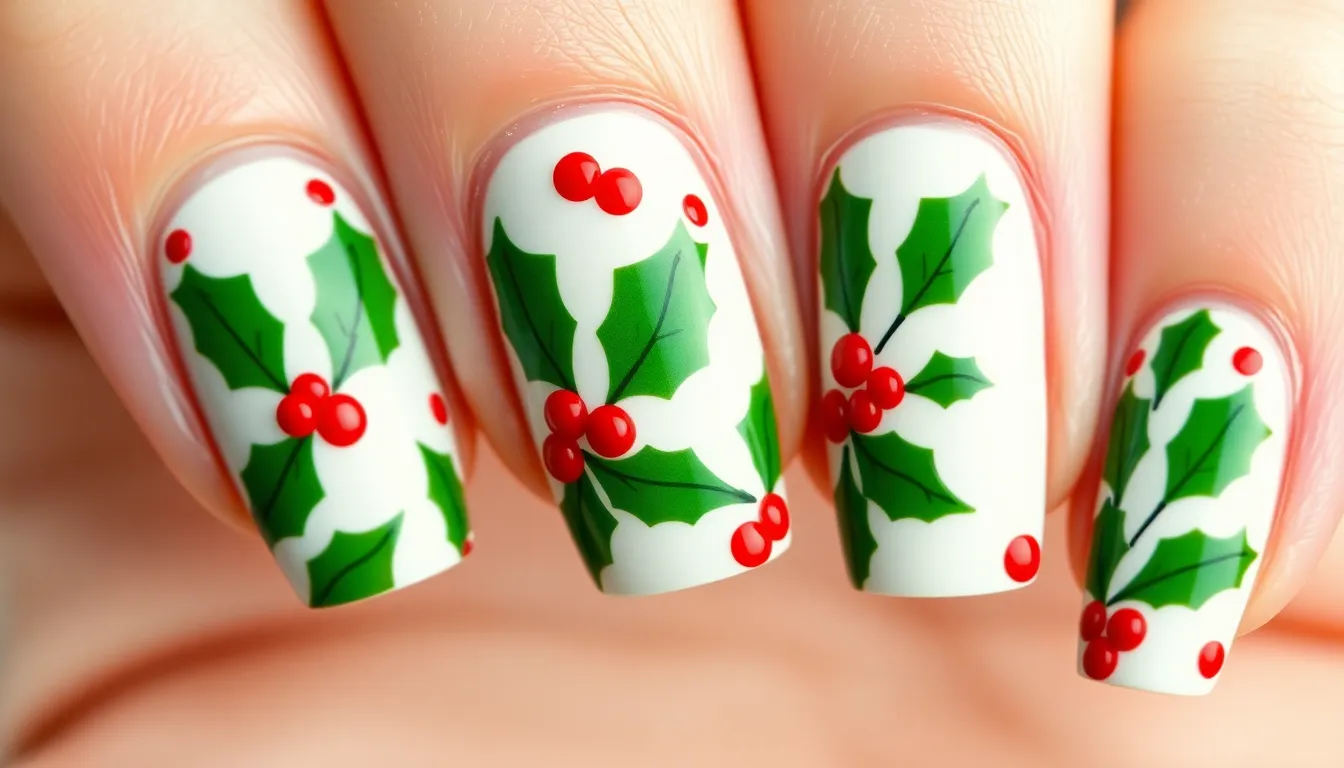
Holly and berry nail art captures the essence of Christmas with its traditional green leaves and bright red berries. These designs work perfectly for beginners who want to create festive nails without complex techniques.
Three-Leaf Holly Pattern
Starting with a green base coat creates the perfect foundation for your holly design. We recommend applying two thin coats for even coverage and allowing each layer to dry completely.
Use a small detail brush to paint holly leaves along the edges of your nail for the most natural look. Create each leaf by painting an oval shape and adding small points around the edges to mimic the characteristic holly leaf texture. Position three leaves together in a cluster for the most authentic appearance.
Add holly berries using a dotting tool and bright red nail polish to complete the design. Place 2-3 small red dots near each leaf cluster, varying their positions slightly for a more organic feel. The contrast between the deep green leaves and vibrant red berries creates an instantly recognizable Christmas motif.
Simple Red Berry Dots
Paint your nails with a neutral or white base coat to make the berry colors pop against the background. Light bases work exceptionally well because they allow the red berries to stand out dramatically while maintaining a clean, festive appearance.
Create small dots using a dotting tool and red nail polish to resemble holly berries scattered across your nail. Vary the dot sizes slightly by applying different amounts of pressure with your dotting tool. This technique adds visual interest and makes the design look more natural.
Add a few green dots or short lines using a fine brush to suggest leaves around your berry clusters. Keep these green accents minimal and place them strategically near your red dots to create the impression of complete holly sprigs without overwhelming the design.
Beginner-Friendly Candy Cane Stripes
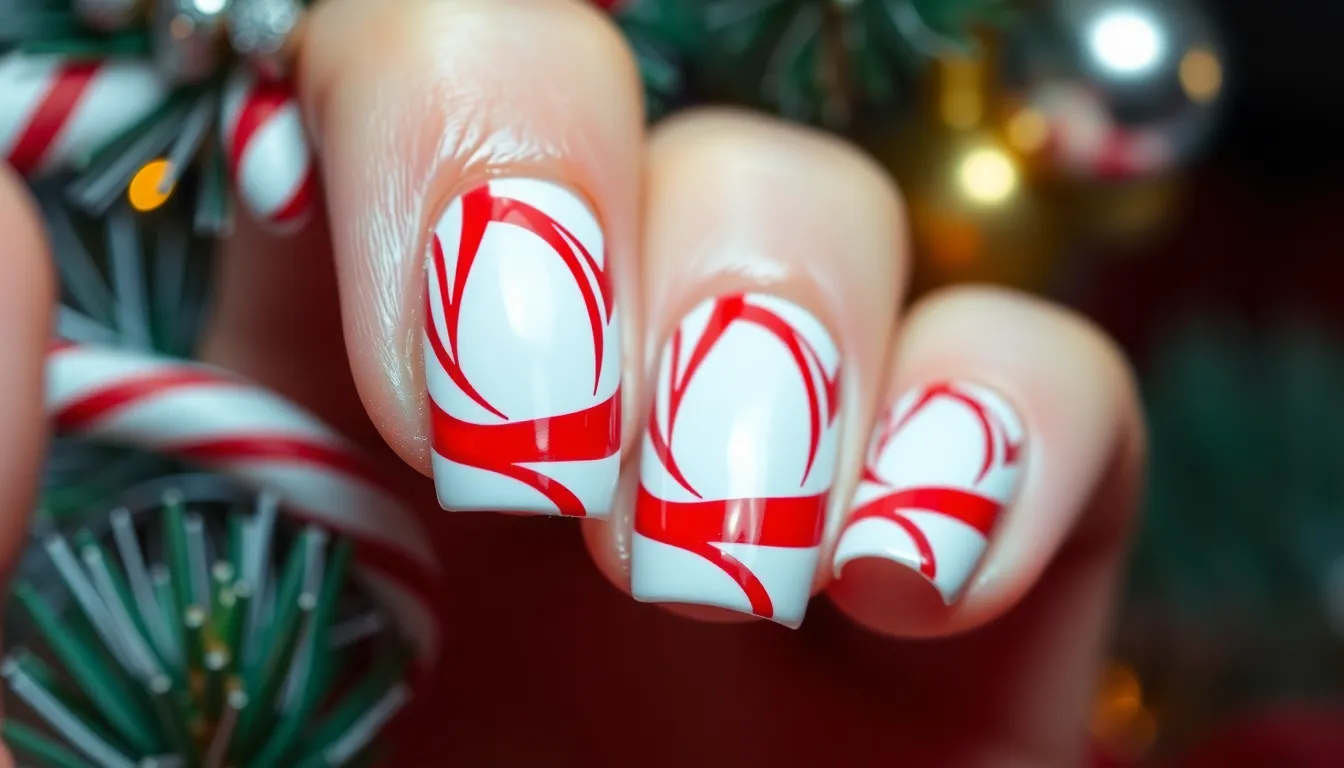
Candy cane stripes bring that iconic peppermint twist to your Christmas nail art collection. We’ll show you two foolproof methods that guarantee crisp lines and professional results.
Vertical Stripe Technique
Start with a white base coat and let it dry completely before adding your stripes. Paint your entire nail with white polish as the foundation for this classic candy cane design. Choose red polish for the traditional look or experiment with green and gold combinations for a festive variation.
Apply painter’s tape vertically across your dried white base, leaving even spaces between each strip. Position the tape carefully to create uniform stripes that run from cuticle to tip. Press down the edges firmly to prevent polish from bleeding underneath.
Paint over the exposed areas with your chosen stripe color, working quickly but carefully. Remove the tape immediately while the polish is still wet to avoid peeling. Apply a glossy top coat once everything dries to seal your candy cane masterpiece.
Using Tape for Clean Lines
Prepare your nails with a base coat and let them cure completely before starting the taping process. Clean nail surfaces ensure better tape adhesion and prevent lifting during the design phase. Choose high quality nail tape or painter’s tape for the sharpest lines.
Create your desired stripe pattern by placing tape strategically across each nail. Diagonal stripes mimic traditional candy canes perfectly, while horizontal lines offer a modern twist. Overlap tape pieces at the edges to maintain consistent spacing throughout your design.
Apply your stripe colors in thin, even coats over the taped areas. Work systematically from thumb to pinky to maintain wet removal timing. Peel away the tape at a 45 degree angle while the polish remains tacky for the cleanest possible lines.
Finish with two thin coats of clear top coat to smooth any slight ridges and add lasting shine. This sealing step protects your candy cane stripes throughout the entire holiday season.
Quick Christmas Glitter Accent Nails

We’ll transform your holiday look with stunning glitter accents that require minimal effort yet deliver maximum sparkle.
Single Glitter Feature Nail
Start with a solid base color across all nails using classic Christmas shades like deep red or forest green. Select one nail per hand to serve as your statement accent nail. Apply glitter polish generously to these chosen nails while the base coat remains slightly tacky for better adhesion.
Choose holographic or chunky glitter polishes that catch light beautifully during holiday gatherings. We recommend focusing on your ring finger or thumb for the most visual impact. Apply two thin coats of glitter rather than one thick layer to prevent clumping.
Finish with a clear top coat to lock in the sparkle and create a smooth surface. This technique works perfectly when you want understated elegance with just a hint of festive glamour.
Ombre Glitter Effect
Begin your ombre glitter design by applying a base coat followed by your chosen color foundation. Create depth by selecting complementary shades like light to dark green or soft pink transitioning to deep burgundy. Apply the lightest shade first as your base color across the entire nail.
Work the glitter polish starting at the nail tip with heavy concentration. Use a makeup sponge to dab and blend the glitter downward toward the cuticle area. Gradually decrease the glitter density as you move closer to the nail base for a seamless fade effect.
Layer additional glitter coats only at the tips to intensify the gradient. We suggest working on one nail at a time to maintain control over the blending process. Seal your ombre masterpiece with a high quality top coat to smooth any texture and enhance the overall shine.
Simple Santa Hat Nail Art
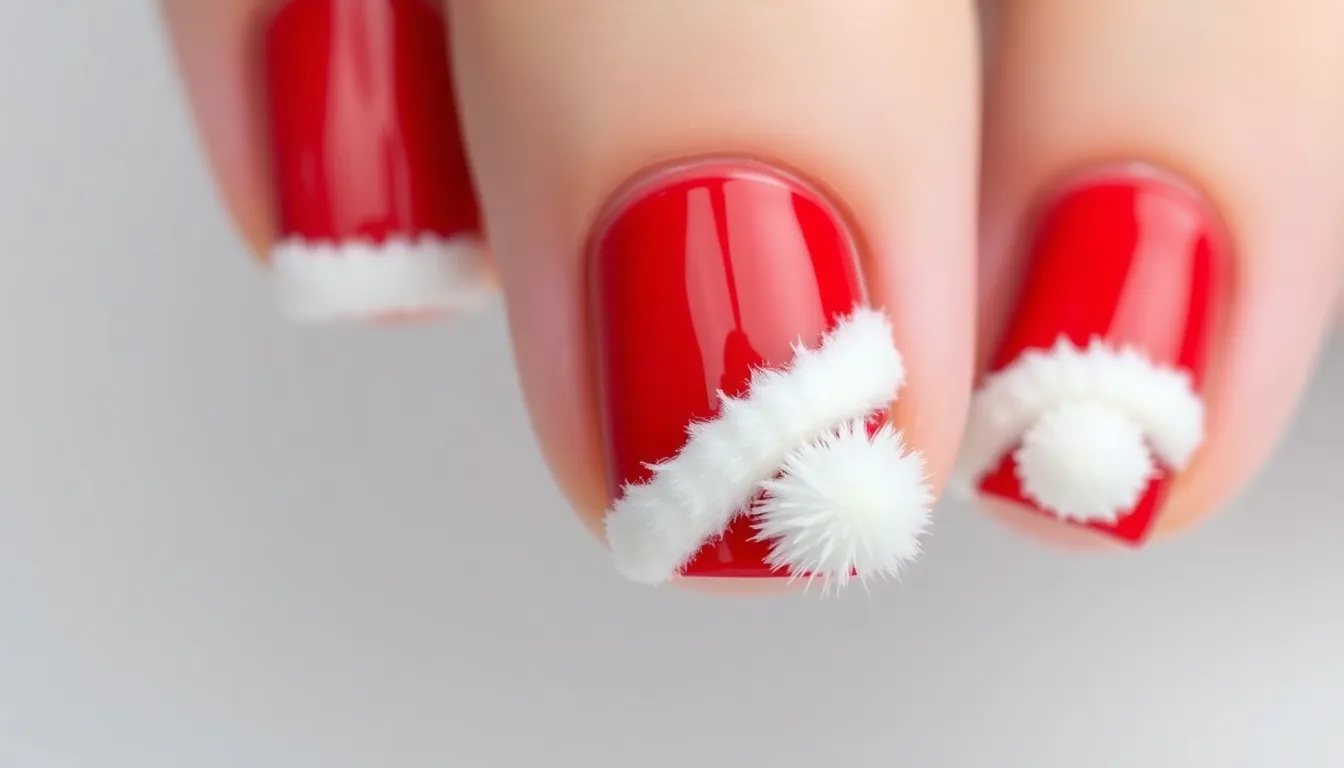
Santa hat designs bring festive cheer to your fingertips with surprisingly simple techniques. We’ll show you how to create this beginner-friendly Christmas nail art using just a few basic supplies.
Basic Red Triangle Design
Start with a clean nail canvas by applying a clear base coat or nude polish to create the perfect foundation. We recommend letting this dry completely before moving to the next step.
Paint a downward-pointing triangle using red nail polish and a small nail art brush or toothpick. Position the triangle’s point toward your nail tip, covering roughly two-thirds of your nail surface. The triangle forms the main body of Santa’s iconic hat.
Keep the shape simple rather than worrying about perfect symmetry. Slightly uneven triangles actually look more natural and charming for this festive design.
Adding White Trim Details
Create the fluffy hat trim by using white nail polish with a thin brush or dotting tool. Paint a wavy horizontal line along the base of your red triangle to represent the soft, furry edge of Santa’s hat.
Add a white pom-pom at the triangle’s tip by dabbing a small circle of white polish. This detail instantly transforms your triangle into a recognizable Santa hat.
Enhance definition with black accents if desired by using a fine detail brush to outline the white trim. This optional step adds professional polish to your beginner design.
Seal your artwork with a clear top coat after each layer dries completely. This prevents smudging and adds brilliant shine to your festive Santa hat nails.
Easy Reindeer Nail Designs

We’ll create adorable reindeer nail art that captures the spirit of Christmas using simple techniques perfect for beginners.
Brown Base with Simple Antlers
Start with a rich brown base coat to create the foundation for your reindeer design. Apply the brown polish evenly across the entire nail and allow it to dry completely before moving to the next step.
Use a small detail brush to draw antlers with black acrylic paint or polish. Create two curved lines extending upward from the top portion of your nail, then add smaller branches to complete the antler shape.
Add white dots for eyes by dipping a dotting tool or toothpick into white polish. Place two small dots in the center area of your nail, positioning them where the reindeer’s eyes would naturally appear.
Create the signature red nose using a dotting tool dipped in red polish. Place a single dot below and between the eyes to complete your simple reindeer face.
Rudolph’s Red Nose Accent
Paint a prominent red dot at the tip of the nose area using a dotting tool for maximum impact. Make this dot slightly larger than the eyes to emphasize Rudolph’s famous glowing nose feature.
Use black polish for facial details by creating small dots or lines for the eyes and mouth. Add these elements with a fine brush or dotting tool to give your reindeer character and personality.
Add a festive black hat if desired by painting a small triangular shape at the top of the nail. This optional detail transforms your basic reindeer into a more elaborate Christmas character that stands out among your holiday nail designs.
Quick Christmas Ornament Nails
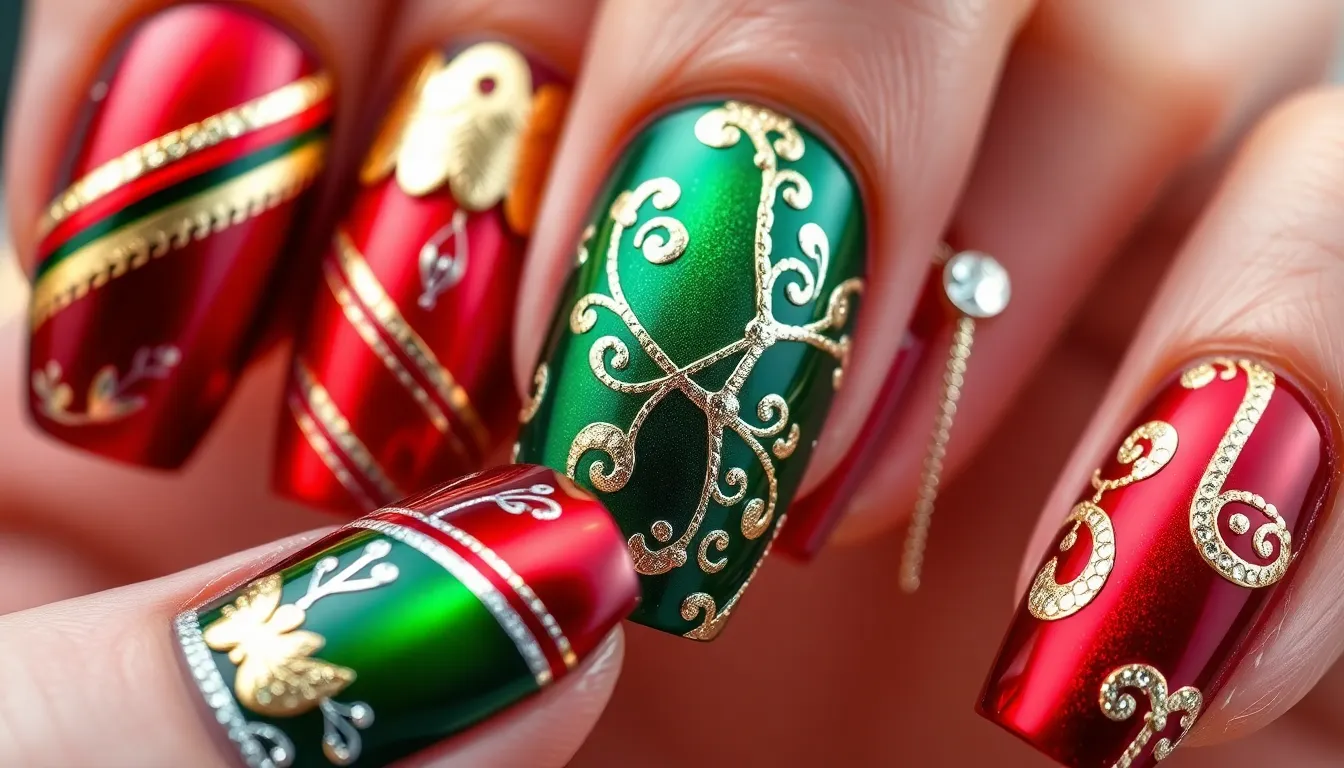
Transform your nails into festive masterpieces with these ornament-inspired designs that capture the magic of Christmas decorations. We’ll show you how to create stunning nail art that looks professionally done using simple techniques and basic tools.
Solid Color Base with Simple Lines
Start your ornament nail design by applying a vibrant base coat in classic Christmas colors like deep red or emerald green. Apply two thin coats for full coverage and let each layer dry completely before moving to the next step.
Use a striping brush to create the ornament’s decorative patterns with contrasting colors. Draw diagonal stripes, zigzag patterns, or geometric lines across each nail using white, gold, or silver polish. Keep your hand steady and work slowly to ensure clean lines that won’t smudge.
Add visual interest by alternating your line patterns across different nails. Create candy cane stripes on your thumb, diamond patterns on your index finger, and wavy lines on your middle finger. This variety makes your manicure more ever-changing while maintaining the ornament theme.
Finish each nail with vertical lines at the top to represent the ornament’s hanging attachment point. Use black acrylic paint or a fine detail brush to draw thin lines connecting your ornament body to an imaginary string above.
Adding Metallic Cap Details
Apply metallic nail polish at the top portion of each ornament to create realistic cap details. Use gold, silver, or rose gold polish to paint small rectangular sections that mimic traditional ornament tops. Work with a small detail brush for precision and control.
Create dimensional effects by adding small metallic dots around the cap area using a dotting tool. These tiny accents catch light beautifully and give your ornament nails authentic sparkle. Space the dots evenly for a polished professional appearance.
Enhance your design with thin metallic lines radiating from the cap area. Draw delicate stems or hanging loops using metallic acrylic paint and a fine brush. These details complete the ornament illusion and add sophisticated finishing touches.
Seal your metallic details with a clear top coat to protect the design and enhance shine. Apply thin layers to prevent smudging your carefully crafted metallic elements while ensuring long-lasting wear throughout the holiday season.
Beginner Christmas French Tips
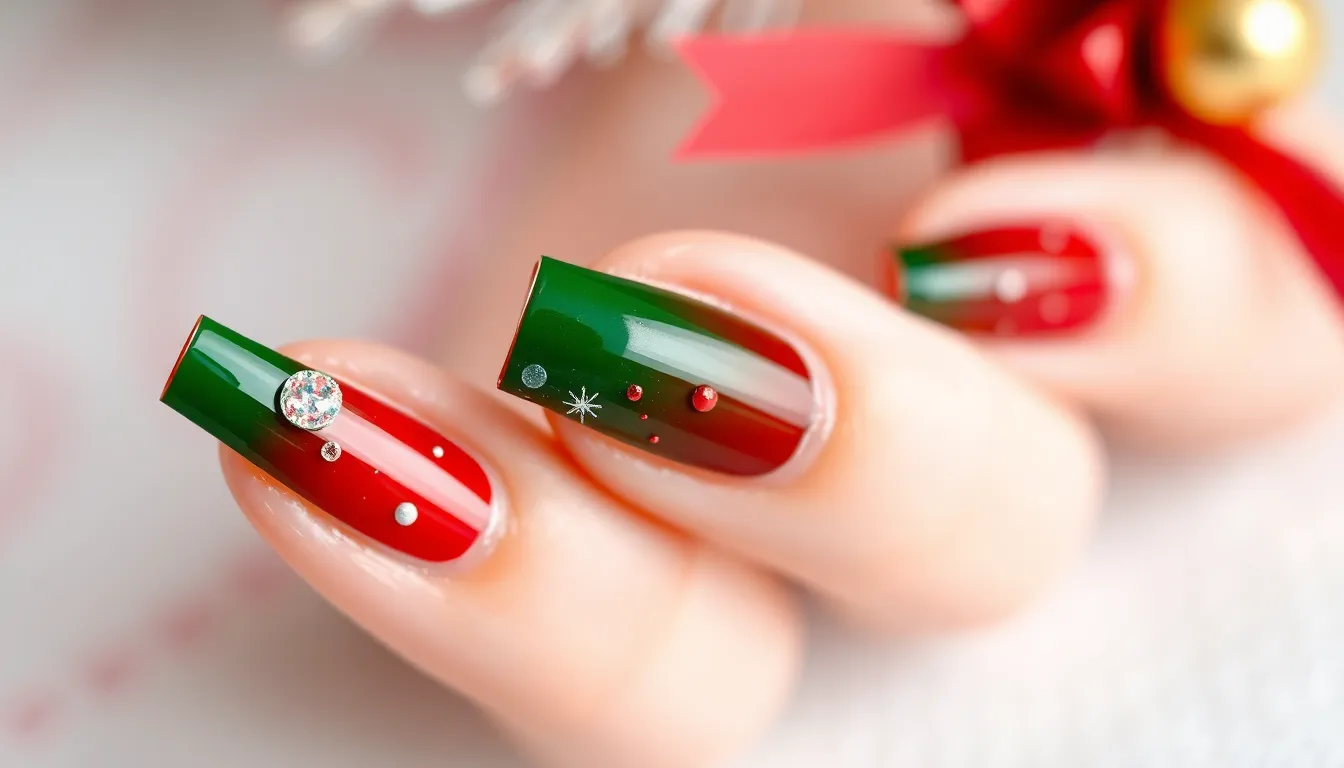
French tips get a festive makeover with these simple Christmas variations that we’ll show you step by step. These designs transform the classic manicure into holiday nail art that’s perfect for beginners.
Red and Green Tip Variations
Red tip designs start with applying a white base coat across all nails, then painting a thin red line at each tip using a steady hand or nail art brush. We recommend adding small green dots above the red tip using a dotting tool for extra Christmas flair.
Green tip variations follow the same technique but reverse the colors, painting green polish at the tip and adding a small red dot or thin stripe above for festive contrast. These alternating color combinations create visual interest when you paint different nails with different tip colors.
Technique tips include using painter’s tape to create perfectly straight tip lines if you’re worried about unsteady hands. We suggest removing the tape while the polish is still slightly wet to prevent peeling and achieve crisp, clean lines.
Glittery Holiday French Manicure
Base preparation involves applying a clear or sheer polish base coat to create the perfect foundation for your glittery French tips. We recommend letting this base dry completely before moving to the glitter application step.
Glitter application can be achieved using glitter polish applied directly to the nail tips, or you can add loose glitter on top of a clear coat for more texture and sparkle. Fine gold or silver glitter creates an elegant look, while chunky red and green glitter delivers more dramatic holiday impact.
Accent details transform your glittery French tips into true Christmas nail art by painting small holiday motifs like snowflakes or holly leaves on one or two nails using a nail art brush. We suggest keeping these accents simple with white snowflakes or green holly leaves to maintain the elegant French tip aesthetic.
Finishing touches require sealing your glittery French manicure with a high quality clear top coat to prevent glitter from shedding and maintain shine throughout your holiday celebrations.
Conclusion
We’ve shared a collection of festive designs that prove Christmas nail art doesn’t have to be complicated to look stunning. These beginner-friendly techniques give you the confidence to create professional-looking holiday nails from the comfort of your home.
Remember that practice makes perfect and each attempt will improve your skills. Don’t be afraid to mix and match different elements from various designs to create your own unique holiday style.
With just a few basic tools and some patience you’ll be sporting gorgeous Christmas nails that capture the magic of the season. Your festive manicure will be the perfect finishing touch to complete your holiday look.
Frequently Asked Questions
What tools do I need for Christmas nail art as a beginner?
You don’t need expensive professional tools to create beautiful Christmas nail art. Basic supplies include nail polish in festive colors (red, green, white, gold), a dotting tool, small detail brush, painter’s tape, makeup sponge, and a clear top coat. Many designs can be achieved with items you already have at home, making holiday nail art accessible and budget-friendly.
How long do Christmas nail designs typically last?
With proper application and sealing, Christmas nail designs can last 7-10 days. The key to longevity is applying a high-quality clear top coat after your design is completely dry. This protects the artwork, maintains shine, and prevents chipping. For glitter designs, the top coat also prevents glitter from shedding throughout the holiday season.
Can I create salon-quality Christmas nails at home?
Absolutely! The article focuses specifically on beginner-friendly techniques that deliver salon-quality results. By following step-by-step instructions for designs like snowflakes, candy canes, and Christmas trees, you can achieve professional-looking nail art at home. The key is taking your time, letting each layer dry completely, and finishing with a glossy top coat.
What are the easiest Christmas nail designs for complete beginners?
The simplest designs include alternating red and green nails, white dot snowflakes, single glitter accent nails, and basic holly berries using a dotting tool. These designs require minimal artistic skill and use basic techniques like dotting and simple brush strokes. Red berry dots on a neutral base are particularly beginner-friendly and instantly festive.
How do I prevent smudging when creating Christmas nail art?
Allow each layer to dry completely before adding the next element. When using painter’s tape for clean lines, remove it while the polish is still slightly wet to avoid peeling. Apply thin coats rather than thick ones, and always finish with a clear top coat after your design is fully dry to seal and protect your artwork.
What’s the best way to create clean lines for candy cane stripes?
Use painter’s tape as your guide for perfectly straight lines. Start with a white base coat, apply tape in your desired stripe pattern, paint over the exposed areas with red polish, then remove the tape while the polish is still wet. This technique works for vertical, diagonal, or horizontal stripes and ensures crisp, professional-looking results.
How can I make my Christmas nail designs more sparkly?
Add glitter polish as an accent nail, create an ombre glitter effect from tips to cuticles, or incorporate holographic or chunky glitter for maximum impact. You can also add glitter to French tips or use it as a topcoat over solid designs. Always seal glitter designs with a clear top coat to prevent shedding and enhance shine.
Do I need artistic skills to create Christmas tree nail art?
No artistic skills required! Christmas tree designs use simple dotting techniques. Start with a green base coat, then use a dotting tool to create progressively larger dots in a triangular tree shape. Add red or gold dots as ornaments and finish with a star decal or glitter at the top. It’s all about basic shapes and patience.

